2025 Lynchburg Living Idea House: West Coast Meets Lake Coast

This year’s Lynchburg Living Idea House is a blending of aesthetics and charm

By: Megan Williams | Photos By: Ashlee Glen

From the sloped driveway—towering oaks, poplars, and hickories parting just enough to make space for a car or maybe a trailer pulling a heap of kayaks—the white modern house looks quaint. As you creep down the drive, acorns popping under your tires, what may have appeared unassuming from the main thoroughfare changes view. The stucco-style exterior, clean lines, and floating concrete steps are your first indication that this isn’t your typical lakefront home.

“You don’t see many West Coast style homes like this on the lake,” said Scott Elliott, President and Head of Design Services at Custom Structures, the team behind the brand-new build at Smith Mountain Lake.

And, sure enough, the home has gleaned a considerable amount of its architectural style from our neighbors across the country. There is a deep connection to nature on the roughly one-acre lot. To the left of the back decks—of which there are three—is a resilient hickory, trimmed to a stump decades ago, which now rises again in triplicate, three identical trunks stretching toward the sky.

“We could have taken the tree out,” Meredith Elliott, Scott’s wife and owner of Southern Charm Interior Design, said. “But just look at how it shades the space. I can envision a tree house being added there one day.”

Mere footsteps away, water ebbs in a quiet cove. The water is over 20 feet deep, making the area ideal for a quiet retreat or families hoping to safely splash in the lake. Stepping out onto a back deck, you would never know that you’re less than one mile from Halesford Bridge and Bridgewater Marina. A hawk circles high overhead, birdsong rings from the dozens of trees peppering the property, and you’re greeted with crisp, resounding silence.

But it’s more than its nod to nature that gives this home its West Coast vibe. Linear lighting, open floor plans, expansive windows, flat roof, and wood and stone surfaces are all integral to the West Coast style and are all prominent here.

“I’ve always wanted to build a West Coast-style house,” Scott said, leaning against the black marble kitchen counter. “Since I was a little kid, I have been fascinated by them. But we didn’t have a ton of clients interested in them.”

So, when the land adjacent to one of the Elliott’s current rental properties came available for sale, the Elliotts snatched it up and began envisioning the home.

“I wanted a lot of sleek lines, not too much detail,” Scott recalled. “It’s one of those things where less is more.”

“Once Scott showed me the plans he had for the house, right away I knew the type of style I wanted the interior to have,” Meredith added. Despite having the vision instantly in mind, it took nearly two years to acquire each decor piece for the home—from sourcing a vintage wooden boat from Facebook Marketplace to repeat trips to Home Goods to curate the large collection of bird prints that are styled throughout the space.

Despite its small footprint, the home boasts a shocking amount of livable space.

“You wouldn’t believe this house sleeps 22,” Meredith said.

Just like the home’s architectural style borrows from West Coast and Scandinavian influences, its use of space is influenced by those styles as well. Four bedrooms, one bunkroom, three living rooms, three full baths, and one powder room are scattered throughout the three floors alongside three deck spaces—for lounging and soaking in the lake breeze or for an al fresco meal in the shelter of towering oaks.

When the Elliotts were dreaming up this space, they wanted an environment where families could come together under one roof and live, sleep, and dine comfortably.

“We just had this vision of three or four families coming together for the holidays or a summer vacation and having everything they need, right here, without renting out a huge mansion,” Meredith continued.

The Elliotts plan to rent the home out to short term renters and even envision renting the space out to private chefs hoping to host an intimate dinner party.

The space is made for entertaining with a top-of-the-line ZLINE range, black marble countertops, and a large dining room table and equally expansive bar that looks out at the tree-studded woods.

And just as the Elliotts envision a home where families and friends can come together, they have created a space that will tell those stories over time. In the kitchen, a sweeping copper backsplash runs from counter to ceiling, gathering patina with age.

“We treated the copper backsplash to jumpstart the patina process,” Scott explained. “But it will continue to change and evolve over time.”

What makes this home so special are those intricate details—no proverbial stone left unturned to ensure the space is cozy yet memorable. Even the cooling system has character. Nine mini-splits are hidden throughout the rooms, covered by linen art so the untrained eye would never notice them—but they’d feel their presence.

“Mini-splits are incredibly energy efficient,” Scott explained, “so each room will cool down incredibly quickly—and quietly.”

As the sun dips behind the trees and light filters onto the copper backsplash, it’s clear the Elliotts have built more than a vacation home—they’ve created a space that celebrates the meeting of contrasts: sleek and natural, minimal and warm, modern and timeless.

“We want people to see what’s possible here,” Meredith said. “You can have modern design without losing that sense of warmth.” And standing on the deck, surrounded by oaks and open sky, you can’t help but agree—this is a home that redefines what lakefront living can look like.

To see all the photos and partners go to: 2025 Lynchburg Living Idea House


23rd Annual Gift Guide

Look What I Found

Not sure where to start with that holiday shopping list? You’ve come to the right place!

Our annual Holiday Gift Guide is an overview of unique gift ideas, all found from local businesses. So you’ll not only feel good about what’s under the tree, but you’ll also know your purchase helped support the local economy.


Growing Good

How Lynchburg Grows Is “Planting Seeds” to Feed and Impact our Community

by: Megan L. Horst | Photos Courtesy: Lynchburg grows

Lynchburg Grows has been serving the community for nearly 21 years. Their seven-acre urban farm offers meaningful job opportunities for individuals with disabilities, while also providing fresh, local produce to the community, restaurants, and organizations.

“Our mission is to work with the community to provide access to healthy food, and then also to provide purposeful jobs to people with disabilities,” said Shelley Blades, executive director of Lynchburg Grows. Currently, they have five paid farmers and two farm coaches who assist with harvesting and farm chores.

“Their coach is there to help answer any questions they may have, make sure everything is being done properly, and that they are doing their job safely,” Blades explained. Farm coaches also work with the farmers to ensure they meet their work and personal goals.

Recently, Lynchburg Grows was one of the ten recipients of the Kubota Hometown Proud Grant® and was awarded $25,000 in cash and $25,000 in Kubota equipment. The grant was awarded to nonprofits nationwide that are making a positive impact on their local communities.

“The work they do to feed the Lynchburg community resonated with the spirit of the Kubota Hometown Proud grant program,” said local dealer Zach Jones, general manager of Kubota of Lynchburg. “Their application made it very clear that they needed the grant resources to be able to increase the number of people they feed, teach, and empower in our community for years to come. At the heart of it all is dependable equipment that is needed to scale the project and to power real change for the goals of their operation.”


Blades expressed that they were pleasantly surprised and excited to have been chosen for the grant.

“It’s really great because we get some Kubota equipment, which will be very helpful,” Blades said. “That will help us in all aspects of the farm. It will help us post-harvest moving produce around, not having to carry 50 to 80 pounds of tomatoes from one greenhouse to another.” The grant funds will be used to expand their operation. They also expect the funds to increase their produce output by 25 percent, enhance nutrition education and provide additional vocational training opportunities for individuals with disabilities.

“We are looking forward to reaching our community in different ways and expanding,” Blades said.

Lynchburg Grows additionally provides opportunities for youth in the community to learn and have fun. A portion of the grant funds will be used to expand their education greenhouse, which is solely dedicated to learning, and used for classes, field trips, and camps.

“This will be a space for students to explore and learn and play without interfering with the day-to-day farm operations,” Blades said. They hope to include a “tasting kitchen” in the learning greenhouse, allowing them to transition from planting to harvesting to tasting all in one space. In the summer, Lynchburg Grows hosts a variety of day camps for kids. At the week-long camps, participants have the opportunity to work alongside farmers with disabilities and harvest produce.

“They learn about plant cycles and planting and growing,” Blades said.

“They learn about nutrition, they’ll cook the food that they are harvesting, and so they get some cooking lessons. They also help clean up, so they’re learning to work together as a team and then also they help us with our donations.” Lynchburg Grows donates to many local organizations, including Park View Community Mission, Miriam’s House, Lynchburg Daily Bread, Connecting Point, and others.

“They [campers] help pack donations up so they’re learning philanthropy and why it’s good to give back to your community,” Blades shared.


A wide variety of produce is grown on their farm, which changes depending on the season. Currently, they are growing a variety of root vegetables, including turnips, beets, carrots, radishes, and leafy greens, as well as eggplant, beans, herbs, tomatoes, cucumbers, cabbage, and more.

“We are lucky to be able to grow year-round,” Blades said. For members who join at the beginning of their growing season, in March, they can pick up their share on Wednesdays; however, their Farm Store is open to the public every Thursday from 9 a.m. through 1 p.m.

“We accept SNAP, which is great,” Blades said. They also participate in the Senior Farmers’ Market Nutrition Program, a government initiative designed to provide seniors with access to fresh produce.

“Lots of ways you can shop,” she said. Another way to support Lynchburg Grows is to volunteer at the farm. They are always looking for help with tasks around the farm.

“Not all of [the volunteer work] is really, really hard,” Blades said. “We can definitely modify it to each person’s abilities.”

Blades expressed that they are incredibly grateful to Kubota. The new equipment and funds will make a substantial impact on their operation.

“We are proud to have selected Lynchburg Grows for this opportunity,” Jones added. “And even more so to see what they’re able to accomplish with
our equipment.”


From Grass to Garden

A Beginner’s Guide to Rewilding Your Landscape

For decades, a lush green lawn was the hallmark of a well-kept home. But more and more homeowners are trading in their turfgrass for something wilder—and more purposeful. Whether inspired by declining pollinator populations, increasing water bills, or the simple desire for a more beautiful and ecologically rich yard, rewilding is having a moment.

Rewilding your landscape doesn’t mean letting it go untamed. Rather, it’s a thoughtful process of transitioning away from traditional grass lawns to native plantings, meadows, or habitat gardens that support biodiversity and require fewer resources to maintain. If you’ve been eyeing your patch of grass and wondering how to begin, fall is actually the perfect time to start laying the groundwork. Here’s how.

Step 1: Start with a Plan

Before you dig in, take a step back. Consider how much of your yard you want to rewild—some people begin with just a corner or border, while others go all-in. Walk your property and note areas of full sun, part shade, drainage issues, or spots prone to foot traffic. These observations will influence the types of plants you choose.

Then, ask yourself a few key questions:
• Do you want a wildflower meadow, a pollinator garden, or a mix of native grasses and shrubs?
• How formal or natural should it look?
• Will you need to maintain some lawn for pets or play?

Sketching out a rough map or plan can help you visualize the change—and stick with it when the grass starts to go.

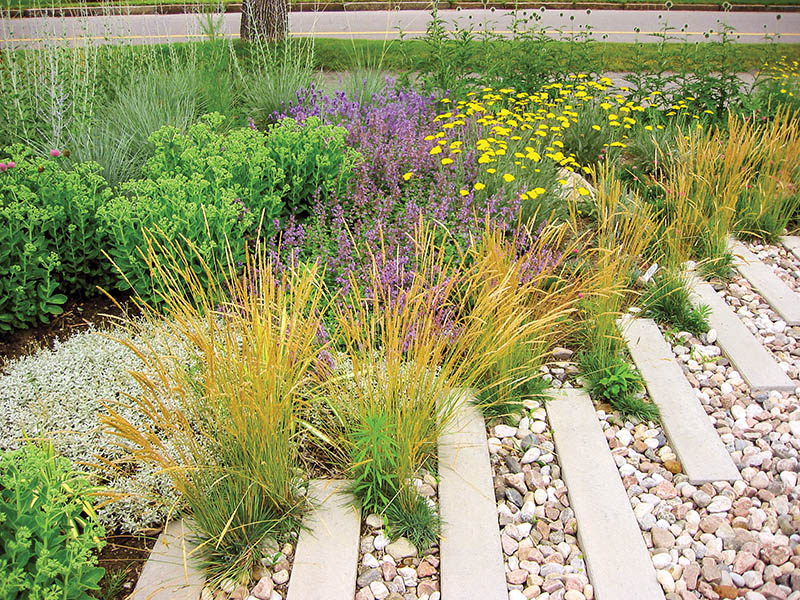
planting suitable for dry climates

Step 2: Remove the Turf

Turfgrass is persistent. Removing it is the first and most labor-intensive part of rewilding. There are a few methods to consider:
• Sheet Mulching (Lasagna Method): Best started in fall. Lay down cardboard or newspaper directly over the grass, then top with layers of compost and mulch. By spring,
the grass will be smothered, and the soil will be richer.
• Sod Cutting: Use a sod cutter to remove grass manually. This provides an immediate blank slate but can disrupt soil health.
• Solarization: Place clear plastic sheeting over the area during the heat of summer. This “bakes” the grass and weed seeds, preparing the site for fall planting.

For small patches, a shovel and persistence may do the trick. For larger spaces, combining methods—like solarizing one area and sheet mulching another—can be effective.

Step 3: Test and Amend the Soil

While many native plants are forgiving, it’s helpful to know your soil type (clay, loam, sandy) and pH. Home soil test kits or local extension offices can help you assess.

Avoid the temptation to over-amend—many native plants thrive in poor soil. Still, incorporating a bit of compost into compacted or depleted areas can give young roots a boost.

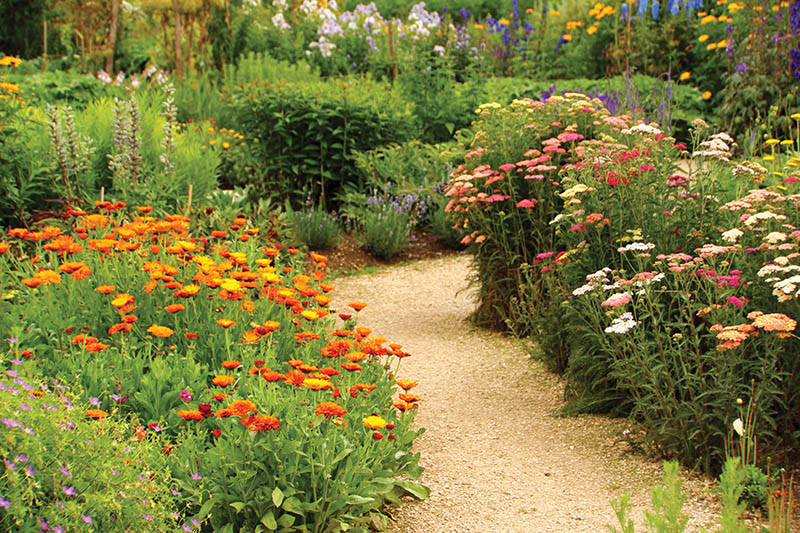
Footpath in awonderful herb and flower garden

Step 4: Choose the Right Plants

One of the joys of rewilding is discovering the diversity of plants native to your region. For Central Virginia, that includes black-eyed Susans, purple coneflower, bee balm, milkweed, little bluestem, switchgrass, and more.

Fall is an ideal time to plant perennials and grasses—cooler temperatures and autumn rains help roots establish before the dormant winter period. Even if you don’t plant this fall, it’s a great time to plan and source plants for a spring installation.

Consider using a mix of:
• Native grasses like little bluestem or Virginia wild rye
• Perennials for color and pollinators—think goldenrod, asters, and Joe-Pye weed
• Shrubs like buttonbush or winterberry holly for structure and wildlife value

Local native plant nurseries or Master Gardener groups can help you find plants well-suited for your yard’s conditions.

Step 5: Planting and Mulching

Planting in fall typically runs from late September through mid-November in our region. Space plants according to their mature size, even if they look sparse now.

Mulch around new plants with shredded leaves or natural wood mulch (but avoid dyed mulch). This helps suppress weeds and retain moisture, especially in the first year.

If you’re seeding a meadow, fall is also ideal for “dormant seeding”—spreading seed just before winter so it naturally stratifies and germinates in spring. Prepare the soil surface, rake lightly to incorporate seed, and press down gently to ensure good contact.

Step 6: Embrace the First-Year Wildness

The first growing season will look different than a manicured garden. It may take a year or two for your rewilded landscape to fill in and begin to self-sustain.

Expect some weeds—early maintenance includes hand-pulling or cutting back aggressive invaders. Watering is also crucial in the first season, especially during dry spells.

In winter, leave seed heads and stems standing to provide food and habitat for birds and beneficial insects. What might look “messy” to some is actually part of a healthy, functioning ecosystem.

A group of brightly colored Monarch butterflies, or Danaus plexippus, feeds on a Buttonbush, or Cephalanthus, on a very warm summer morning near a lake in Texas. A lone honeybee approaches to join them.

Step 7: Long-Term Care and Evolution

After the first year, your rewilded garden will require far less work than a traditional lawn. Native plantings generally don’t need fertilizer, and once established, they’re drought-tolerant and low-maintenance.

Cut back dead stalks in early spring (not fall) to allow overwintering insects to emerge. Re-seed or divide as needed, and enjoy the evolving beauty of a space that reflects nature’s rhythm.

Small Steps Make a Big Impact

If the idea of transforming your entire yard feels overwhelming, start small. Convert a strip by the sidewalk into a pollinator border. Replace part of the backyard with native grasses. Every square foot of rewilded land makes a difference—for butterflies, birds, bees, and for you.

With fall on the horizon, now is the perfect time to begin the transformation. The rewards are plentiful: less mowing, more beauty, and a yard that gives back.


Photo Finishes

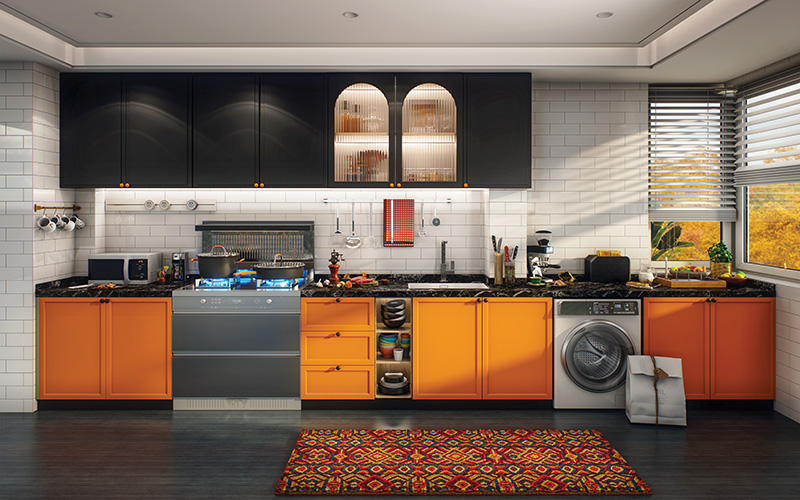
Thinking about replacing or refurbishing your kitchen cabinets? Here is a designer’s guide to finish types, colors, and combos

By Jaime Simpson

I could happily discuss cabinets all day. There is just so much to love about them! Cabinets provide storage, allow for a higher level of organization and make items easier to access (especially with inserts and gadgets).

And that is just the functionality. There is a plethora of style and finish options available to put the icing on the cabinet cake.

The main finish options for cabinetry are stained, painted or laminated. Metal cabinet doors are increasing in prominence as well, especially for outdoor kitchen spaces.

Stained cabinetry is available in many wood species and in many colors. Warm, cool, light, medium and dark stains can be achieved depending on the preferred look. Most cabinet manufacturers offer paint colors in white, grey, blue and an off white/cream/ecru look. Other colors are available depending on the customization options, while fully custom cabinetry has no limit on paint color options.

Laminated cabinet doors are typically constructed of a plywood core with a laminated surface; these laminates can offer a modern wood grain look, texture or high gloss effect that cannot be easily achieved with wood or paint.

Each finish type has its own beauty and glory. Though one finish and color throughout a kitchen space is lovely and can be a timeless look, you don’t have to choose just one.

Here I have included some thoughts about how to approach using one or more finishes and colors.

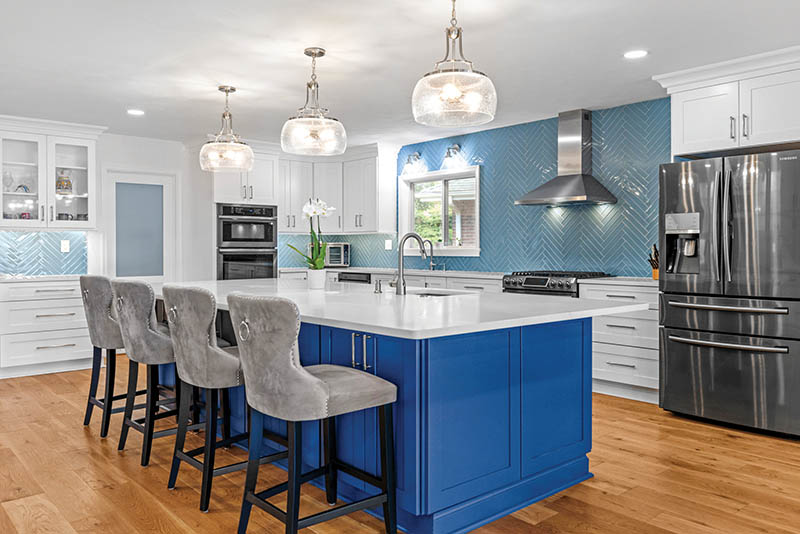
One Cabinet Finish/Color / Top Photo Courtesy of Accent Kitchens, Photo By David Uhrin

  • Use this option if you are looking for a classic and streamlined look.
  • Consider pattern or texture in the countertop and backsplash to provide interest.
  • Choose flooring that provides contrast with the cabinetry.

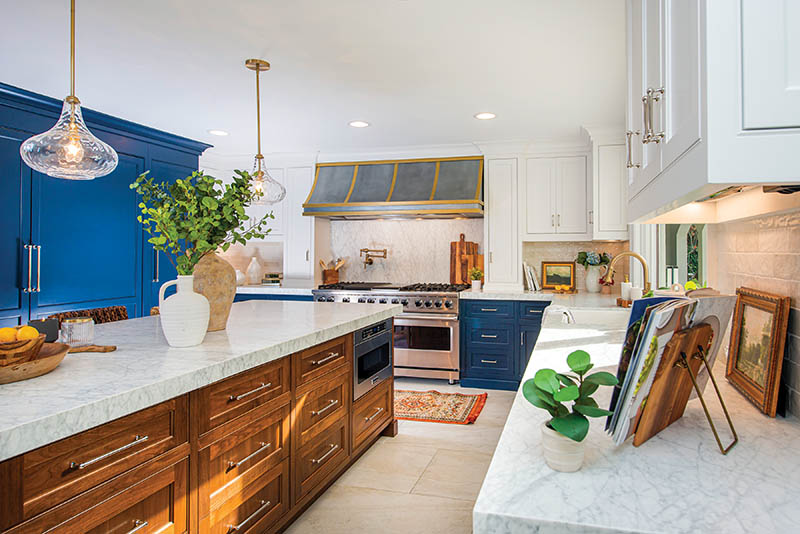
Two Cabinet Finishes/Colors

  • Start with one main finish—whether stain, paint or laminate.
  • Use the second finish/color as an accent or highlight—perhaps the island, base cabinetry, or tall cabinetry.
  • Look for a backsplash or countertop that can unify the two finishes.
  • Find a flooring option that can still contrast both cabinet finish options.

Three Cabinet Finishes/Colors

  • Start with one main finish in this case as well. Use the second finish as a more prominent accent, and the third finish in smaller doses.
  • Stay more subdued with the countertop and backsplash patterns so the various elements don’t compete.
  • Find flooring with minimal pattern, and that coordinates with the third finish.
  • For example, the base and wall cabinetry are the main finish (a white paint) the island and range hood are the second finish (a sage green paint), and floating shelves are a third finish (a walnut stain).

Four Cabinet Finishes/Colors

This is where it gets really fun.

  • If you love eclectic and maximalist styles, don’t be afraid to mix it up.
  • Contrast is the key here—ensure that all the finish tones are clearly different and defined to maintain the presence of each.
  • For example, the base cabinets could be one paint finish (blue), the wall cabinets another paint finish (white), the range hood could be a third paint finish (black), and the island cabinetry could be a contemporary wood-grain laminate (zebra wood).


The Case for Keeping It

Rethinking the Renovation Mindset

It’s easy to get swept up in the promise of a fresh start. The blank slate. The trendy backsplash.

The Pinterest-worthy after photo. But what if the most compelling, most personal design choice you could make wasn’t new at all?

As the renovation boom continues across the country, many homeowners are beginning to rethink the impulse to gut, replace, or cover up what’s already there. Whether it’s original tile, natural wood trim, a quirky built-in cabinet, or an antique fireplace, there’s a growing movement toward preservation—and for good reason.

Holding onto original features isn’t just about honoring the past. It’s about embracing character, sustainability, and in many cases, a better return on investment.

Before you pick up the sledgehammer, it might be worth asking: What’s worth saving?

Embracing the Charm of Imperfection

The truth is, older homes were built differently—and often more durably. Solid wood doors, hand-crafted trim, plaster walls, and detailed millwork can be difficult and expensive to replicate today. Even common elements, like mid-century tile or built-in shelving, were designed with a level of intention that mass-produced materials sometimes lack.

There’s a soul to an old house. When you walk in and see worn hardwood floors or a creaky staircase, there’s a story.

Those imperfections can be beautiful if you let them be.

Preserving original features can create a layered, lived-in feel that brings depth and authenticity to a space. It can also help your home stand out in a sea of renovations that often follow the same trends.

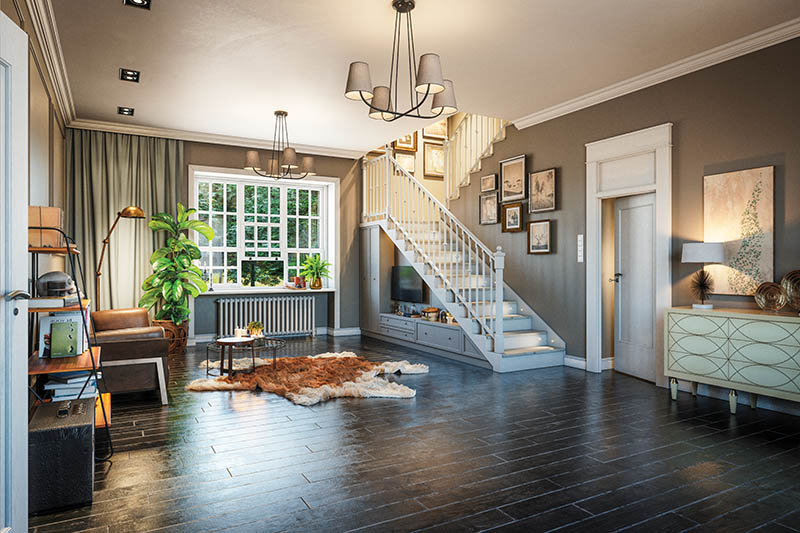
Digitally generated elegant Scandinavian style home interior scene.The scene was rendered with photorealistic shaders and lighting in Autodesk® 3ds Max 2020 with V-Ray 5 with some post-production added.

Digitally generated elegant Scandinavian style home interior scene.
The scene was rendered with photorealistic shaders and lighting in Autodesk® 3ds Max 2020 with V-Ray 5 with some post-production added.

From Functional to Focal Point

Rather than viewing older elements as obstacles to be updated, consider how they might become focal points instead.

Take vintage tile, for example. That powder blue bathroom tile from the 1950s might not match your usual aesthetic—but with the right supporting elements, it can become a retro-chic statement. Brass or matte black fixtures, white walls, and minimal accessories can help highlight the tile rather than fight against it.

The same goes for original fireplaces. Instead of covering up a dated mantel or painting over brick, lean into it. Restore the wood, limewash the brick, or simply keep it as-is and let it ground the room with texture and warmth.

Sometimes the best design decision is doing nothing at all. Or doing just enough to protect and showcase what’s already there.

Tips for Thoughtful Preservation

If you’re ready to rethink your renovation mindset, here are a few ways to preserve character while still meeting modern needs:
1. Restore, Don’t Replace
Refinish wood floors rather than replacing them. Strip and reseal original doors or trim. If cabinets are solid wood, consider repainting or refacing rather than tearing them out.

2. Blend Old and New
Let original features shine by surrounding them with modern, minimal design. A sleek sofa or contemporary light fixture can balance the patina of an older space.

3. Respect Scale and Proportion
Many original elements—like doorways, ceilings, or moldings—were designed with specific proportions in mind. Keep additions and updates in harmony with those original lines for a cohesive look.

4. Update Function, Not Just Style
Keep that quirky built-in, but make it useful—add lighting, repaint the interior, or use it for a modern purpose like barware or board games. You can also retrofit older cabinets with soft-close hardware or install energy-efficient inserts in old windows.

5. Salvage and Reuse
If you must remove something, consider salvaging it for another part of the house—or donating it to a local reuse center. Vintage materials are not only valuable but often higher in quality than what’s available today.

Sustainability and Storytelling

Choosing to preserve instead of replace is also a deeply sustainable choice. Demolition and new materials contribute to landfill waste and increased carbon emissions. In contrast, restoring what already exists minimizes waste and often reduces overall renovation costs.

And then there’s the emotional value. That worn banister your child slides down every morning. The original transom windows that let in just the right slant of afternoon light. These elements tell a story—your home’s and your family’s.

When you live in a space that’s not perfect but has a history, it grounds you.

You become part of something bigger than just the latest trend.

When to Let Go

Of course, not everything can or should be saved. Water damage, mold, structural issues, and hazardous materials like lead paint or asbestos may require removal for safety reasons. In some cases, preservation isn’t practical—and that’s okay.

But for everything else? It’s worth pausing before you replace.

The best homes often reflect a balance between old and new, polished and worn. They evolve slowly, lovingly. And sometimes the most meaningful design choice isn’t about what you add—but what you choose to keep.

5 Original Features Worth Saving

Before you demo, take a second look—these vintage details can add charm, value, and character to your home.
1. Hardwood Floors
Even if they’re scuffed or hiding under carpet, original wood floors are often solid and salvageable. Refinishing can restore their luster and preserve their timeless appeal.

2. Trim and Molding
Crown molding, picture rails, baseboards, and window casings add architectural depth. Solid wood trim is hard to replicate and worth keeping whenever possible.

3. Built-In Cabinets or Nooks
From hallway linen closets to breakfast benches and phone niches, built-ins offer functional storage and personality. Fresh paint or hardware can give them new life.

4. Original Doors and Hardware
Solid wood doors—especially those with panels or glass—are sturdy and stylish. Keep the vintage knobs and hinges for added character (or clean them up for a polished antique finish).

5. Fireplace Surrounds
Whether brick, stone, or tile, an original fireplace brings warmth and texture to a space. Even a non-functioning fireplace can serve as a cozy design anchor.

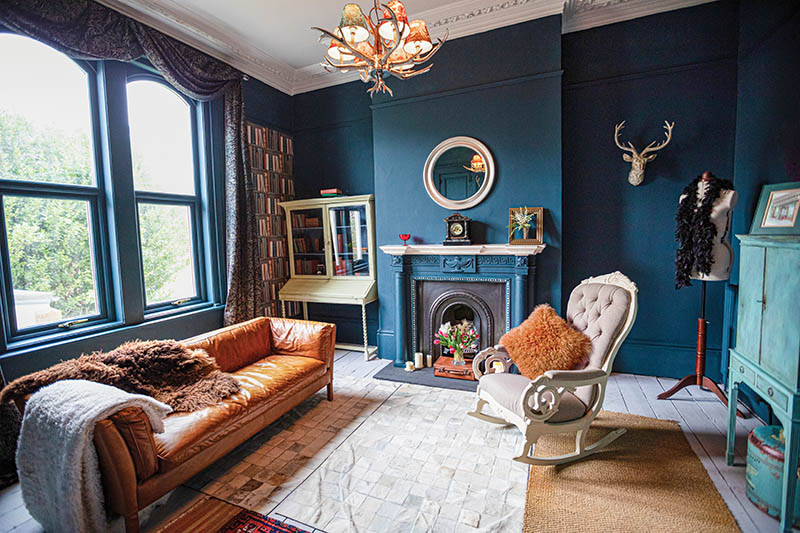
Drawing room with high ceilings and architectural features

Drawing room with high ceilings and architectural features


Carved in Stone

Craftsmanship and Collaboration Leave an Enduring Mark at the Woodsmalls’ Nelson County Home

By: Anna Eileen White / Photos Courtesy: Jonathan Mitchell, Simply Branding

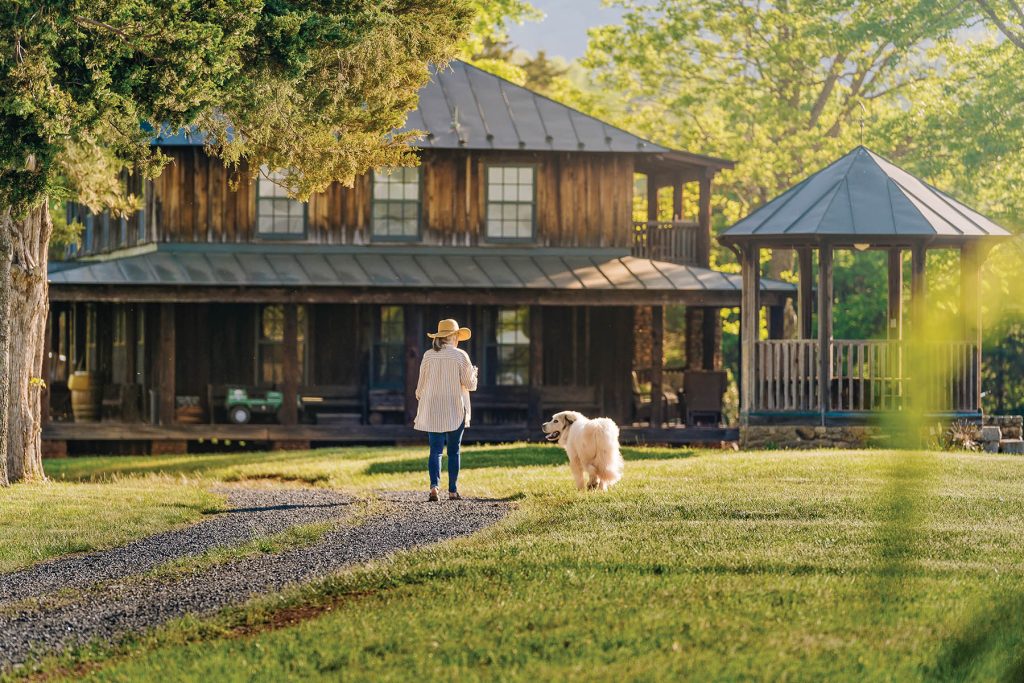
Tucked where winds sweep between blue peaks and race among receding foothills, a lodge and cottage stand. Framed by summer’s mature greens, panoramic pastureland, and layered ridges, the two buildings watch over storied grounds—grounds that owners Don and Barb Woodsmall have spared no expense coaxing back to life and infusing with their own stories. These buildings are Roseland Lodge and Helen’s Cottage.

Since 2005, Don and Barb have completed project after project here, most recently engaging Corey and Lindsey, founders of Shrader Stone, to build a sauna using river rock gathered from the property and granite lintels salvaged from Danville textile mills. The natural edges and organic tones seem to breathe in tandem with the surrounding landscape, a result of “thinking about what nature and the landscape are telling us,” according to Lindsey.

Don first thought the property had potential when he saw the 180-degree views; “It’s just unbelievable,” he said. A lover of history, he values the location’s authenticity, a quality that Corey says made their collaboration a good fit, “having other people around you that share the same vision and level of care about what’s happening is really nice.”

Corey and Lindsey specialize in creating unique outdoor spaces using Old World stone masonry techniques and natural gardens that emphasize native plants. Though they both have their own specialty—Corey, masonry and Lindsey, gardening—they’re closely involved in each other’s process and share a love of sustainability, history, and working with their hands. “I love that type of project where the last time it was reassembled and touched by human hands was maybe 200 years ago,” said Corey. The Woodsmall estate fits the bill.

Roseland Lodge, which the Woodsmalls reserve as a guest space for friends both local and from distances as far away as Germany and Ireland, was constructed in 1922.

It was originally built using dead American Chestnut trees harvested from the area that were killed by the Chestnut blight. The original owner could hardly have imagined that an emphasis on local and salvaged materials would be revered so many years later.

In 1990, the building stood in disrepair and was acquired by Mark Smith, a Lynchburg figure known for his collection of rare automobiles housed at the corner of Main and 13th Streets in downtown Lynchburg prior to his passing. “He loved bringing things back to their original glory, but not making them unnaturally shiny and sparkly,” Barb said of Smith.

The Woodsmalls bought the property from Smith in 2005.

The Cottage, which the Woodsmalls have made their home, holds its own touching history. Upon learning that a nearby 80-year-old neighbor was born in the cottage in 1928, the Woodsmalls lovingly designated it “Helen’s Cottage.” A plaque now hangs in her honor by the front door, commemorating the friendship that grew between them before her death in 2015.

While both the lodge and the cottage have been through many iterations since Helen’s birth and death, the Woodsmalls’ updates all have one element in common: permanence. That’s what draws Don to stone.

“You never have to do anything to it, and 200 years from now, it’ll still be there,” he explained.

Corey said they’d originally thought of building double-faced stone walls on the sauna, but landed on a single-faced stone wall to preserve heat efficiency in the winter. Some of the river rocks were pulled from the perimeter of nearby fields where farmers deposited them over the centuries, others directly out of the Tye River where Corey and his team often retreated for lunch during construction. “It is just impossible to leave a good rock sitting there on the riverbank once you’ve seen it,” he said.

The sauna was Corey’s first experience with Cotswold architecture, a special request from Don, who loves the English style featuring stonework and a steep roof pitch with no overhang. Don also requested that Corey use minimal mortar, a technique which means the mason must work with the natural contours of the stones. “A lot of guys put stone up and put a foot of mortar around it and then another rock way over here,” Don explained. “That’s easy, anybody can do that, but to make them all fit together like Corey did, that takes talent.”

The salvaged lintels, some still sporting flecks of paint from their more polished days, form steps descending from the patio to the sauna. Quoins and headers chiseled from the same lintels accent the doorframe along with a cross. Don says the cross represents his and Barb’s worldview, a worldview he hopes his grandsons know and share when they own the property one day.

One more step forward through the doorway and the resinous scent of cedar hangs in the air—this spot is Don’s retreat at the end of most days, an easy choice seeing as he can heat the sauna with the touch of a button on his phone.

“It was great collaborating with a long-time friend and long-time customer,” said Corey, whose craftsmanship is seen elsewhere across the property in the form of lintel steps, pillars, and foundation work. Lindsey agreed, “We have the most fun clients. There are faster and cheaper ways to do this, but I think we’re all getting tired of things that break.”

For the Woodsmalls, these thoughtfully crafted outdoor spaces are perfect for enjoying mornings and evenings accented by bird songs and wildlife sightings, but the stories of friends from far and near enjoying the spaces with them seem to be their favorites. Barb’s top memories on the patio? “I think it would always involve grandkids,” she said, smiling.


Let the Floor Do the Talking

When it comes to home design, we often focus on what’s at eye level—paint colors, artwork, statement lighting. But some of the most impactful design choices happen beneath our feet. Bold area rugs, painted wood floors, vintage tile, and graphic runners can define a space just as effectively as a feature wall or chandelier. In fact, when thoughtfully incorporated, the floor becomes the feature.

Whether you’re decorating from scratch or looking for a way to refresh an existing room, letting the floor take center stage can elevate your home’s personality while still remaining functional. Here’s how to make the most of what’s underfoot—without overwhelming your space.

Go Bold with Area Rugs

Rugs are one of the easiest and most flexible ways to introduce color, pattern, and texture. They can serve as a visual anchor, define distinct zones in an open floor plan, or breathe life into a neutral room.

Oversized or graphic rugs work especially well in minimalist spaces, where they can become the central focal point without competing with other decor. Vintage or Persian-style rugs can add warmth and history, particularly when layered into contemporary or industrial rooms.

Painted Wood Floors with Personality

Painting a wood floor might sound sacrilegious to some homeowners, especially in historic homes—but under the right circumstances, it’s a design-forward move that can completely transform a space.

Painted floors can brighten a dark room, hide imperfections, or add unexpected charm. From classic white or soft gray to checkerboard patterns and colorful borders, the options are practically endless. Painted stairs in particular offer a narrow canvas for creativity—try numbers, stripes, or even ombré effects.

Painted floors tend to work best in rooms where wood isn’t pristine to begin with—think enclosed porches, attic bedrooms, or cottage-style kitchens.

TIPS FOR SUCCESS
• Choose the rug first when possible, and let its colors inspire the rest of the palette.
• Don’t be afraid of color, but consider sticking to one bold element—if the rug is loud, keep furniture and accessories more subdued.
• Use rug pads to add cushioning and prevent slipping, especially in high-traffic areas like hallways or kitchens.

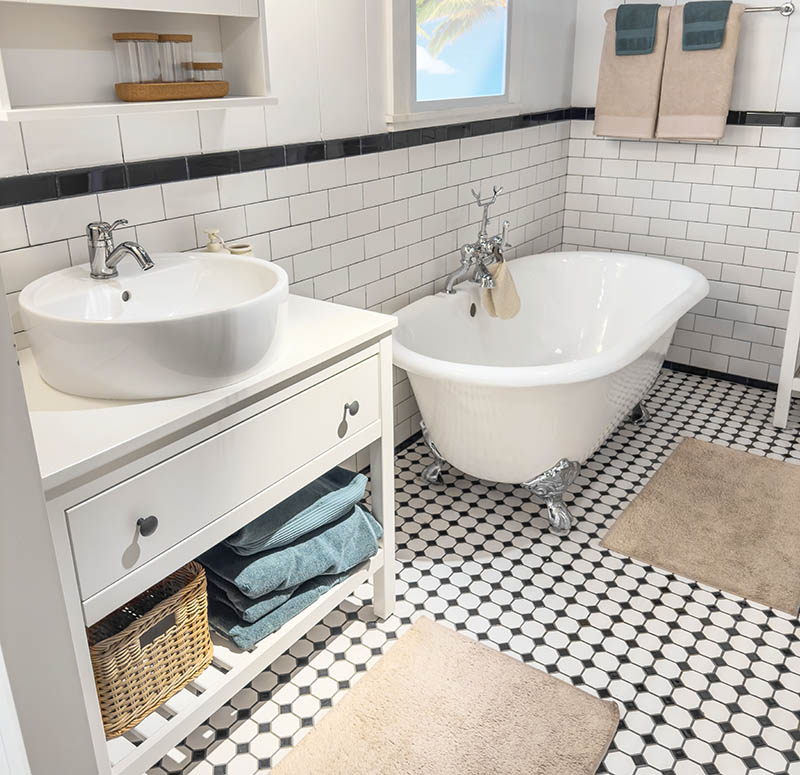
Free standing bathtub in a stylish bathroom

Celebrate Original Tile

There’s a reason vintage tile has made a major comeback in recent years—it’s full of character, often handcrafted, and always full of story. Whether it’s a patterned hex tile from the 1920s or a colorful mid-century mosaic, original tilework deserves to be celebrated, not torn out.

In older bathrooms, lean into the nostalgia by pairing vintage elements with updated fixtures that complement its character—perhaps a modern sink or floating vanity that doesn’t block the view of the floor. In entryways or sunrooms, patterned tile can become the entire design concept.

Even newer homes can benefit from tiled floors with personality. Consider encaustic-look tiles in laundry rooms, bold cement tiles in powder rooms, or terrazzo in modern kitchens.

TIPS FOR SUCCESS
• Prep is key. Sand, clean, and prime thoroughly for a durable finish.
• Choose a floor paint formulated for high-traffic use, and allow plenty of curing time.
• Consider stencils or masking tape to achieve crisp lines or geometric designs.

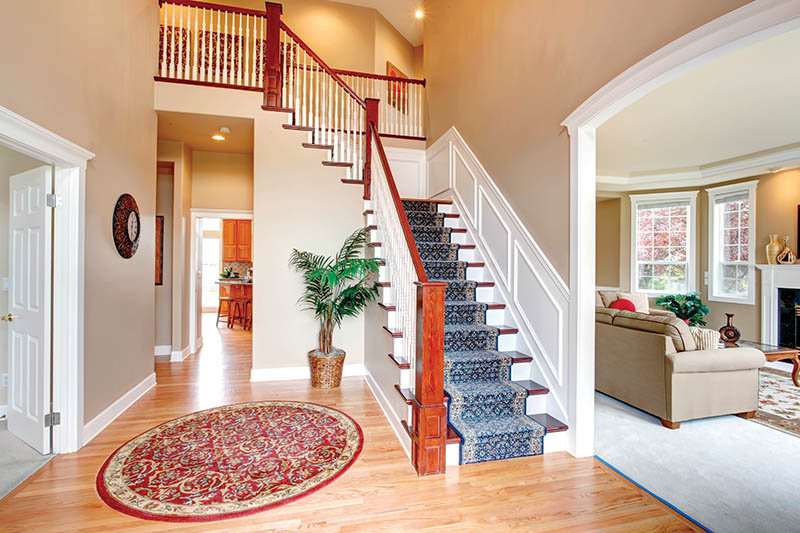
Hardwood hallway with red round rug and palm tree. View of staircase with blue rug

Statement Runners for Style & Function

Hallways and staircases are often overlooked when it comes to design, yet they’re some of the most frequently used spaces in the home. A vibrant runner can soften these transitional areas while adding unexpected color and energy.

Patterned or vintage runners are especially effective on stairs, where the repetition of each step enhances the visual impact.

In long hallways, a runner can break up monotony and create rhythm. Bonus: They help reduce noise and protect high-traffic surfaces.

TIPS FOR SUCCESS
• Clean and reseal vintage tile to restore vibrancy and protect from moisture.
• If the pattern feels too busy, balance it with solid colors on the walls and ceiling.
• Avoid placing rugs over tile unless it’s for warmth or safety—let the craftsmanship show.

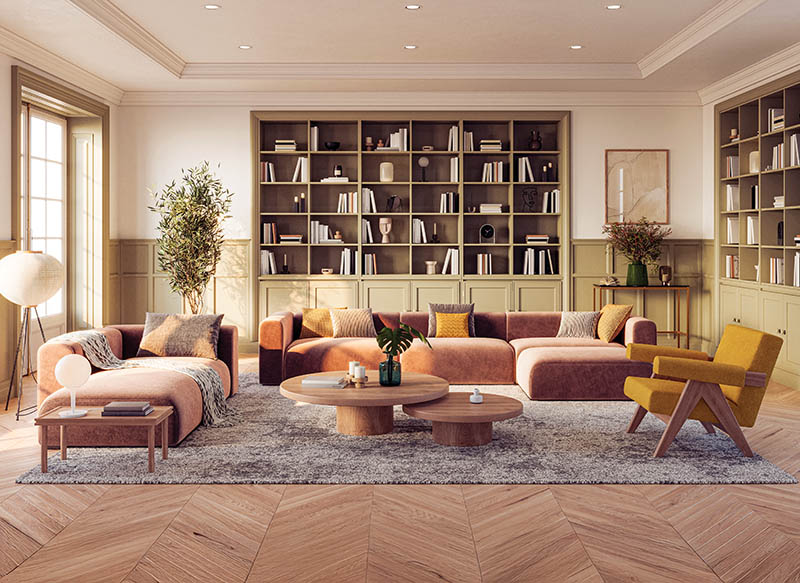
A stylish living room interior featuring modern designer furniture, wall paneling and elegant accessories

Balance Is Everything

The key to using the floor as a design element is balance.

If your flooring is loud, keep the surrounding elements clean and intentional. If your room is minimal, a floor with personality can become the showstopper. Not every room needs a statement floor—but every home can benefit from at least one.

Entryways, powder rooms, and stairwells are great candidates for bolder underfoot choices, while main living areas might benefit from subtler grounding tones.

When done thoughtfully, floors don’t just support the design of a room—they define it. They set the tone, carry the eye, and tell a story that no wall color can quite match. So next time you’re planning a room refresh, look down. You might already be standing on your next design idea.

Tips for Success
• Use a stair rod or rug tape to ensure safety on stair runners.
• In hallways, leave a few inches of flooring visible on each side for a tailored look.
• Don’t shy away from layering—a flatweave runner over hardwood or tile adds texture and warmth.


Climate-Resilient Curb Appeal: Durable Upgrades for Today’s Homes

Curb appeal has long been a hallmark of great design, but in today’s world, looks alone aren’t enough. As Central Virginia experiences hotter summers, heavier rain events, and stronger storms, homeowners are increasingly searching for ways to make their properties both beautiful and resilient. In fact, a recent Zillow survey found that 86% of home buyers believe it’s very important for a home to include at least one climate-resilient feature.

This growing focus reflects a broader shift in how we think about home upgrades. It’s no longer simply about aesthetics or short-term value—it’s about protecting your investment, creating comfort, and ensuring your home can withstand whatever nature brings. From porches and patios to roofs and siding, resilient choices are reshaping the way we approach home design.


Weather-Resistant Materials: The Foundation of Resilience

Traditional materials like wood or untreated metals can be charming, but they often don’t hold up over decades of seasonal shifts. Wood siding, for example, may crack, warp, or splinter after repeated exposure to rain and sun. Newer composites and engineered products offer an alternative, resisting fading, scratches, and stains while keeping their structural integrity.

These materials are especially appealing for outdoor living areas. Patios, porches, and decks are some of the most-used spaces in Virginia homes, and when they are built with durability in mind, they add lasting value. Engineered decking and siding often come in a wide range of colors and finishes, allowing homeowners to match their preferred style without sacrificing strength.

Staying Cool When It Heats Up

Heat waves are becoming more frequent, and with them comes the challenge of keeping outdoor spaces comfortable. Anyone who has tried walking barefoot across a hot deck or patio knows the frustration. New technologies now address this issue head-on by reflecting solar energy and reducing heat absorption.

These “cool surface” products—whether decking, pavers, or roofing shingles—make a tangible difference. Not only do they make patios and porches more enjoyable during the height of summer, but they can also ease the cooling burden on the home itself. Over time, these smart choices can reduce energy costs and improve overall comfort, extending the usability of outdoor spaces well into July and August.

Fire-Smart Choices: Protection Where It Counts

While Virginia is not known for wildfires on the same scale as the West, fire-resistant design is becoming more common nationwide. Roofing, siding, and decking materials that meet stringent safety standards can significantly reduce the risk of fire spread.

This is particularly relevant for homeowners in rural or wooded areas around Central Virginia, where dry conditions can increase vulnerability. By making proactive choices now, families can safeguard their homes while still achieving the style they want.

Sustainable by Design: Looking Beyond the Present

Resilience isn’t only about protection—it’s also about responsibility. Many homeowners are motivated by the desire to reduce their environmental impact. Materials made from recycled or renewable resources allow homeowners to make eco-friendly decisions that still align with their design goals.

Take composite decking as an example. Many brands now produce boards made from up to 95% recycled content, giving plastic waste and wood scraps a second life. That means homeowners don’t have to choose between sustainability and style—they can have both.

A Local Perspective: Smart Investments That Last

Companies like Trex, a composite decking manufacturer with products made in the USA, demonstrate what’s possible when innovation meets sustainability. Their decking resists fading, heat, and moisture, while also being fire-compliant and environmentally responsible. While Trex is just one example, it highlights the types of options available to homeowners who want long-term resilience built into their outdoor spaces.

The Future of Curb Appeal

Ultimately, climate-resilient curb appeal is about thinking ahead. By selecting materials and upgrades that can withstand Virginia’s changing conditions, homeowners not only protect their investments but also improve daily life. Imagine a deck that stays cool underfoot, a roof that reduces fire risk, or siding that looks as fresh after ten years as it did on day one.

These aren’t futuristic ideas—they’re available now. And as buyers continue to prioritize resilience, the homes that feature these upgrades will stand out, offering both beauty and peace of mind.

The takeaway: Resilience has become as much a part of curb appeal as paint colors and landscaping. For Central Virginia homeowners, investing in durable, sustainable, and future-proof materials ensures that their homes remain strong, stylish, and welcoming—no matter what the forecast brings.


In the Heat of Summer: Gardening with Resilience

By: Lindsey Cline-Shrader

As we move from a cool, rainy spring and step into the season of summer squash, sticky, sweet watermelons, and thick humidity, watering quickly becomes one of the gardener’s main challenges. Each year, our summers become hotter and drier—changing how our gardens grow and how we care for them. But plants don’t have to suffer. With a shift in approach, summer gardens can remain beautiful, healthy spaces.

Water Deeply and Early

The best time to water is early in the morning. This gives plants a strong start to the day and allows leaves to dry out by the afternoon, reducing the risk of powdery mildew and fungal diseases. Morning watering minimizes evaporation, meaning less water is wasted, and more reaches the roots.

Whether tending a new bed or maintaining an established one, water deeply and less often. Quick watering encourages shallow root growth, making plants less resilient to drought. Light watering can run off without soaking in if the soil is very dry.

Aim to imitate about one inch of rainfall—placing a shallow pan in the garden can help gauge your efforts. Or dig six inches down and check how far the water has reached.

Choose the Right Plants

Most importantly, plant the right plants in the right place. Choose drought-tolerant plants for sunny, dry areas. Many native species are naturally adapted to our summer
heat and bloom all season. You can also include Mediterranean plants like lavender, rosemary, sage, and lamb’s ear, which thrive in hot, dry conditions.

You’ll often hear gardeners talk about “hydrozoning”— a fancy term for grouping plants with similar water needs.

Keeping thirsty plants together and separate from drought-tolerant ones makes watering more efficient and offers spaces to enjoy after spring blooms disappear.

Reduce your garden maintenance by placing ornamentals in part shade or rich-soil pockets. Unless planted in a thoughtful place, common plants like roses, lilacs, rhododendrons, azaleas, and hydrangeas will likely need afternoon shade, yearly soil amendments, and weekly watering to look their best.

Observe Your Microclimates

Most often, the best improvements and the garden you dream of comes from simply paying attention. Which areas get the most afternoon sun, and which are partially shaded? Which areas have reflected heat from a building or pavement? Which areas get water from a downspout or depression?

These microclimates determine how much watering a space will need. Look for signs of heat stress—sunburnt leaves, brown or yellow leaf edges, or midday wilting—that signal a plant needs to be moved in the fall. Today’s observations shape next season’s plans and slowly build a resilient garden.

Quick Tips

Organic mulches help retain moisture, cool soil, improve soil health, and reduce weeds. Healthy soil holds moisture better, and planting densely helps plants thrive.

Shade new plants during establishment (the first 4-6 weeks after planting) in the summer. Shade cloth, other plants, or umbrellas can provide enough relief for plants to get fully rooted before the summer heat takes them out or slows their growth.

Install a rain barrel, which has two-fold benefits: first, it captures and reduces runoff and erosion, and second, it provides water when our water table dips in mid-summer. The James River Association periodically offers rain barrel workshops.

Use drip irrigation and soaker hoses to conserve water and deliver it directly to plant roots. Overhead watering wastes more water and encourages foliar diseases. If you prefer hand-watering, consider a watering wand to avoid over-spray and water roots directly.

Check containers daily. Potted plants dry out quicker than plantings, especially in terracotta pots that absorb moisture.

Unless you have self-watering pots, containers often need water daily during heatwaves. Top with mulch to help retain moisture.

Gardening is an act of resilience for us and the landscape. In the face of a changing climate and other environmental setbacks, we can begin with small, hopeful acts of restoration: planting native, reducing water use, and planning our spaces for resiliency. By creating habitat and beauty, we may find resiliency for ourselves, too.


10 Drought-Tolerant Native Plants

Common Yarrow
(Achillea millefolium)
A tough, spreading perennial with finely cut foliage that blooms all summer.

Black-eyed Susan
(Rudbeckia fulgida)
A cheerful and resilient bloomer that handles heat, neglect, and clay soil.

Little Bluestem
(Schizachyrium scoparium)
A native warm-season grass with a striking fall color that grows in nearly any place.

Narrowleaf Mountain Mint
(Pycnanthemum tenuifolium)
Consistently ranks highest in pollinator support,
is also deer resistant, and thrives in tough, dry soils.

Wild Bergamot
(Monarda fistulosa)
Lavender-pink flowers throughout late summer, deer resistant and adapted to dry soils.

Butterfly Weed
(Asclepias tuberosa)
A tap-rooted milkweed with bright orange flowers, ideal for dry, sandy soils.

Beardtongue
(Penstemon digitalis)
Grows easily in dry, well-drained soil with beautiful upright white blooms in spring.

Threadleaf Coreopsis
(Coreopsis verticillata)
Light, airy foliage with bright yellow blooms; thrives in hot, dry gardens.

Field Goldenrod
(Solidago nemoralis)
A showy, graceful goldenrod of manageable size that tolerates drought and thrives in tough soil.

Purple Lovegrass
(Eragrostis spectabilis)
A low, airy native grass with delicate pink-purple seed heads.