Designing a Cutting Garden

Having a cutting garden is good for the soul. It’s a good place to clear your head, observe nature and give the kids a few chores to “build character.”

As the owner of Irvington Spring Farm, I enjoy sharing our fresh flowers with locals—but I also enjoy sharing my expertise with those who want to make their own garden at home. Here, I walk you through some of the top factors to consider:

Take Inventory
To get started, take a walk around your yard, and see what you already have. Many common shrubs and trees can be used as cut greenery for flower arranging. Camelia, abelia, boxwood varieties, crabapple and evergreens are all options. Do you have clematis, ivy, honeysuckle, or sweet pea? Those vines can all be used for cutting. If you currently have any kind of landscape plantings, test them, and see if they work as cuts.

When plants are just emerging in the spring and have tender new leaves, they are not nearly as hardy. If you try something in May and it fails, try it again in June. It just might work then.

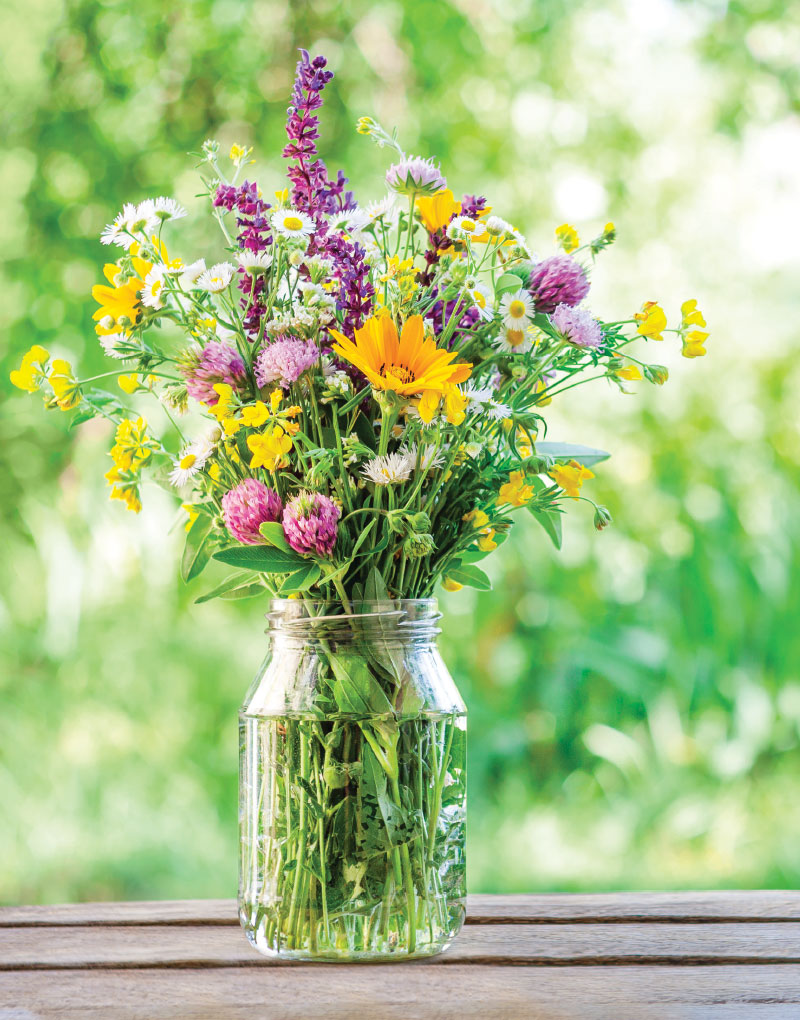
wildflowersLocation Selection
To bloom well, most flowers need full sun. Watch the way the sun moves around your yard and find an area that receives close to six hours of daily sun. Your spot should also have good drainage, good air circulation, relatively level ground, fencing and loose rich soil.

Humidity can cause a lot of fungus and mildew issues. Choosing resistant varieties and providing both good light and air flow is your best defense. To achieve good air flow, don’t crowd your garden next to your house, garage, or densely planted shrubs. Plants, like people, want to be able to feel the breeze blow through!

To check soil drainage, test the site you are considering.

Dig a planting hole 12 inches deep by 12 inches wide and fill it with water. Does the water stand in the hole?

Does it drain?

Does it drain slowly? You should be able to see water in the hole for about 10 minutes.

Water
You must have water easily available to keep your plants receiving the equivalent of an inch of rain a week. Drip irrigation systems and lay flat hoses are more efficient than both hose and overhead watering systems. Don’t water in the heat of the day as this increases plant stress and can cause disease issues. Watering early in the morning is best.

If you want to be a conscientious water user, consider drought-tolerant native plants such as mountain mints, monardas, rudbeckias, coreopsis species or herbs.

Soil Prep
Now, you are ready to prepare your beds for seeds or tender young plants. Loose, well-draining loamy soil is ideal. Garden writers are encouraging us not to till soil like our predecessors did. If you construct raised beds, you can create the perfect soil and have very few residual weeds as well. The term raised bed simply means an above-ground garden. It can be soil layered on top of the ground, a lasagna-style layered garden (for more information on this, I recommend visiting: growmyownfood.com

lasagna-gardening-101/), or a formal-built garden frame filled with purchased garden soil. However you choose to design your bed, three to four feet wide is usually good.

A soil with good loam will form a ball when you squeeze it together in your fist but easily crumbles apart when you poke it. These home tests obviously can be subjective. To request a soil test, call the Lynchburg office of the Virginia Cooperative Extension at (434) 455-3740.

Planting
Creating a garden is like painting a picture. There are so many colors and forms to choose from that you will be constantly curating your collection. It is extremely important when choosing plants that you know how tall they will get. Read the label on your plant or seeds and know what its growing habits are.

Include perennial plants where you can because they will save you money over time. They can be divided every three years or so, thus increasing your available plants, or trade them with friends for new varieties you don’t currently have. Think about having perennial plants that go through the whole season—from early spring favorites such as primrose, Lenten rose or columbine to fall-blooming asters and sedums. Garden Phlox is a nice medium-size perennial flower to have for cutting. Peonies are always a favorite, and they bloom for 50 years or more.

Annuals must be planted every year and they give gardens color quickly. To keep them blooming they must be deadheaded, which is when you cut old blooms off the plant. If you allow your flowers to make seeds, they will stop blooming. Zinnias and cosmos are prolific bloomers. Sunflowers, not so much. They must be replanted every two weeks to have successive blooms available.

Bulbs and tubers are another category in the cutting garden. Tulip bulbs allow you to grow an amazing array of color and form, if you can keep animals away from them. Orienpet lilies, also bulbs, have an amazing fragrance and are long-lasting. Dahlias, grown from tubers, are the fall queens. There is surely one that will become a favorite in your garden.

If you have multiple beds, don’t forget to use cover crops on rows that are done for the season. Cover crops help keep your soil well-fed so it in turn can keep producing well for you. (You can study more about cover crops at Johnny’s Selected Seed: www.johnnyseeds.com.)

Leave your garden debris along your path somewhere, perhaps at the end of the bed. This provides habitat for native bees and other creatures, such as toads and turtles, that will share your garden.

Maintenance
To keep your cutting garden looking its best, you need be attentive to it. A daily walk in the morning or evening to deadhead and watch for insect or other plant health issues will keep problems in check. You should harvest your flowers in the morning before it is too hot or once the temperatures drop in the evening. Always place your stems in water as soon as you can. Recut your flower stems after three days and fill your vase with clean water.

When you do diligent planning work, choose the right plants for your space, pay attention to the amount of water they are receiving and do your best to keep your plants deadheaded, your cutting garden will reward you with both bounty and beauty.

Irvington Spring Farm
Irvington Spring Farm offers cut flower seed trays, individual plants they think are worth adding to your garden, as well as dahlia tubers. Gardening classes on different topics are offered throughout the season. Learn more by following them on Facebook, Instagram and TikTok or visit their website, Irvingtonspringfarm.com.


Composting 101

Down and dirty advice to cultivating better soil in your garden

Soil is tricky. It is arguably the most critical component of a healthy garden, and yet it can feel a little overwhelming to try to get a good grasp on topics such as pH, macronutrients vs. micronutrients, and other aspects of soil science. Composting is a wonderful way to skip the headache and get your plants the food they need
(so they can provide you with the foods you need).

There are tons of benefits to composting. Here are a few:

It’s a No-Brainer
Not only is the process of composting pretty simple, but it also eliminates the guesswork of trying to fertilize the right plants with the right chemicals at the right time. Compost is all-natural, and can pretty much be applied to everything (veggies, perennials, shrubs, trees, etc.) any time and in any amount! You can’t overdo it, because the nutrients in compost are stored up to be used by the plants when they need them.

Beneficial Critters
Compost is a great habitat for the beneficial organisms that make nutrients available to your plants. Think of these critters as little factories that take the nutrient-rich compost and process it into accessible, bite-sized morsels of goodness for your plants’ roots to eat up. Additionally, they often provide natural antibiotics, aeration, and water systems to keep your plants healthy.

It’s the Cornerstone of Soil Structure
Good dirt isn’t just about the nutrients it contains; it’s also about structure. If your garden soil is too compacted, too wet, too dry, or too sandy, plants won’t be able to reach their full potential. Compost helps to improve the structure of your garden soil, allowing for good air flow and drainage. These things are critical to happy, healthy plants, especially in our clay-rich Virginia gardens.

Of course, these things are all in addition to the fact that compost is a powerhouse of essential plant food. So how does composting work?

Compost is Made of 4 Simple Ingredients:
Greens—Nitrogen-rich items such as kitchen scraps and grass clippings that break down quickly and provide the energy needed for quick microbial growth.

Browns—Carbon-heavy items such as straw, wood chips, and untreated cardboard. These things help to add air space to your compost pile, because unlike the wet, dense green materials, they are dry and won’t decompose quickly on their own.

Air—Composting is an aerobic process. The organisms working to break down the composted materials need air to breathe!

There is actually a surprising amount of debate over how frequently you should “turn” or aerate your compost heap, but a good rule of thumb for a hot (see below), active pile is roughly once a week.

A pitch fork is a great tool for a manageable-sized compost pile.

Hot? Yes! The process of breaking down the composted materials actually generates heat. If done correctly, your compost heap should reach an internal temperature of between 130 to 150 degrees. You don’t want your heap to exceed 160 degrees though, as this is too hot for the organisms to work. You can get a temperature gauge or an internal thermometer to monitor this, but it isn’t essential.

Water—Those microbes need water to work, too. After piling your compost heap, you’ll want to water it. You want it damp—but not soaked—at all times. This just means that during dry spells, you may have to water it a bit more, and during rainy spells, you may need to add some cover to keep it from getting soggy.

Finally, the How-To for Making Great Compost:
These tips are for creating an open-air compost heap. You can purchase enclosed composting bins at any garden store, but you can also make your own compost containment system using stuff you probably already have laying around: fencing, logs, cinder blocks, etc. A fully enclosed compost bin has some advantages, but a simple three-walled structure and a compost pile on the ground will get the job done.

  • Choose a spot in your yard convenient to where you’ll need the compost, and strip it down to bare dirt.
  • Start with a layer of straw or twigs a few inches deep; this helps with drainage
  • Begin adding your compost materials in layers, alternating green and brown.
  • Add a “manure” material to the top of the pile, which is any high-nitrogen source like grass clippings. This starts the composting process.
  • Cover the pile with a sheet of plywood or a tarp—anything really—to retain heat and moisture.
  • Turn your pile about once a week; you can turn less once your pile is established.
  • In the future, just mix in your new compost scraps!


The Best Gardens of Virginia

MAKE PLANS TO VISIT THESE HORTICULTURE-FOCUSED DESTINATIONS IN 2022

It’s no secret that Virginia is a beautiful place to live, and every season brings out a new aspect of its beauty. Right now, while the air is cold and the trees are bare, we can appreciate that unhindered view of the Blue Ridge, maybe capped with a dusting of white. We can also plan for what we will do once the weather warms up again.

With that in mind, and to coordinate with our annual “Best Of Issue,” we have worked with some of Lynchburg Living’s most beloved contributors to curate a list of Virginia’s “best,” must-see gardens. Without further ado, here are our recommendations:

Charlottesville

Thomas Jefferson’s Gardens at Monticello
www.monticello.org/house-gardens/farms-gardens
Thomas Jefferson was an avid observer of nature, and a dedicated and methodical gardener. The gardens at Monticello served not only as a functional producer of food, but also as a lab for Jefferson’s experimentation with imported and exotic vegetables and botanicals. In fact, he documented his gardening experiments in his “Garden Kalendar,” which he wrote with a scientific exactitude, reflecting his passion for horticulture. Today, visitors can tour the lovingly restored flower gardens, the stunning 1,000-foot-long vegetable garden terrace, and the sprawling orchards maintained by the Thomas Jefferson Foundation. You will also have the opportunity to learn about 19th-century cultivation and the rich history of Virginia as a critical state in our nation’s development.
Recommended by Kaye Moomaw

Pavilion Gardens at University of Virginia
While you’re in town exploring Monticello, you’ll want to take a quick drive over to the University of Virginia, founded by—you guessed it—Thomas Jefferson. At UVA, TJ really flexed his truly inspired talent for landscaping. There are 10 unique pocket gardens spaced symmetrically along both sides of the famous “Lawn.” Many of the flowers and shrubs on display at UVA in Jefferson’s time were cultivated at Monticello and transplanted into the university gardens, which were traced and outlined by Jefferson’s own invention—serpentine brick walls. You’ll want to find a shady spot to sit with a cup of tea and a good book, because the small size and elegance of some of these spaces truly project a “secret garden” feel.
Recommended by Kaye Moomaw


Lexington

Boxerwood Gardens
boxerwood.org
The Boxerwood Education Association maintains over 15 acres of protected property, where they have identified and cultivated five unique ecosystems, all available for the inspiration and education of anyone with an interest in environmental preservation. The Pioneer Forest— complete with a “fairy forest” the kids are sure to love—is a great place to experience forest succession. The Wetlands is a habitat teeming with life, and is home to wonderful critters. As you transition into The Field, you can observe the different fauna that are attracted to this grassy, open space. The Hedgerow provides a transition between forest and field, and serves as a sort of highway for smaller critters and sun-loving trees and shrubs. Finally, the Established Woods is the picture of an old-growth, healthy and active forest full of large trees, and three distinct levels of growth: the upper, middle, and lower stories.
Recommended by Shannon Brennan


Nelson County

The Quarry Gardens at Schuyler
quarrygardensatschuyler.com
This one is a bit out of the way from our other suggestions, but well worth the trip because of its truly unique offerings. Once a very profitable soapstone quarry, the Quarry Gardens are spread out over two distinct geological formations, which foster a wide array of diverse ecosystems. In fact, maintained within these 40 acres is the largest concentration of Virginia native plants in the entire commonwealth. A large and winding trail system boasts 34 “galleries,” where you’ll find everything from pollinator gardens and vernal pools to wetlands, barrens and a fern gully.
Recommended by Shannon Brennan


Greater Lynchburg Region

Lynchburg Grows
www.lynchburggrows.org
Lynchburg Grows is a seven-acre, nonprofit urban garden that employs individuals with disabilities and provides fresh, organic produce for the community. Veggies are grown in greenhouses with all sorts of gardening techniques, including hydroponics. They also run a CSA, a farm store, and FreshRX, a super-inventive vegetable prescription program aimed at helping people with diet-related illnesses make healthy lifestyle changes.
Recommended by Susan Timmons

Anne Spencer House and Garden Museum
www.annespencermuseum.com
The Anne Spencer House and Garden Museum was home to late Harlem Renaissance poet Anne Spencer, who was an essential voice, both locally and nationally, for civil rights and equality. Her garden was a place of solitude and peace amid the very turbulent and racially segregated period of history in which she lived. The time she spent in reflection while tending to her garden inspired her writing; the house and gardens also played host to intellectuals, creatives, and African American travelers. The gardens have been restored with the help of Spencer’s direct descendants, as well as old photographs. Tours are available, which we highly recommend. Not only is this a beautiful, creative space, but it is also an invaluable piece of history.
Recommended by Susan Timmons and Ashleigh Meyer

Old City Cemetery
www.gravegarden.org
No local garden list would be complete without mentioning Old City Cemetery, with its peaceful rolling hills, sculptures, ponds, and, of course, Virginia’s largest public collection of heirloom roses. Yes, it’s also a cemetery, but it’s such a beautiful place. I personally think the cemetery adds an intriguing historical element to the whole experience, which you can learn about by visiting the gift shop/museum on the grounds—but if you’re just there for the flowers, you may not even notice the cemetery at all. Admission is free, so take advantage of a sunny winter afternoon and stop by.
Recommended by Susan Timmons and Ashleigh Meyer

Cloverlea at Claytor Nature Center
www.lynchburg.edu/academics/academic-and-community-centers/claytor-nature-center
Owned by Lynchburg College, Claytor Nature Center is a hidden gem located off Route 43 in Bedford County. The gardens enshroud a stunning 1780s farmhouse (Cloverlea) with breathtaking views of the Peaks of Otter. The grounds are free and open to the public, and feature meticulously trimmed boxwoods, a variety of flowers and shrubs, and one of Virginia’s largest white ash trees. I find it to be a truly calming and inspiring landscape. Also at Claytor Nature Center are multiple trails through forests and wetlands along Big Otter River. The Education and Research Center on site houses the Ramsey-Freer Herbarium, a collection of more than 63,000 dried and preserved plant specimens from all around the region.
Recommended by Ashleigh Meyer


Richmond

Lewis Ginter Botanical Gardens
www.lewisginter.org
This destination has more than a dozen themed gardens across 50 acres, complete with a really gorgeous glass-domed conservatory. A designated rose garden, an “Asian Valley” incorporating the stunning design features of Japanese gardens, and a fun and educational children’s garden are just a few of the reasons you need to visit the Lewis Ginter Botanical Gardens. In fact, you can even make a stop in the winter! Lewis Ginter is open year-round for guests and also offers membership options.
Recommended by Susan Timmons and Kaye Moomaw


THE CHRISTMAS CACTUS TRADITION

We take part in many horticultural holiday traditions in the United States, but there’s only one that is beautiful, long-lasting and great for gifting: the Christmas cactus.

Your Christmas tree will eventually turn brown and end up on the curb along with your wreath. Your poinsettia will lose its eye-catching color. But this unique winter-flowering plant can live for literally hundreds of years. Also, cuttings are often given as gifts and passed down through generations, making them the perfect candidate for a special holiday tradition.

There are three popular holiday cacti: the Easter cactus, the Thanksgiving cactus, and the Christmas cactus. Though they can be difficult to tell apart, there are a few subtle differences. The “leaves” of the Christmas cactus will be softly scalloped or bluntly serrated, while the Thanksgiving cactus will be sharply serrated with a claw-like projection on its edges. The Easter variety has very rounded leaf edges.

Cultivating a Christmas Cactus

If you have an established plant, you can actually coax these holiday cacti into blooming with just a few tricks, but you need to get started on this well before your desired bloom date. About six to eight weeks before you want to see some color, you’ll want to make sure your plant is moved to a cool, dark location.

Though the Christmas cactus is native to the rainforests of Brazil, they are actually stimulated to bloom with low lighting and cool weather. Fifty-five degrees is ideal. You’ll also want to make sure they receive 12 to 14 hours of darkness a day. This seems counter-intuitive, but these conditions actually encourage the cactus to put on heavy buds, because the plant thinks it’s dying. In an effort to reproduce, the cactus will bloom.

During this period, water sparingly—only when the soil dries out. At every other watering or so, you might want to use a gentle fertilizer higher in phosphorous. You’ll notice a lot of little buds developing on your plant in no time.

Once your plant is heavy with buds and ready to bloom, put it on display and it will be sure to wow your guests and add a burst of natural color to your Christmas decor. These plants can be kept to bloom on their own time on a shady porch or in your house. Just be sure to maintain mild conditions, dappled sunlight and a humid but not overly wet environment.

A Green Gift to Others

Of course, if you plan to gift cuttings of your cactus, you’ll want to avoid taking the cuttings while the cactus is in bloom or heavy with buds. A few weeks before Christmas is a great time to take the cuttings and propagate individual plants. Better yet, if you get them repotted before Thanksgiving and gift them on turkey day, your friends just might get lucky and have their own blooms by Christmas

These cacti are “epiphytes,” like the very trendy air plant. In their natural environment, they grow on other plants. As such, they prefer a loamy potting mix over traditional soil. Prepare a pot with a moist (but not soaked) cactus or succulent blend soil. You can find this at most garden centers. You can also make it yourself by mixing your own blend of 50 percent peat moss and 50 percent perlite.

Look for healthy leaf segments on your mature Christmas cactus. Then, choose a piece with at least two or three healthy segments above the bottom. The more leaves, the better, as long as you don’t leave the parent plant with too few.

Carefully twist the lower leaf segment off of the plant, being sure to get the very bottom of the segment where it attaches to the top of the one below. You should pull out a small root with it. Then bury the cutting about half way up the bottom segment into the prepared pot, just deep enough so that it can hold itself up.

Some people elect to let the cutting “heal” overnight before repotting it. Your baby cacti will need to be watered or misted only when the top layer of soil is dry. Watch it closely though—this soil type dries out quickly. Once a good root system is established (after about two weeks) you can water more heavily—but remember these plants do not like wet feet.

This plant truly embodies the spirit of the season: offering up beautiful cold-season color, requiring virtually no work, and even doubling as a sentimental and lasting Christmas gift.


Cold Weather Crops

Prepping a productive winter garden

Wow, what a summer. If you’re a gardener, your garden this year has been a labor of love. Drought, peppered by random, short-lived downpours and scorching hot days, made this a difficult season.

Soon, our days will grow shorter and cooler, marching slowly toward autumn. Maybe you’re not ready to be done yet. Your green thumb is still a little itchy. Well, I’ve got great news for Virginia growers: gardening doesn’t have to be reserved for the warm months of May through August!

With a little planning, you can grow and harvest fresh veggies all year, and keep your soil healthy for early and easy spring planting.

There are just a few things you need to know before hitting the dirt:
1. When is the first “killing frost”?
2. Which veggies are frost-hardy?
3. When do you need to plant them?

Here in zone 7a, our average first killing frost date is around October 14. This is the date that the frost becomes strong enough to kill tender plants. Generally speaking, you’ll want your fall/winter vegetable garden started well before this date, in August or September. However, gardening hacks such as cold frames and hoop houses can protect those more tender plants through the frost and extend the growing season well into winter. (See sidebar on page 71.)

Since most hobby gardeners stop growing in the fall, it’s not always easy to find garden-ready plants for sale after August.

This means you may have to start from seed. When purchasing veggie seeds for the winter garden, you’ll want to look for the words “hardy” or “frost-tolerant.” These are the varieties especially equipped to handle the cold.

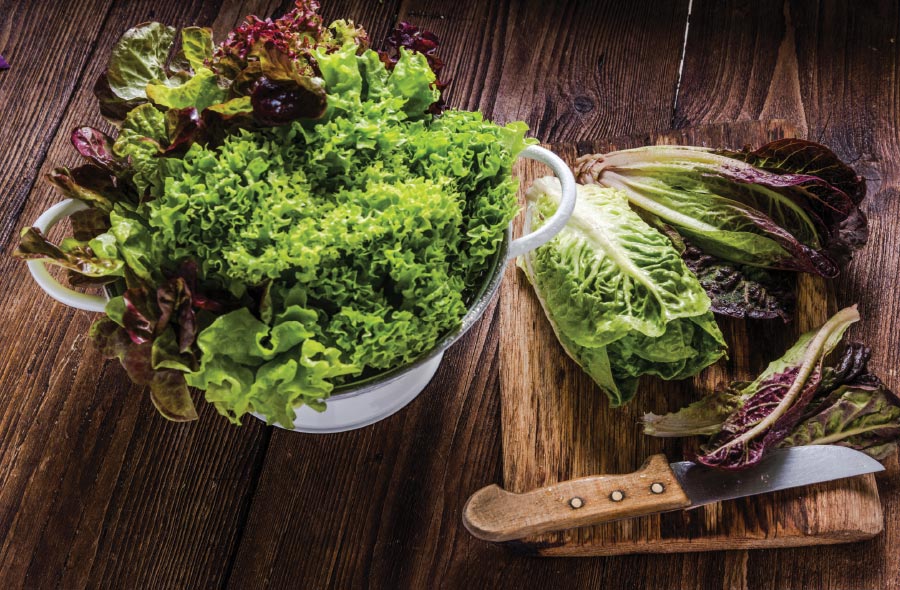
winter garden lettuceSo what exactly can you grow through the colder months?
Some of the most nutrient-packed produce we enjoy thrives with a little frost. Here’s a list:
Brassicas: Veggies in this family such as broccoli, kale, and kohlrabi actually grow better in the fall, and can even survive snow if they’re planted early enough to get established before the really cold weather sets in.

Carrots and their friends (such as radishes & turnips) love a little frost and actually get sweeter, because they naturally produce a surge of sugar to protect themselves from the cold. That means tastier harvests for us!

Peas: This is probably my favorite.

Snow peas and sugar snap peas grow well in the fall garden. Plant new seeds every two weeks for a constant harvest as long as they’ll hold out. Depending on the harshness of our winter, you can plant right through November!

Brussels Sprouts: Like carrots, they actually get sweeter after a frost.

Lettuces and greens: Little leafy guys such as collards, lettuces, mustards, arugula and endive are tender, but given the right conditions they can tolerate the cold and provide a long harvest of healthy veggies. Plant these in cold frames or hoop houses in a sunny location to protect them from the chill, and reseed every few weeks.

Garlic and onions: These can be planted as late as October and November, and love a nice, long growing season. But don’t expect a winter harvest, they’re slow to grow (but worth the wait).

green onions winter gardenThere are some really nice benefits to cold weather gardening. For one, I’m not on my hands and knees in 90 degree weather pulling weeds and plucking cherry tomatoes. But also, there are far fewer pests and diseases to worry about, fewer weeds, and—I hesitate to say this, but—a winter garden requires a bit less work. It also keeps your soil loose and productive so that it’s ready in the spring.

Winter gardening is fun and experimental, because our winters are a little unpredictable. I love trying new things to see what can survive.

How to Extend the Season withCold Frames
A cold frame, defined: A cold frame is a shelter from frost that uses sunlight to maintain warmth and moisture for your veggies. You can spend a lot of money on cold frames, but they don’t have to be fancy or expensive at all.

My method
I use my collection of old windows—which can be found everywhere on the internet for cheap and sometimes free—and whatever I have laying around my yard to construct cold frames.

If you have good sunlight on a particular side of your house, you can even use your wall as the fourth wall for your cold frame. I build a little box, usually out of wood or hay bales, and then I place a window on top of it. I like my window to have a little angle to it in order to capture the most sunlight. You can find plans for cold frames online. The more airtight and sealed, the warmer the temperature will remain inside.

Why they work
Cold frames allow you to harvest longer, and even plant later, in the season. They keep the soil warm and they keep ice off of tender leaves. For most of the list of vegetables I mentioned, you’ll want to get them planted no later than the end of September, especially the tender ones like greens. But if you use a cold frame, you can plant continuously much later into the season.

For example, carrots like a good frost, but they (like most vegetables) can’t survive extreme low temperatures or constant freezing. So after the first fall frost, or once it starts to get consistently cold outside, you can plant your next carrot harvest into cold frames. I succession-plant carrots and greens all winter long in my cold frames. They get a little slower to mature in the cold, but planting every week or two gives me a nice consistent harvest.

Final tip
One thing to remember about cold frames is that on warmer days, you’ll want to crack the top open a bit to allow some air flow and moisture reduction. Then close them overnight and on those bitter cold days.


Getting to Know Virginia’s Cantaloupes

Memories of a sweet summer job

Virginia loves melons. They grow wonderfully in our climate, and they make the perfect sweet addition to every picnic table. However, there is one melon that has brought Virginia some attention: the cantaloupe, a deceptive fruit with a blandly colored, rough netted rind and soft, juicy center.

There is a hidden beauty in these modest melons. They aren’t printed on tablecloths and sundresses or painted into Norman Rockwell’s idyllic picnic scenes. However, I would argue that they should be. After all, despite the cantaloupe’s quiet, non-ostentatious reputation, it is the most popular melon in America, consistently outselling the pompous watermelon.

But despite loving and growing up around cantaloupes, I can honestly say I didn’t fully appreciate them either until I spent a summer years ago deep in cantaloupe juice. That kind of intimacy with a melon? Well, let’s just say it changes things.

If you are traveling north on Route 43 in Bedford County towards the Peaks of Otter, you will spot a quaint little store resting in mountain shadows and encircled by crouching peach trees. The single ancient gas pump still works, and inside you’ll find the best pie in the Blue Ridge, among other wonderful treats.

At Mountain Fruit and Produce, where I worked that summer, we got cantaloupes by the box load. By the shopping cart load. By the truck load. And we sold it, too, hand over fist.

Restocking dry goods on the shelves involved battling the crates of cantaloupes that were left in the aisle for lack of better floorspace. We sold them whole, we sold them in slices, in ice-cream form, and in juice form.

People would wander up the mountain specifically in search of a good cantaloupe. They would tap their fingers against the rind, sniff the bottom where the vine was once connected, give it a good shake and inquire as to where each cantaloupe was grown until they settled on the perfect one—the cantaloupe of their dreams. Over the course of that one summer we probably sold a thousand cantaloupes. Suddenly, a large portion of my hourly wages was thanks to this one particular fruit.

That summer I sliced, diced, peeled, pulverized and blended hundreds of pounds of cantaloupe. I would arrive at the store in the morning and be ushered to a shopping cart straining under the weight of our most recent shipment. It was delivered to us from the orchards in beat up flatbed trucks loaded down with farm hands.

I learned even more tips and tricks on spotting the perfect cantaloupe: one that is nearly round, weighs about three pounds, gives just a little when you squeeze it, and makes a nice hollow knocking sound when tapped.

Unlike the watermelon, the cantaloupe is easy to work with. A sharp blade slices through the rind with little effort and the center of the fruit is so soft that if the knife wielder is not careful, he may lose control of the tool and cut himself, caught unaware when the blade falls rapidly through the meat. (Trust me.) Once halved, the delicious sun-colored fruit clings closely to the thin rind where a ring of light green brings the two together. The fruit is light, soft and sweet.

At the center of each half is a hollow cavity where around 400 little seeds are stored in a runny liquid, best removed by a metal stirring spoon. But as I learned at Mountain Fruit and Produce, you must be careful to not scrape away too much of the fruit. In the cantaloupe ice-cream business, every bit counts.

Long before becoming a beloved summer farmers market find, the cantaloupe wasn’t even grown in the U.S. It originated in Iran, India and Africa, around 5,000 years ago, where it grew naturally and was a staple food for the natives of each region. Europe’s first encounter with the cantaloupe, however, is quite an interesting tale.

There is much debate surrounding the truth of this story, but it is worth being told. Thirty miles north of Rome, there was a small papal village by the name of Cantalupo di Sabina. In this village rested the country estate of Pope Paul II, a very large, very demanding Pope who held his office from 1464 to 1471. During this time, an envoy of Armenians arrived from the East bearing gifts of melons, namely, the cantaloupe. Pope Paul had one taste and was mystified. He became obsessed with the cantaloupe, devoting garden space to the wandering vine and demanding that they be grown and harvested in the best possible conditions, ensuring the best possible outcome.

Paul was a pious man. (Maybe. It’s debatable.) But his desire for the melon was insatiable, and in July of 1471, at the age of 54, Pope Paul II suffered a heart attack and died. What brought on this heart attack? He suffered severe indigestion brought on after gorging himself on multiple cantaloupes hours before his death. Or so the story goes.

Fast forward several years and Christopher Columbus brought the cantaloupe with him on his maiden voyage to the New World in 1492. The fruit grew wonderfully in America’s fertile, loamy soil and thus the cantaloupe turned a new leaf, feeding settlers, natives, colonists and revolutionaries, to eventually find a soft landing place in every grocery store across the U.S.

Virginia has particularly loved and embraced the cantaloupe. In fact, in pre-pandemic years, we had a thriving festival dedicated to it. The Virginia Cantaloupe Festival began in 1981 in Halifax County, where it is suggested that the best of the best cantaloupes are grown. In past years, the festival limited ticket sales to “only 1,500” and they would always sell out.

With all of this information in mind, I hope the next time you discover that pale orange cube in your fruit cup you won’t dismiss it entirely. The cantaloupe is not meant to be plucked before its prime, crammed into a plastic cup alongside other, less worthy fruits and refrigerated for weeks on end. It is meant to be enjoyed fresh, in its boldest colors. Or better yet, as a dessert.

To this day, enjoying a spoonful of freshly made cantaloupe ice cream at Mountain Fruit and Produce brings back memories of that summer where I learned to respect this misunderstood melon.

How to Choose a Cantaloupe

Color—The outside should be a uniform pale, creamy yellow, with no green or white.
Webbing—The web-like texture covering the melon should be consistently rough ridges all the way around.
Stem—A ripe cantaloupe will fall on its own from the vine. The point where the stem was attached should be a little indented. If it is poking or bulging out, it could mean the farmer cut the melon too early.
Scent—The stronger the smell at the stem, the riper the melon.
Feel—Give it a good squeeze. If it’s hard, it’s not ripe. It should give a little in your hands. If it’s squishy, it’s overripe. That doesn’t mean it’s a goner! These are great for juicing.
Sound—Finally, give it a little knock. You should hear a low, solid thunk. A high-pitched sound could mean unripe.


Your Best Vegetable Garden Ever

Avoid These Five Pitfalls to See Success

I love our Virginia summer mornings when the fog lays low over the fields as a bright new sun stretches its sleepy arms. Usually, the heat of the previous day is subdued in the night, and the mornings are cool and comfortable. This is when I find myself most productive. I have a cup of coffee, take a few minutes to greet the day from the porch, and then stroll over to my favorite part of my yard: my vegetable garden.

Many people, myself included, find gardening to be a sort of soul-affirming ritual. It makes us feel closer to the earth and for me, closer to God. It slows down our thoughts and narrows our focus while we care for things small and tender. It gives us something to share with our friends and neighbors (and gardeners love to share) and it allows us to enjoy the fruits of our own hard work, directly.

A lot of people are hesitant to start a vegetable garden. It can seem a bit overwhelming. Still, 2020 saw a worldwide spike in home gardening as people developed pandemic-inspired anxieties about food security, and suddenly had the time to test out their green thumb. Growing your own food isn’t hard to do and it ensures healthy, accessible nutrition for you and your family, even in uncertain times.

I say, “it isn’t hard,” but also acknowledge that there are a slew of factors that cause new or amateur gardeners to get overwhelmed. Here are some pitfalls to avoid
so you won’t give up this season.

Pitfall One: Stretching yourself too thin
My eyes are sometimes bigger than my appetite. When you’re tending to everything from a veggie patch to fruit trees to gourd trellises to chickens, it can be a bit much. For your first season, set reasonable goals. You don’t need to go from zero to a five-acre farm. A 10×10 patch is a whopping 100 square feet, is manageable by one person, and can really pack a ton of produce. There’s nothing wrong with going smaller, either.

Also, beginners are better off starting in the spring when the weather is pleasant and the ground is warm and soft before attempting winter growing. You’ll want to pick a spot that gets plenty of sun—at least six hours a day. It also needs to be convenient. Make sure your hoses reach, you don’t have to hike to it, and it isn’t in the way of your other outdoor activities. These little inconveniences can cause a gardener to neglect their patch.

Pitfall Two: Not paying special attention to your soil
Good dirt covers a multitude of sins. It’s arguably the most critical component of successful gardening, so we’ll spend a minute here. It’s worth having a soil test done to find out what you’re lacking. You’ll want to do it as soon as possible, and you can pick these up for cheap at any garden center. You’ll send off a sample of your soil, and the lab will send you a report detailing your pH and nutrient levels. I know this sounds like it could get complicated, but it really isn’t.

There are many nutrients found in healthy soil, but the three that plants need the most are: nitrogen for healthy green leaves, phosphorous for strong roots, and potassium for overall plant hardiness and disease resistance. On garden fertilizers, you’ll see these nutrients identified as N (nitrogen) P (phosphorus) and K (potassium). When choosing a fertilizer, it’s a good rule of thumb to get a complete fertilizer with a higher middle number (phosphorous). Something in the 10-20-10 range is a good start. Organic additives such as compost are also great for adding nutrients to the soil.

Of course, in order for plants to have full access to these nutrients, proper pH is absolutely critical. Most garden plants prefer a pH range of six to seven. If your pH is low, you can bring it up by adding agricultural lime. If it’s high, you can lower it by adding aluminum sulfate or sulfur. You can find all of this at a garden center. Most soil tests even include advice for how to amend soil for certain issues.

Pitfall Three: Planting garden enemies together
First off, I highly recommend starting from seed. Read my article in our previous issue, (“Starting from Scratch,” March/April, available online) to learn all about seed starting. While it’s a little too late for that this year, there’s always next season.

Select your plants from a local garden store. You can find decent stock at department store garden centers, but your local stores will have a wider variety of stronger, healthier plants.

When it’s time to actually put your plants in the ground, remember this: Everyone likes to spend time with friends, and vegetables are no different. Some plants do better when grown near their companions, with whom they have symbiotic, mutually beneficial relationships.

On the contrary, some plants do not get along. For example, tomatoes love how basil repels the insects that threaten them. However, tomatoes do not appreciate the way broccoli competes for much needed nutrients in the soil. Meanwhile, zucchini and squash have a great relationship with beans, which replenish nitrogen for the hungry squash. But zucchini and squash should not be planted near pumpkins, which are unruly and can cross-pollinate, infecting the flavor of your squash.

Another thing to keep in mind is don’t plant tall plants at the “front” southern-facing side of your garden, where they will soak up all that long-day sun but overshade smaller plants in the back. I like to plant my taller plants on the sides of my garden (east and west) and leave the long center open for shorter plants.

Pitfall Four: Neglecting routine maintenance
It’s so important to visit your garden every day if you can. Your plants will thank you, and so will your mind and body. Remember, gardening is good for you!

When you check on your garden, make sure that you’re not letting weeds encroach on your veggies as they eat up vital soil nutrients and choke out your plants. Ensure that your plants get regular waterings, and when mother nature isn’t providing enough rain, get out the hose! Feed your plants if they start to look wilted or discolored. Side-dress with a little compost or a gentle water-soluble fertilizer.

Pitfall Five: Getting lazy during harvest time
Reap the rewards of your hard work! Fruits left on the plant can quickly grow too large, which causes them to lose flavor or be eaten up by wildlife. Also, regular harvesting is another component of routine maintenance, since it encourages new growth for most garden favorites.

The best part about learning to garden is that the first season is the toughest. But there is some kind of spiritually satisfying joy that comes from plucking a snap pea or a cherry tomato off the vine and snacking as you tend to errant weeds under the summer sun. After your first successful season, you’ll be hooked for life.
Be careful—gardening is addictive!


Prepped for Pandemic

Historic Garden Week set for April 17-24 with Lynchburg event on April 20

For only the second time in its history, Virginia’s Historic Garden Week was cancelled last year when COVID-19 came calling.

This year, however, the show will go on after months of careful planning. “We knew doing Historic Garden Week in the way we’ve done in the last 87 years was not going to work in 2021,” said Karen Cauthen Ellsworth, director of Historic Garden Week and editor of the guidebook.

Presented by the Garden Club of Virginia, Historic Garden Week will offer 30 tours organized and hosted by 48 member clubs during the week of April 17-24. The nation’s only statewide house and garden tour has contributed an estimated $518 million to state and regional economies in the last 50 years.

1924 Ladies

A photo from the Lynchburg archives titled, “1924 Ladies.” Location unknown.

While some clubs are still hoping they may be able to provide indoor house tours, each club is ready to make this year’s tour entirely outdoors. They’ve lowered ticket prices, created timed ticketing, and are requiring masks.

Ellsworth expects enthusiasm for the tours to remain high. “Gardens have given people a lot solace in this upside-down, topsy-turvy world,” she said.

The only other time the weeklong festivities were cancelled was during World War II, Ellsworth said, noting that funds were sent to London to help restore gardens damaged in bombing raids.

The Garden Club of Virginia has since extended its mission and goodwill to other friends in need, Ellsworth said. After Hurricane Hugo, a donation was made to replant trees in Charleston, South Carolina. After Hurricane Katrina, money was sent to the New Orleans Botanical Garden to rebuild its greenhouses.

The roots of Historic Garden Week date to 1927, when a flower show organized by the Garden Club of Virginia raised an impressive $7,000 to save some of the trees planted by Thomas Jefferson on the lawn at Monticello.

Today, tour proceeds primarily fund the restoration of Virginia’s historic gardens and, since 1996, to provide graduate level research fellowships. In celebration of the Garden Club of Virginia’s 2020 centennial, funds were also pledged to support Virginia State Parks.

Annual Meeting of Garden Club

Annual Meeting of Garden Club of Virginia in Lynchburg on May 18, 1926.

During the past year, funds were distributed to Poplar Forest for restoration of the roundabout driveway and the creation and restoration of Reveley Garden at William & Mary.

The formal tours began in 1929, benefitting gardens at Monticello, Beatrix Farrand’s Green Springs Garden, Bacon’s Castle, Lewis Ginter Botanical Garden, and the State Arboretum in Winchester, among many others.

The Garden Club of Virginia’s horticultural programming and flower shows inspire one of Historic Garden Week’s greatest attractions, the world-class floral arrangements by club members featured on tours. An estimated 2,300 will be created for Historic Garden Week this spring.

Another plan upended by COVID-19 was a Garden Club of Virginia centennial celebration with renowned floral arranger Paula Pryke of London. The organization is working on having her do a virtual event this year. “We’re definitely trying to find the silver lining in all of this,” Ellsworth said.

Since 1920, the Garden Club of Virginia has grown from eight founding clubs to 48 clubs with more than 3,300 members. The efforts of these volunteers, along with the generosity of nearly 150 private homeowners across the commonwealth, make Historic Garden Week possible.

The Lynchburg Garden Club was founded in 1923 and started participating in Historic Garden Day in 1932. In 1953, the Hillside Garden Club was founded and the two joined together to support Historic Garden Week.

Normally, garden tours include tours of the four to five houses on the tour, but because the pandemic may force an outdoor-only focus this year, the group decided to capitalize on the change by emphasizing sustainable lawns and gardens. “We’re trying to educate people about what they can do in a small space to help our environment and our state,” said Jeanna Chapman, co-chair of Lynchburg’s Historic Garden Week.

Garden of John and Jill Fees

Garden of John and Jill Fees, one of the homes on Lynchburg’s 2021 Garden Day tour. Photos by Amanda Smithson.

Homeowners at the four houses on the tour are getting certified through Blue Ridge Conservation, a partnership between the Lynchburg and Hillside Garden Clubs started in 2019 to make Central Virginia more pollinator-friendly. A demonstration on how to plant a pollinator garden will be held at Irvington Springs Farm on Irvington Springs Road.

Several precautions are being taken to keep visitors safe. Tickets will be for sale for $25 online at VAGardenWeek.org, rather than for pickup, and will be offered as either morning (10 a.m. to 1 p.m.) or afternoon (2 to 5 p.m.) tours to allow for social distancing. There will be no day-of ticket sales.

Lynchburg has always been supportive of Historic Garden Week, Chapman said, noting that sponsors help defray the costs. The Bank of the James, for example, contributes $5,000 annually.

An added benefit of this year’s ticket will be the inclusion of local restoration sites. In Lynchburg, for example, visitors will also have free admission to Poplar Forest, Point of Honor, the Anne Spencer Garden, Old City Cemetery, the Miller-Claytor House, and the gardens at Sweet Briar College. “Lynchburg is special in the state in that there are several restorations sites,” Ellsworth said.

garden tour

Tickets include admission to the following four private properties in Lynchburg:
1221 Fox Hill Road, John and Jill Fees, owners
This English Country estate, completed in 2013, combines stately architecture and the function of a working farm.
A recently added folly, an ornamental building, is nestled on the left as visitors enter. Farther along the bricked driveway are manicured lawns, a commanding stone forecourt, and a view of the residence. The gardens are filled with fruit trees, evergreens, and numerous native species. The family keeps bees and chickens, a large greenhouse, and maintains kitchen, vegetable, and floral cutting gardens.

1116 Running Cedar Way, Drs. Tim and Sarah Hellewell, owners
Built in 1983, this Federal Revival gem is a traditional Virginia Piedmont home, featuring Flemish bond brickwork, a Doric-columned entrance porch, and arched windows. The homeowners are committed to sustainability and biodiversity. The lawn has been pesticide- and herbicide-free for more than a decade, and the owners continue to reduce areas of manicured lawn to support pollinators and wildlife. Thirty-three solar panels on the rear roof provide all the power the property needs from March to October, while a fenced compost pile enriches the soil that sustains the vegetables growing on the back porch. Garden beds include a mix of old and new varieties of ornamentals and native species.

4113 Peakland Place, Dr. James E. and Elizabeth Foster, owners
Located in the heart of Boonsboro, this recently renovated Colonial Revival home was built during the early twentieth century suburban expansion of Lynchburg. The exterior is brick, painted in soft white. The neutral façade, weathered gray slate roof, and bluestone terraces counterbalance vivid greens and vibrant plant selections that provide year-round color.

A commanding front lawn framed by pyramidal evergreens and low boxwood contrasts with the casual entertaining spaces behind the house, including hidden nooks, a fairy garden, stone terraces, and a Williamsburg-style potting shed. A cascade of seasonal blooms begins with camellias and is followed by azaleas, peonies, magnolia, and hydrangeas.

4108 Peakland Place, Dr. Samuel and Mary Omotoye, owners
This charming English Country manor–style residence was built in 1928 in the midst of Virginia’s English Revival architectural and landscape movement. To emphasize a rural setting, previous owners added a circular drive and a walled cottage garden to provide a transition to the multiple side and rear gardens original to the property. The front beds have undergone a recent transformation with the addition of numerous American boxwoods. Colorful perennials, such as poppies, delphiniums, and irises, soften the brick exterior. In the rear gardens a terrace, fashioned with salvaged flagstones from downtown Lynchburg sidewalks, juxtaposes the natural earth tones of the brick and stone house with the lush green extending to the rear of the property.


Planting for the Birds and the Bees

Turning Your Garden Into a “Certified Pollinator Habitat”

Pollinating insects are in trouble! Almost daily you hear continuing reports of declining numbers of insect and bird populations. There is one thing we can do to help that is actually pretty simple—many of us are already halfway, if not almost, there.

Under the direction of Lynchburg’s Blue Ridge Conservation (BRC) it is easy to create a pollinator garden and certify it as a “pollinator-friendly habitat.” BRC is dedicated to supporting the biodiversity and sustainability of the natural environment. They have worked throughout the region and are now encouraging the citizens of Central Virginia to sign up for their truly local garden certification program.

Their online certification application directs you through a process that can be completed in only six simple steps. Below is an overview:
1. Provide food. It’s important that you choose only plants from BRC’s native plant list for the certification. Our local insects and wildlife need plants that have evolved in this region. This is particularly true when they are raising offspring!

The plants that provide nesting sites and food for insects in the larval stage are called “host” plants. Most of the time it takes one specific plant to feed one specific insect—commonly called a specialized relationship. (Think monarchs and milkweed for example, or fennel and parsley for swallowtail caterpillars.) The more diverse your host plants, the more insect variety you’ll find in your garden later.

You’ll also need plants that provide nectar in the summer. European honeybees will collect nectar from a variety of plants, but native bees have more specific needs. Asters and goldenrods are only two of the power-packed nectar sources for our local insects. Make an effort to provide nectar plants throughout the summer into late fall.

Refer to the native plant list (located on the BRC website with the application), do some homework and choose plants that feed the most insects and bees.

2. Provide a water source. It doesn’t have to be elaborate. A saucer, or even a dog bowl, with water and unsubmerged stones for the insects to sit on while they cool themselves is enough to do the job. If you’d like to attract birds into this lush habitat you’re creating, consider a moving water source; add a running water sound from a trickling fountain and you’ll be serenaded by songbirds.

3. Provide shelter. This where you can get really creative or be extremely simple. Your choice! You could make an elaborate bee hotel or simply leave a small pile of sticks somewhere on the ground for insects to use for a home. If you just want to check the box and not think about making something, BRC has solitary bee houses for sale on their website. Most of the things that we throw away as lawn debris would provide habitat if we only thought differently about them.

4. Safeguard your habitat. Once your garden is planted you have to take some precautions to keep it safe and healthy by reducing the use of pesticides and herbicides around your home. It’s also necessary to fight invasive plants that crowd out the native plants our pollinators require to thrive. You can identify invasive plants on the Department of Conservation Resources website: www.dcr.virginia.gov/natural-heritage/invsppdflist.

5. Remit payment. Finish filling out the application with a $20 fee that purchases your own “Certified Pollinator Habitat” metal sign. You can proudly show others you are helping to support the pollinator population in Central Virginia.

6. Submit application. With a few small steps in your garden, together we can help make Central Virginia “bee aflutter,” one pollinator garden at a time.


Starting from Scratch

A Complete Guide to Starting Seeds Indoors (and Producing Your Best Veggie Garden Yet!)

The most difficult time of year for me as a gardener is the window between winter and spring, when the planting season is tantalizingly close, but the ground is still too frozen, and the last frost of the season has not yet come and gone. That’s when I’m itching to get out into my garden and get my hands into that dark soil. But I can’t. Not yet.

Conveniently, right around the time that I start to get worked up into a gardening frenzy, it’s time to start seeds indoors!

A lot of folks believe that growing from seed is too challenging and not worth the effort. However, with a little knowledge, anyone can grow from seed. Once you
get the hang of it, you’ll never go back.

Here are the advantages:
Starting from seed is more cost-effective than purchasing transplants from garden stores. A seed packet contains dozens (even hundreds) of seeds, each one a potential plant. And in the right conditions they can be stored for years. This means that your single $1-$5 purchase can produce a bounty of vegetables over multiple growing seasons.

When it comes to live plants, most garden stores only stock a small variety. You’ll find regional staples: tomatoes, peppers, zucchini. But there are hundreds (maybe thousands) of interesting and unique varieties of veggies to try.

And finally, growing from seed is more sustainable.

2020 brought to light a host of concerns and uncertainties—a big one was food security. As a result, more people than ever were trying their hand at home gardening for the first time. The ability to grow your own food is an essential skill. But knowing how to grow from seed is the bedrock of sustainable food. Also, when you grow from seed you can purchase from ethical companies who are open about their seed acquisition and development processes.

Without further ado, let’s get to the dirt of the matter:
First, you’ll need some seeds. Seed shopping is one of my favorite activities. I adore seed catalogues! I have a dictionary-thick stack on my coffee table. The best part?

They’re usually free!

I’ve included a list of my favorites. Of course, there’s also nothing wrong with taking a trip to your local garden store, or even a big box store, and picking your seed packets right off the shelves.

Start by reading the back of a seed packet (or the description in the catalogue), which should contain everything you need to know. It will help you figure out when to start your seeds—which is very important. On average, most crops can be started indoors about six weeks before the last frost. In Zone 7a, our last frost date averages around April 16.

Next, choose a location and gather your supplies. You’ll need plenty of space and a safe, level surface for your seedlings that won’t be bumped. You’ll also need someplace warm once the seeds have germinated. Supplies include seed-starting mix, something to plant the seeds in, labels for identification, and plenty of light and water.

Seed-starting mix is actually not “dirt” in the strictest sense of the word. It usually doesn’t contain any actual soil, but instead is loaded with compost, peat, and other things that hungry young plants need to thrive. You can purchase it at a local garden store, or make it yourself. I personally like those seed pods that come with the seed-starting trays available in garden centers. They’re cheap, easy to work with, and they do a great job of containment, at least in the beginning. The trays are also really easy to move and help with drainage. But you can use anything such as plastic cups or yogurt containers. But make sure to poke plenty of holes in the bottom of whatever you use.

Now, it’s time to plant! In each seed pod or container, open a hole in the soil to the appropriate seed depth, and drop in a seed. You may choose to plant a couple of seeds in the same container, and thin them out once they start to grow. Cover the seeds lightly with the dirt, and water gently. Make sure to label your plantings. I use plastic spoons and a Sharpie.

Most seeds germinate best in dark environments.

They actually don’t need sunlight at this point. Set them somewhere away from direct sun, in a darkened area if possible, and keep the seeds watered, but not soaked. Make sure that water does not collect at the bottom of your seed containers or in your tray. Seeds that stay too wet can grow mold and won’t thrive. This watering approach should continue as your seedlings sprout and grow.

Check on them daily. Once you see little green sprouts, it’s time for a change of scenery because now they’ll need a nice bright location. Of course, access to sunlight is ideal, although extremely warm temperatures are not required. Average temperatures of between 55 and 70 seem to be perfect.

While we’re on the subject of light, everyone knows that light is vital to plant growth. This is especially true for seedlings.

While a sunny, temperature-controlled area may work to produce healthy seedlings, the reality is you probably don’t have enough natural light to get your seeds off to the best start. To solve this problem, you can purchase grow lights (which can get expensive) or you can create your own, more affordable lighting by simply using a fluorescent shop light with one “warm” white bulb, and one “cool” white bulb. You’ll want to suspend your lights about three inches from the tops of the plants. You can do this by purchasing an adjustable fluorescent light stand, or by simply hanging some chain or wire from above. Move the lights upward as the plants grow, but keep them close so that the seedlings can soak up all the energy they need. Ideally, the lights should be on for at least 16 hours a day.

As your plants grow, they will need more nutrients. The first set of leaves that appear are called cotyledons and are not considered “true leaves” because they’re actually a part of the seed or embryo. They’re typically very simple-looking. Soon, however, your plants will start to develop true leaves, which look a bit more crinkled and unique. Once the second set of true leaves form on your plants, it’s time to give them a boost. Use a liquid vegetable fertilizer, but mix it to half-strength. Water your seedlings with it about twice a week.

This is also the time when you will want to thin your seedlings to one plant per pot. Choose the one that looks the healthiest and carefully pluck the other. As they grow, you may need to move them into larger containers.

Eventually, the day will come when your little seedlings are ready to be transplanted outside. Of course, the real world is much more unpredictable than the comforts of the nursery, so they’ll need to be prepared. “Hardening” is the process of preparing seedlings for the outdoor environment and is a very important part of growing from seed. In fact, if this step is skipped or not done properly, all of your hard work could be lost. About two or three weeks before your transplant date (which will be noted on your seed packet) begin to set the seedlings outside on calm weather days. Place them in a shady location and bring them back inside in the evenings. Don’t allow them to be subjected to wind, extreme temperatures, or direct sun.

Each day, expose them to just a bit more sunlight, and continue to water, though not as rigorously as before.

Once your seeds are used to full sun, transplant your seedlings into your prepared garden beds by digging planting holes a bit wider than the root ball of the plant. Remove the plant from its pot, careful not to damage the roots too much.

Then, set the plant into the hole, and cover lightly with soil. Water them into their new homes, and monitor them in the days and weeks to come. Use stakes and cages to support tall growing plants as they clamber toward the sunlight and begin to produce tons of delicious fruits and veggies for you and your family to enjoy!