Cool by the Spoonful

Light and Fresh Summer Soups

When the Virginia heat settles in for the season, the last thing you want is a heavy meal—or a hot kitchen. That’s where chilled summer soups shine. Refreshing, hydrating, and often bursting with produce at its peak, these spoonable delights are more than just an appetizer—they’re a celebration of the season itself. From the bold bite of gazpacho to the soothing calm of cucumber-dill, these light soups offer a fresh way to beat the heat while still savoring every bite.

Here are four chilled soup recipes perfect for a breezy lunch, a make-ahead dinner starter, or even a garden party centerpiece.

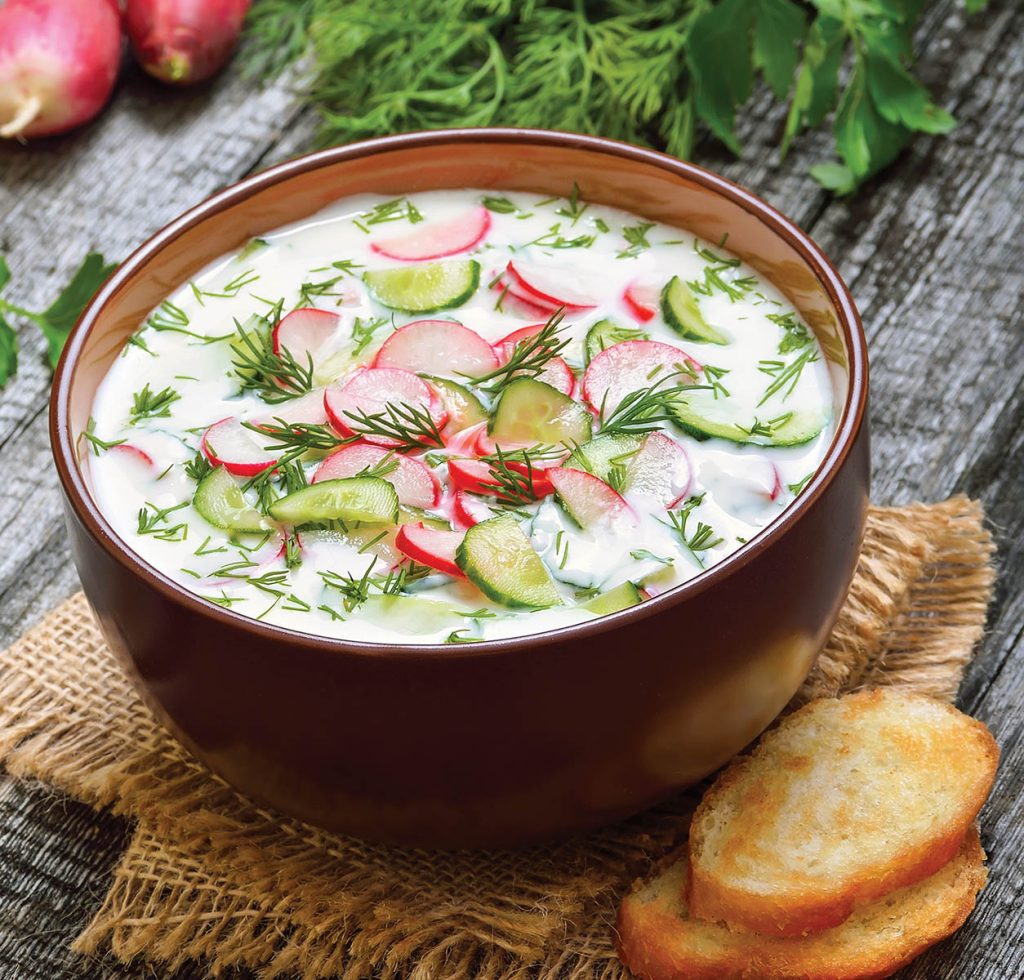
Chilled Cucumber-Dill Yogurt Soup

Chilled Cucumber-Dill Yogurt Soup

This cooling, creamy soup pairs beautifully with grilled fish or a slice of seedy bread.

Ingredients:
2 large cucumbers, peeled and seeded
2 cups plain Greek yogurt
1 tablespoon fresh lemon juice
1 garlic clove, minced
2 tablespoons fresh dill, chopped
Salt and pepper to taste
Optional: diced avocado or radish for garnish

Directions:
1. Blend cucumber, yogurt, lemon juice, garlic, and dill until smooth.
2. Season with salt and pepper.
3. Chill for at least 1 hour.
4. Serve topped with avocado cubes or thinly sliced radish.


Classic Andalusian-Inspired Gazpacho, photo at top of page

Bright, bold, and bursting with flavor, this tomato-based soup is summer in a bowl.

Ingredients:
6 ripe tomatoes, chopped
1 cucumber, peeled and chopped
1 red bell pepper, chopped
1/2 red onion, chopped
2 garlic cloves
1/4 cup extra virgin olive oil
2 tablespoons red wine vinegar
Salt and pepper to taste
Optional: crusty bread cubes for blending or topping

Directions:
1. Combine all ingredients in a blender. Blend until smooth.
2. Taste and adjust salt, vinegar, or olive oil as needed.
3. Chill for at least 2 hours before serving.
4. Garnish with crusty bread or a drizzle of olive oil.

Watermelon smoothie with mint and chocolate topping on wooden background

Watermelon-Mint Soup

Equal parts sweet and savory, this vibrant soup is a conversation starter.

Ingredients:
4 cups seedless watermelon, cubed
1 tablespoon lime juice
6 fresh mint leaves
Pinch of salt
Optional: crumbled feta or a swirl of Greek yogurt

Directions:
1. Blend watermelon, lime juice, mint, and salt until smooth.
2. Chill for at least 1 hour.
3. Serve in small bowls or glasses. Garnish with feta or yogurt.

Chilled Sweet Corn and Coconut Soup

A subtle and silky soup that captures the essence of corn season with a tropical twist.

Ingredients:
3 ears of fresh corn, kernels removed
1 cup coconut milk
1 cup vegetable broth
1/2 teaspoon fresh ginger, grated
Juice of 1/2 lime
Salt to taste
Optional: chopped scallions or chili oil for garnish

Directions:
1. Simmer corn kernels in broth for 10 minutes. Let cool slightly.
2. Blend with coconut milk, ginger, and lime juice until smooth.
3. Strain for a silkier texture (optional). Season with salt to taste.
4. Chill for at least 2 hours. Garnish as desired.

Whether you’re hosting a summer soirée or simply trying to stay cool, chilled soups are a delicious way to showcase local produce and treat yourself to something that feels both indulgent and nourishing. Grab a spoon—and a fan—and dig in.


Wholesome & Hearty

4 Plant-Based Recipes to Try

Eating plant-based doesn’t mean you have to sacrifice flavor or satisfaction. In fact, plant-based meals can be as filling and comforting as any traditional dish, without missing a beat. Whether you’re a long-time plant-based eater or just starting to explore, these recipes offer inventive and accessible options that anyone can try. From a hearty curry to a zesty salad, these dishes are packed with fresh, nutritious ingredients that will keep you feeling energized. Ready to dive into some delicious plant-based cooking? These four recipes are here to inspire your next meal.

Chickpea & Spinach Curry (photo above)

A one-pot wonder, this creamy and flavorful curry brings together chickpeas, spinach, and a blend of aromatic spices. The coconut milk creates a rich base while the spices add warmth and depth to every bite. Served with basmati rice or quinoa, this dish makes for a satisfying meal that’s as comforting as it is healthy.

Ingredients:
2 tbsp olive oil
1 onion, chopped
3 cloves garlic, minced
1 tbsp grated fresh ginger
1 tbsp curry powder
1 tsp ground cumin
1/2 tsp ground turmeric
1 can (14 oz) coconut milk
1 can (15 oz) chickpeas,
drained and rinsed
1 can (14.5 oz) diced tomatoes
4 cups fresh spinach
Salt and pepper, to taste
Fresh cilantro, for garnish
Cooked basmati rice or quinoa, for serving

Directions:
1. In a large pot, heat olive oil over medium heat. Add the onion and sauté until softened, about 5 minutes. Add garlic and ginger, cooking for another 1-2 minutes.
2. Stir in the curry powder, cumin, and turmeric, and cook for 1 more minute until fragrant.
3. Add coconut milk, chickpeas, and diced tomatoes. Stir well and bring to a simmer. Let it cook for about 10-15 minutes, allowing the flavors to meld together.
4. Stir in spinach and cook until wilted, about 3-5 minutes. Season with salt and pepper to taste.
5. Serve over basmati rice or quinoa and garnish with fresh cilantro.

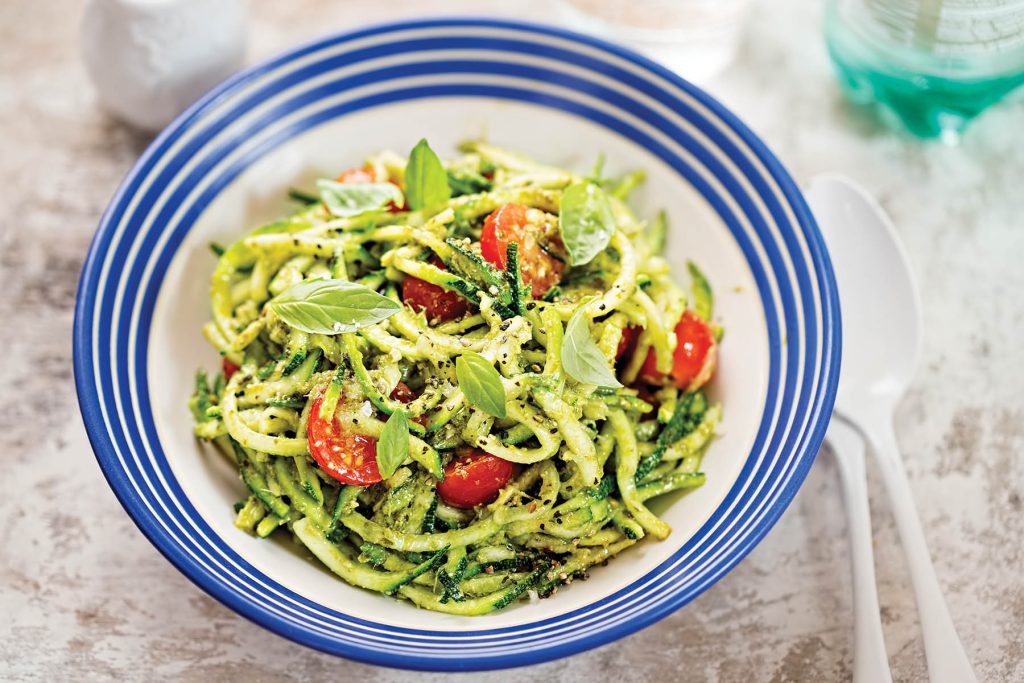
Spiralled courgette spaghetti with green pesto and cherry tomatoes

Zucchini Noodles with Pesto & Cherry Tomatoes

This fresh, vibrant dish is light yet satisfying, with spiralized zucchini noodles tossed in homemade pesto and juicy cherry tomatoes. It’s a gluten-free, plant-based alternative to traditional pasta, perfect for a quick and delicious weeknight dinner.

Ingredients:
4 medium zucchinis, spiralized
1 pint cherry tomatoes, halved
1/4 cup toasted pine nuts (optional)
1/4 cup fresh basil, chopped
1/2 cup pesto (store-bought or homemade)
Salt and pepper, to taste

Directions:
1. In a large bowl, toss the spiralized zucchini noodles with pesto until well coated.
2. Gently fold in the halved cherry tomatoes and chopped basil.
3. If desired, sprinkle with toasted pine nuts for added crunch. Season with salt and pepper to taste.
4. Serve immediately as a light lunch or dinner option.

Cooking Roasted Cauliflower and roasted chickpeas salad, with pomegranate, kale, with spices, oil and lemon dressing. Vegetable winter season food on a light background. Vertical image.

Roasted Cauliflower & Chickpea Salad with Tahini Dressing

This roasted cauliflower and chickpea salad is a warm, hearty meal packed with protein and fiber. The smoky, roasted cauliflower pairs beautifully with crispy chickpeas, all tied together with a creamy tahini dressing. The perfect balance of flavors and textures, this salad works well as a main or a side dish.

Ingredients:
1 head cauliflower, cut into florets
1 can (15 oz) chickpeas, drained and rinsed
1 tbsp olive oil
1 tsp ground cumin
1 tsp smoked paprika
Salt and pepper, to taste
4 cups fresh arugula or kale
1/4 cup tahini
2 tbsp lemon juice
1 tbsp maple syrup
1 garlic clove, minced Pomegranate seeds, for garnish
Water, as needed to thin the dressing

Directions:
1. Preheat the oven to 400°F (200°C). Line a baking sheet with parchment paper.
2. Toss cauliflower florets and chickpeas with olive oil, cumin, smoked paprika, salt, and pepper. Spread evenly on the prepared baking sheet and roast for 25-30 minutes, until cauliflower is golden and chickpeas are crispy.
3. While the vegetables roast, whisk together tahini, lemon juice, maple syrup, garlic, and a pinch of salt in a small bowl. Add water a tablespoon at a time until the dressing reaches your desired consistency.
4. Once the cauliflower and chickpeas are done, toss them with the arugula or kale in a large bowl. Drizzle with tahini dressing and garnish with pomegranate seeds if desired. Serve immediately.

Baked sweet potato stuffed with tomatoes, chickpeas, onion and avocado. Close up. Vegan food concept

Stuffed Sweet Potatoes with Black Beans & Guacamole

These roasted sweet potatoes are the perfect vessel for a savory black bean filling and topped with creamy guacamole. It’s a nutrient-dense dish that’s packed with fiber, healthy fats, and protein. Plus, it’s easily customizable with your favorite toppings.

Ingredients:
4 medium sweet potatoes
1 can (15 oz) black beans, drained and rinsed
1 tsp ground cumin
1 tsp chili powder
Salt and pepper, to taste
1/2 cup guacamole (store-bought or homemade)
Fresh cilantro, for garnish
Lime wedges, for serving

Directions:
1. Preheat the oven to 400°F (200°C). Pierce sweet potatoes with a fork and place them on a baking sheet. Roast for 40-45 minutes, or until tender.
2. While the potatoes roast, heat black beans in a small saucepan over medium heat. Stir in cumin, chili powder, salt, and pepper. Simmer for 5-7 minutes until heated through.
3. Once sweet potatoes are done, slice them open and fluff the insides with a fork. Top with black beans, a generous scoop of guacamole, and fresh cilantro.
4. Serve with lime wedges on the side for an added burst of freshness.


Garden Fresh Foods

Herby Recipes that are Full of Flavor

Written & Photographed By: Laura Miner

The first signs of spring are beginning to show, and at my house, that means my little herb garden will be coming back to life soon.
And after a long, dreary winter, it’s a very welcome sight!

There’s really nothing that brightens and livens a dish like fresh herbs. If you take simple ingredients, cook them just right, and make sure to include plenty of fresh herbs, you may be surprised at how much flavor can be packed in every bite.

In the kitchen, I love to be inspired by the fresh flavors and bright scents of the new season. These recipes are quick to make, full of bright flavors, and they’re perfect for any spring meal!

So grab your favorite herbs from the garden or grocery store, and watch what they can do!

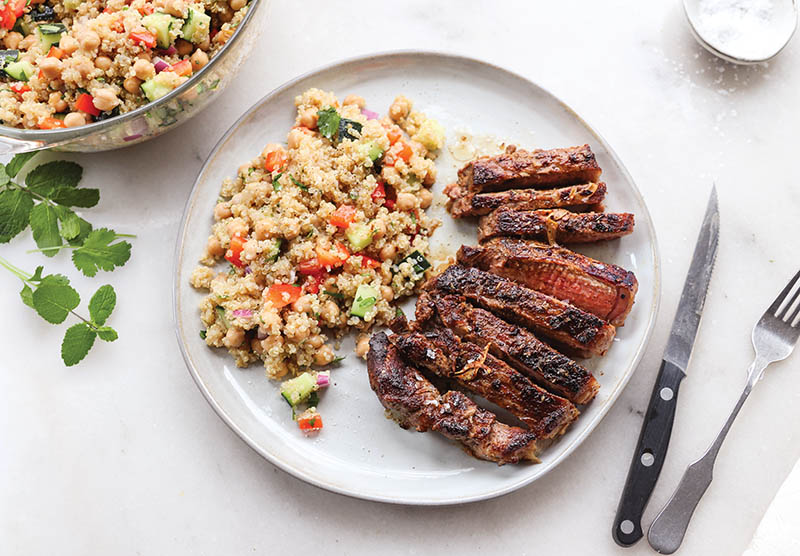
Garlic New York Strip Steak with Viral Quinoa Salad

Serves: 4

This mouthwatering NY Strip Steak is infused with bold, citrusy flavors from a zesty herb marinade, seared to juicy, tender perfection, and paired with the quinoa salad.

Every bite of these dishes delivers! It’s a wonderful pairing of savory steak goodness and fresh, vibrant vegetables and quinoa. The herbs come through on all fronts! It’s simple yet impressive, and absolutely perfect for a restaurant-quality experience right at home!

You might remember this quinoa salad from the way it went absolutely viral last year. But what makes a simple quinoa salad go viral? I think it’s the way all the ingredients work together so beautifully! The quinoa is tossed with crisp cucumbers, bell peppers, onions, chickpeas, and a light dressing, then finished with a medley of fresh herbs.

What I love most about this recipe is that when you make the marinade, you use half to marinate the steak and half doubles as the bright, tangy dressing for the salad. Hello, time saver!

Ingredients:
2 NY Strip steaks, about 1 inch thick
4-5 cloves sliced garlic
1 tsp olive or avocado oil
1 tbsp butter

Marinade/Dressing Ingredients:
1/3 cup extra virgin olive oil
3 tbsp red wine vinegar
2 tbsp lemon juice
3-4 cloves minced garlic
1 tsp minced fresh thyme
1 tsp minced fresh oregano
1 tbsp minced fresh chives
1/4 tsp red pepper flakes (optional)
1/4 tsp salt & pepper

Salad Ingredients:
2 cups quinoa (cooked and cooled)
1 cup chickpeas
2 tbsp minced red onion
2/3 cup diced bell pepper
1 cup diced cucumber
(1/2 large cucumber)
2 tbsp minced fresh mint
2 tbsp minced fresh cilantro

Instructions:
1. Make the marinade/salad dressing by whisking all the ingredients together. You will use half for a steak marinade and half for the salad dressing.
2. Pat the steaks dry and place in a bag or wide rimmed dish. Pour half of the marinade on top, turning to coat. Set the rest of the marinade/dressing aside to use in the salad later. Cover the steaks and set in the refrigerator for at least one hour, up to overnight.
3. Meanwhile, make the quinoa salad. Add half of the salad dressing/marinade to a medium bowl. Add the minced red onion to the marinade and allow it to sit while you prep the rest of the salad ingredients. This will take some of the bite out of the raw onion.
4. Dice the bell pepper and cucumber and mince the mint and cilantro.
5. Add the cucumber, chickpeas, bell pepper, and quinoa to the bowl. Toss to coat. Season to taste with salt and pepper and stir in the mint and cilantro. Keep the salad covered and refrigerated until you’re ready to serve it.
6. Next, cook the steaks. Preheat your oven to 400°F. Heat a large, oven-safe skillet over medium-high heat.
7. To sear the steaks, heat the oil in the pan, then place the steak in the skillet and allow them to cook for about
3 minutes per side without moving them. Add the sliced garlic to the pan and top each steak with half of the butter.
8. Transfer the skillet to the oven to finish cooking for 3-5 minutes for medium rare (135-140F). Remove the skillet from the oven and check the internal temperature of the steaks.
9. Season with a sprinkle of salt and pepper and serve with a generous helping of the quinoa salad.

Herby Spring Vegetable Frittata

Serves: 4

This herb-loaded, veggie-packed frittata is giving all the weekend brunch vibes!

But because frittatas are incredibly simple to make using just one skillet, it’s a simple way to make any morning a whole lot more flavorful.

Mushrooms and thyme give the frittata a deep, earthy flavor, while the chives and dill freshen and brighten every bite. Asparagus adds extra texture and savory Parmesan cheese balances it all out. Even my mushroom-despising kids gobbled up every bite! Serve it up with smashed avocado, crispy potatoes, and toast.

Ingredients:
8 large eggs
1 cup sliced mushrooms (about 4 oz.)
1 cup asparagus, cut into 1-inch pieces
1/3 cup milk
1 tbsp minced fresh chives
1 tbsp minced fresh dill
1 tsp minced fresh thyme
4 tbsp shredded parmesan cheese,
plus more for serving
2 tbsp olive oil, divided
1/2 tsp salt
1/2 tsp black pepper

Instructions:
1. Preheat your oven to 375°F.
2. Meanwhile, prepare the vegetables and herbs. Slice the mushrooms, trim and cut the asparagus into 1-inch pieces, and mince the herbs.
3. Heat 1 Tablespoon of olive oil in a 9-inch, oven-safe skillet over medium heat. Add the mushrooms and cook for about 3 minutes, stirring occasionally. Add the asparagus pieces and cook for another 2-3 minutes until slightly tender.
4. While the vegetables cook, whisk the eggs, milk, salt, and pepper together in a large bowl. Stir in the herbs and Parmesan cheese.
5. Reduce the heat to low and spread the vegetables evenly across the skillet. Drizzle the remaining oil over the vegetables. Pour the egg mixture into the pan.
6. Allow the eggs to cook, gently pulling the mixture from the sides toward the center of the pan, allowing the eggs to fill in the space, about 2-3 minutes.
7. Once the egg mixture slows at filling in the edges, transfer the skillet to the oven.
8. Bake for 8-10 minutes, until the eggs are fluffy and completely set in the center.
9. Remove the skillet from the oven. Carefully slide the frittata out of the pan and allow it to cool slightly. Season with a little more salt and pepper and sprinkle with extra parmesan cheese. Slice into 4-6 pieces and serve.

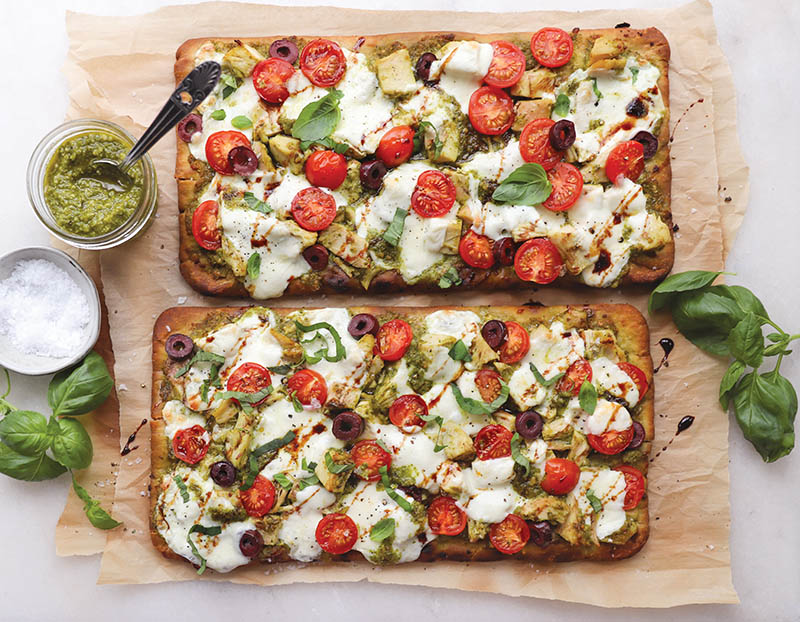
Oven Baked Italian Pesto Chicken Flatbread

Serves: 4-6

Enjoy this flavor-packed flatbread recipe as a shared snack during happy hour, a game-day treat with friends, or as an easy weeknight meal.
The crispy flatbread is topped with homemade pesto, chicken, tomatoes, fresh mozzarella cheese, and olives, and finished with balsamic glaze and more fresh basil. The homemade pesto really brings the flatbread to the next level!

To save time, repurpose leftover chicken or use store-bought rotisserie chicken.

This meal comes together in a snap! Best of all, you can cook in the oven or on the grill, but either way, it’s guaranteed to disappear in minutes!

Pesto Ingredients:
2 bunches of fresh basil, large stems removed (about 2 packed cups)
1/3 cup pine nuts
1/2 cup extra virgin olive oil
1/4 cup grated Parmesan cheese
2 cloves garlic

Flatbread Ingredients:
2 flatbreads (or substitute naan)
1 1/2 cups cherry or grape tomatoes, halved
8 oz. fresh mozzarella
1/4 cup sliced olives
1/2 – 2/3 cup pesto
1 tsp olive oil
2 cups of cooked, cooled chicken
1 tbsp balsamic glaze
Fresh basil, for serving

Instructions:
1. Make the pesto. Add the garlic, basil, pine nuts, and Parmesan to a food processor. Pulse for 30 seconds until broken down into a finer mixture. Turn the food processor on low and slowly drizzle in the oil. Blend just until smooth. Season to taste with salt and pepper.
2. Preheat the oven to 400°F. Slice the tomatoes and olives in half. Cut the cooked chicken into bite-sized pieces. Set them aside.
3. Brush the bread on both sides with the oil. Set it directly on the oven grates or on the grill for 2-3 minutes. Remove from the oven and set on a baking sheet.
4. Spread 1/4 – 1/3 cup of pesto evenly over each flatbread. Arrange the chicken, halved tomatoes, and olives on top. Spread the shredded or sliced cheese on top.
5. Bake in the oven or carefully transfer to a well-oiled grill and cook until the cheese is melted and bubbly, about 7-9 minutes.
6. Sprinkle with salt, pepper, and fresh basil, and drizzle with the balsamic glaze. Cut into individual pieces and serve right away while still hot.

Notes:
• Optional: Toast the pine nuts in a medium-hot skillet for 3-4 minutes, just until fragrant, before making the pesto! It will bring out more of the nutty flavor.
• Add fresh baby spinach and/or thinly sliced red onion to the flatbreads for extra flavor!
• Be careful not to over blend the pesto. It should be smooth, but still have a bit of texture to the consistency.
• You can freeze any leftover pesto for later! Spoon the pesto into a cube tray, freeze for 3-4 hours, then pop out the cubes and transfer to an airtight container or bag. Freeze for 3-4 months, per USDA.


The Perfect Pantry Soup

A Warming White Bean Soup for Winter

Ingredients:
2, 14-ounce cans of white cannellini beans, drained and liquid reserved
1/4 cup good olive oil
4 ounces pancetta, diced into 1/4-inch pieces (or substitute with bacon)
2 leeks, white and light green parts only, chopped (about 2 cups)
2 medium yellow onions, chopped (about 2 cups)
5 medium carrots, scrubbed and diced into 1/2-inch pieces (about 2 cups)
4 ribs celery, diced into 1/2-inch pieces (about 2 cups)
6 garlic cloves, minced (about 2 tablespoons)
2 teaspoons fresh rosemary, minced
6 cups chicken stock (preferably homemade)
2 bay leaves
Kosher salt and freshly ground black pepper, to taste
Freshly grated Parmesan cheese, for serving
Fresh parsley, chopped (optional)

Instructions:
1. Cook the Soup Base:
• In a large Dutch oven or pot (about 10 inches), heat 1/4 cup of olive oil over medium heat.
• Add the pancetta (or bacon) and sauté for 4-5 minutes, until browned and crispy.
• Add the chopped leeks, onions, carrots, celery, garlic, and rosemary. Cook over medium-low heat for about 10 minutes, stirring occasionally, until the vegetables are tender.
2. Add Beans and Stock:
• In a food processor, combine 1 cup of the canned beans with 1/2 cup of the reserved liquid and purée until smooth.
• Add the purée, then add the remaining drained beans (discard the remaining liquid), 6 cups of chicken stock, bay leaves, 1 tablespoon of salt, and 1 teaspoon of black pepper to the pot.
• Bring the mixture to a boil, then reduce the heat to low and simmer, partially covered, for 45 minutes, or until the beans are tender. Stir occasionally, scraping the bottom of the pot to prevent sticking.
3. Final Adjustments:
• Discard the bay leaves. Cover the pot and let the soup sit off the heat for 15 minutes to allow the flavors to meld.
• If the soup is too thick, stir in up to 2 additional cups of chicken stock until it reaches your desired consistency.
• Top with freshly grated Parmesan cheese, chopped fresh parsley, and a drizzle of olive oil. Serve hot.


Rolling Into the Holidays

The Perfect Yule Log Cake

By: Mikael Blido | Photos by: Ashlee Glen

Every holiday season, I look forward to indulging in delicious traditions, and one dessert that never fails to impress is the Yule log cake. Also known as Bûche de Noël, this cake has its origins in an ancient European tradition where families would burn a large log during the winter solstice as a symbol of protection and warmth.

As fireplaces became less common, the tradition transformed, leading 19th-century French pastry chefs to create a dessert version of the log. This rolled sponge cake, often filled with buttercream or whipped cream and covered in chocolate ganache, quickly became a holiday centerpiece.
In this recipe, I’m using a delicious caramel cream. For a more striking effect, you can deepen the filling’s color by adding two teaspoons of cocoa powder to mimic the rings of a tree.

While this cake might seem daunting, it’s more manageable than it appears—especially if you master the key step of “training” the sponge using a damp tea towel. Rolling the warm cake in the towel sets its shape without cracking, ensuring a beautiful spiral when filled. The addition of meringue mushrooms and a chocolate crumble “forest floor” is optional, but it adds a touch of whimsy and elevates the presentation for special occasions.

Caramel Yule Log with Meringue Mushrooms & Chocolate Crumbles

Serves: 10 to 12
Time: 6 1/2 hours, plus 4 hours cooling

Ingredients
Meringue Mushrooms
3 large egg whites
1/4 teaspoon cream of tartar
Pinch of salt
2/3 cup granulated sugar

Chocolate Forest Floor
6 tablespoons unsalted butter,
cut into 1/2-inch pieces
2 ounces bittersweet chocolate, chopped
1 cup all-purpose flour
1/2 cup dark brown sugar
1/2 cup unsweetened cocoa powder
1/2 teaspoon salt
1/4 cup toasted, ground pistachios (optional)

Filling
2 cups heavy cream
3/4 cup granulated sugar
1/4 cup water
1 tablespoon light corn syrup
4 ounces cream cheese

Cake
1 1/3 cups cake flour
3/4 cup granulated sugar
1 1/2 teaspoons baking powder
1/4 teaspoon salt
5 large eggs, separated
1/2 cup vegetable oil
1/4 cup water
2 teaspoons vanilla extract
1/4 teaspoon cream of tartar

Ganache Tree Bark
3/4 cup heavy cream
6 ounces bittersweet chocolate, chopped
2 teaspoons light corn syrup
Confectioners’ sugar (optional)

Instructions
1. For the Meringue Mushrooms: Preheat the oven to 200°F. Draw mushroom cap shapes on parchment paper and place the paper, pencil side down, on baking sheets. In a stand mixer, whip egg whites until foamy. Add cream of tartar and salt, then gradually incorporate sugar. Continue whipping until stiff peaks form. Pipe meringue caps and stems onto parchment. Bake for 2 hours, then turn off the oven and let the meringues dry for an additional
30 minutes. Store in an airtight container.

2. For the Chocolate Forest Floor: Preheat oven to 350°F. Combine butter and chocolate, melt together, then stir in the remaining ingredients. Crumble the dough onto a lined baking sheet and bake for 15 minutes, stirring halfway through. Let cool completely before using.

3. For the Filling: Heat 1 cup of cream in a saucepan. In a separate pot, bring sugar, water, and corn syrup to a boil and cook until deep golden brown. Gradually whisk in the hot cream and add the cream cheese. Cool to room temperature, then chill for at least 3 hours before whipping. Whip on high speed for 1 1/2 to 2 minutes, until the mixture becomes thick and fluffy, like buttercream frosting.

4. For the Cake: Preheat oven to 350°F. Grease and line a baking sheet with parchment. In a bowl, whisk together flour, sugar, baking powder, and salt.
In another bowl, combine egg yolks, oil, water, and vanilla. Add the wet mixture to the dry ingredients. In a stand mixer, whip egg whites with cream of tartar until stiff. Gently fold egg whites into the batter, then spread onto the prepared baking sheet. Bake for 12-14 minutes. After baking, turn the cake onto a damp tea towel and roll gently to cool.

5. For the Ganache Tree Bark: Heat cream and pour over chopped chocolate and corn syrup. Let sit for a minute, then whisk until smooth. Let cool to a spreadable consistency.

6. Assembly: Unroll the cake and spread the whipped filling evenly. Re-roll the cake and chill for 20 minutes.
Cover the cake with ganache, using a fork to create bark-like texture. Decorate with meringue mushrooms and chocolate crumbles. Dust with confectioners’ sugar before serving if desired.


Fresh Coconut Cake: A Family Recipe

Editor’s Note: Every Christmas, there is always a fresh coconut cake on our family’s table. For years, my mom and grandmother would make these cakes together—sitting in my Granny’s basement on homemade stools, breaking up coconuts on the concrete floor. It was tradition that they make two at a time—one for the McGuire family Christmas dinner and one for my mom to share with my dad’s side of the family. My grandmother is no longer with us, but the tradition still stands. My mom still makes this cake every Christmas.

Below is the recipe my family has used for years, written from memory.

Ingredients
1 box white cake mix
1 fresh coconut (my mom jokes that you always have to go back to the store and buy another one because the first is always bad)
1 1/2 cups sugar
1/3 cup water
2 egg whites
2 tsp. light corn syrup
1 tsp. clear vanilla flavoring
1/4 tsp. cream of tartar
Pinch of salt

Directions
1. Prepare one white cake mix as directed and bake in two 9-inch round cake pans.
Let cool.
2. Grab a hammer and a penny nail. Poke a hole in the eyes of the coconut. Then flip it over and let the milk drain from it. Save the milk and set it aside. Always do a taste test before continuing because not all coconuts are good.
3. Once the coconut is drained, take that hammer and give the coconut a few good whacks in the middle to open it up. That’s when you see all the pretty white meat.
4. The hard part is getting the coconut out of the shell. You have to be persistent and work a paring knife between the coconut and the shell. You are almost there.
5. Now you have to cut away the brown layer of skin that is on the back of the coconut. Once all the meat is removed, you can either grate it or use a food processor to grind it into small flakes.
6. Take your cooled cake layers and poke holes in them with a toothpick.
7. Now drizzle the saved coconut milk over the cake layers until the tops are moist.
8. Make the icing by combining sugar, water, egg whites, light corn syrup, cream of tartar, and salt with an electric mixer for 30 seconds in a heat-proof bowl.
9. Set the bowl over (but not touching) simmering water and continue to mix with a mixer for 7 minutes, or until the mixture is stiff.
10. Remove from heat and add vanilla and mix for another 1 to 2 minutes.
11. Immediately ice the cake. Once the cake is iced, pat the shaved coconut onto the iced cake.
12. Refrigerate or freeze.


Rediscovering Ancient Grains

In the quest for healthier eating, ancient grains have re-emerged as nutritional powerhouses worthy of our attention.

While quinoa and farro have [deliciously] found their place in modern diets, lesser-known grains like teff, amaranth, and millet are finally stepping into the spotlight. These grains, rich in history and packed with nutrients, offer a wealth of health benefits and culinary versatility.

Teff: The Ethiopian Supergrain

Teff, a tiny grain native to Ethiopia and Eritrea, is one of the oldest cultivated crops. Despite its diminutive size, teff boasts an impressive nutritional profile. It is rich in protein, fiber, and essential minerals like calcium and iron. Teff is also gluten-free, making it an excellent choice for those with gluten sensitivities or celiac disease.

Health Benefits of Teff
High Nutrient Density: Teff is a complete protein source, containing all nine essential amino acids. This makes it particularly valuable for vegetarians and vegans.
Rich in Fiber: Its high fiber content aids in digestion and helps maintain stable blood sugar levels.
Packed with Minerals: Teff provides significant amounts of calcium, iron, magnesium, and phosphorus, essential for bone health and energy production.

Teff Porridge (photo above)
Ingredients
1 cup teff grains
3 cups water
1 cup almond milk
2 tablespoons honey
1 teaspoon vanilla extract
Fresh berries and nuts for topping

Instructions
1. Rinse teff grains under cold water.
2. In a saucepan, combine teff, water, and almond milk. Bring to a boil.
3. Reduce heat and simmer for 15-20 minutes, stirring occasionally, until teff is tender and the mixture thickens.
4. Stir in honey and vanilla extract.
5. Serve warm, topped with fresh berries and nuts.

Tabouleh Salad Close-Up

Amaranth: The Aztec Nutrient Treasure

Amaranth, revered by the Aztecs, is another ancient grain gaining popularity. Known for its high protein content and impressive array of nutrients, amaranth is a versatile ingredient in many dishes. Its slightly nutty flavor and crunchy texture make it a delightful addition to both sweet and savory recipes.

Health Benefits of Amaranth
Complete Protein Source: Like teff, amaranth is a complete protein, making it ideal for plant-based diets.
Gluten-Free: Suitable for those with gluten intolerances, amaranth can be used in various gluten-free recipes.
Rich in Micronutrients: It provides significant amounts of manganese, magnesium, phosphorus, and iron, supporting overall health and well-being.

Amaranth Salad
Ingredients
1 cup cooked amaranth
1 cup cherry tomatoes, halved
1 cucumber, diced
1 red bell pepper, chopped
1/4 cup red onion, finely chopped
1/4 cup fresh parsley, chopped
2 tablespoons olive oil
1 tablespoon lemon juice
Salt and pepper to taste

Instructions
1. Cook amaranth according to package instructions and let it cool.
2. In a large bowl, combine cherry tomatoes, cucumber, bell pepper, red onion, and parsley.
3. Add the cooled amaranth to the vegetable mixture.
4. Drizzle with olive oil and lemon juice, then season with salt and pepper.
5. Toss gently to combine and serve chilled.

Millet stir-fry with vegetables

Millet: The Ancient Asian Staple

Millet, a staple in many Asian and African cuisines, is a drought-resistant grain with a slightly sweet and nutty flavor. This versatile grain is often overlooked in Western diets but is gradually gaining recognition for its health benefits and culinary potential.

Health Benefits of Millet
High Fiber Content: Millet is rich in dietary fiber, promoting healthy digestion and preventing constipation.
Rich in Antioxidants: It contains phenolic compounds that help fight oxidative stress and inflammation.
Gluten-Free: Millet is naturally gluten-free and a great alternative for those with gluten allergies.

Millet Stir-Fry
Ingredients
1 cup cooked millet
1 cup mixed vegetables (carrots, bell peppers, broccoli)
1 clove garlic, minced
1 tablespoon soy sauce
1 tablespoon sesame oil
1 tablespoon olive oil
2 green onions, chopped
Sesame seeds for garnish

Instructions
1. Heat olive oil in a large skillet over medium heat.
2. Add minced garlic and cook until fragrant.
3. Add mixed vegetables and stir-fry until tender.
4. Add cooked millet to the skillet and stir to combine.
5. Drizzle with soy sauce and sesame oil, and stir well.
6. Garnish with chopped green onions and sesame seeds before serving.


Integrating Ancient Grains into Modern Diets

Incorporating ancient grains like teff, amaranth, and millet into contemporary diets is easier than it might seem. Their versatility allows them to be used in various dishes, from breakfast porridges and salads to main courses and desserts. By experimenting with these grains, individuals can enjoy their unique flavors while reaping their numerous health benefits.

These ancient grains not only offer nutritional advantages but also contribute to sustainable agriculture. Their ability to grow in arid conditions makes them vital for food security in regions affected by climate change.  


Healthy Picnic Recipes

Summertime is picnic time! Get three simple and delicious recipes to enjoy on a warm day with friends.

Written & Photographed By: Laura Miner

All of the dishes are jam-packed with flavor while still being a bit better for you than traditional picnic foods. So go ahead, indulge in these recipes at your next backyard cookout or picnic. Your taste buds will thank you!

BLT Salad (Photo Above)
Serves: 4
Imagine everything you love about the classic BLT sandwich, but with a refreshing, healthier twist! Every single element that makes a BLT so beloved is represented in this recipe, but this BLT is served in a veggie-packed salad form. Crispy bacon, fresh lettuce, juicy tomatoes, and crunchy croutons are paired together, then tossed in a creamy, rich, and herby dressing, made with a base of Greek yogurt! Every bite just gets better and better.

Dressing Ingredients:
1/2  cup nonfat plain Greek yogurt
2 tbsp mayonnaise
1 tbsp lemon juice
2 tbsp olive oil
1 clove garlic, minced
1/4 cup minced fresh herbs. Use any combination of parsley, dill, tarragon, and chives.
1/4 tsp salt & pepper

Salad Ingredients:
6 cups chopped lettuce
8 pieces bacon, cooked and cooled
1.5 cups croutons
1 cup diced tomatoes

Directions:
1. Prepare the dressing by whisking all the ingredients together. Store covered in the refrigerator until you’re ready to serve the salad.
2. Assemble the salad. Cut the bacon and tomatoes into bite-sized pieces. Add all the salad ingredients to a large bowl. Toss with the salad dressing and serve right away.

Notes:
• If you’re making this in advance, keep the dressing, bacon, and croutons separate until just before serving to keep it crunchy!
• For a lower fat option, use turkey bacon.
• Make it a complete meal by adding your favorite protein to the salad, like grilled chicken or hard boiled eggs.

Southwest Turkey Burgers
Serves:
Inspired by bold southwest flavors, this turkey burger puts a healthier twist on a cookout classic. The burger is flavored with chipotle peppers and tons of herbs and spices for just the right amount of spicy kick. It’s all mellowed out with a cooling cilantro-lime avocado spread, your favorite toppings, and served on a toasty bun.

Burger Ingredients:
1 lb. ground turkey
1/4 cup minced cilantro
1/2 tsp each cumin, salt
1/4 tsp each garlic powder, onion powder, smoked paprika, chipotle powder
3 tbsp canned chipotles, minced
Optional toppings: lettuce, sliced tomato, monterey jack cheese
4 burger buns

Smashed Avocado Spread:
2 avocados
1 tbsp lime juice
2 tbsp minced cilantro
1/4 tsp salt

Chipotle Ketchup:
1/2  cup prepared ketchup, any kind
1/2  tsp apple cider vinegar
1/2  – 1 1/2 tsp chipotle powder

Directions:
1. To prepare the burger mixture, use your hands to mix together the ground turkey, cilantro, chipotles, and seasonings. Form into four patties. Place the burgers in the refrigerator to chill for about 30 minutes to help them firm up and stay together when transferring to the grill. 
2. Make the avocado mash. Cut open and remove the pits from the avocados.
Scoop out the flesh and place it in a bowl. Add lime juice, cilantro, and salt.
Use a fork to roughly smash the avocado and mix it together. Mix the chipotle ketchup ingredients together.
3. Mix the ketchup with apple cider vinegar and chipotle powder, starting with less and tasting until it’s the level of spicy that you enjoy.
4. Preheat a clean, well-oiled grill to 400°F. Place the burgers on the grill and cook for about 13-16 minutes total, carefully flipping halfway through. When the middle of the burger reaches 165°F, remove the burgers and set them aside.
5. Assemble and serve. Toast the buns. Spoon a few tablespoons of the avocado spread onto the bun, then layer the burger along with any other toppings you enjoy. Serve right away. 

Mediterranean-Inspired Chicken Skewers with Orzo & Feta Salad
Serves: 4-6 (About 8 Skewers)
This recipe is a celebration of all things Mediterranean, and it’s absolutely perfect on a hot summer day! Tender pieces of marinated chicken and thinly sliced summer squash, zucchini, and onions are grilled to perfection and served up on skewers. Plate it alongside a crowd-pleasing orzo salad tossed with crunchy vegetables and delicious feta cheese.

Best of all, the marinade pulls double duty—half will be used to marinate the chicken and half will be used as a vibrant dressing for the orzo salad!

Chicken Skewers Ingredients:
1 lb. chicken breasts
2 medium zucchini
2 medium summer squash, medium size
1/2 red onion

Marinade/Dressing Ingredients:
1/2 cup extra virgin olive oil
3 tbsp red wine vinegar
2 tbsp lemon juice
3-4 cloves garlic, minced
1 tsp dried oregano
1/2 tsp each of dried thyme, dill, and onion powder
1/4 tsp salt & pepper

Orzo Salad Ingredients:
3 cups cooked & cooled orzo
1/2 cup diced bell pepper
1/2  cup diced tomato
1 cup diced cucumber
1/2 cup crumbled feta cheese

Directions:
1. Make the marinade by whisking all the ingredients together.
2. Next, marinate the chicken. Cut the chicken in 1 inch cubes. Place them in a large bowl and pour half of the marinade on top, setting the other half of the marinade aside to use as a dressing later. Turn the chicken until all the pieces are coated.
Cover the bowl and set it aside to marinate for at least 30 minutes.
3. Meanwhile, make the orzo salad. Toss the orzo with the diced bell peppers, tomato, cucumber, feta cheese, and the reserved marinade/dressing. Season to taste with salt and pepper. Keep the salad covered and refrigerated until you’re ready to serve it.
4. Prepare the skewers. Cut the onion into ½ inch pieces. Using a mandolin or vegetable peeler, slice the zucchini and summer squash lengthwise to make long ribbons. Thread a piece of chicken, folded zucchini, squash, and onion onto the skewer. Repeat this process until the skewers are filled. 
5. Preheat a well-oiled grill to 400°F. Cook the skewers for 5-7 minutes per side, turning occasionally, until the chicken reaches an internal temperature of 165°F, per USDA.
6. Serve the skewers right away with the orzo salad.

Notes:
• Smaller zucchini and squash tend to work better in this recipe. Avoid large zucchini and squash since they are seedy.
• If using wooden skewers, soak them in water for about 30 minutes before using them to keep them from burning.
• Don’t pack the skewers too tightly. Leave a little bit of space between each element to ensure even cooking.  


Read It & Try It!

Recipes from this issue for you to enjoy

Sweet Cornbread Biscuits

Photo Above. Recipe courtesy Chef Candace Vinson, pg. 63.
Serves: 8-10

“The aroma of fresh yeast from the nearby bread factory always filled the air with a delightful scent, bringing warmth and comfort to my childhood in Portsmouth, Virginia.” – Chef Candace Vinson

Ingredients
1/4 cup warm water
1 tsp granulated sugar
2 1/4 tsp rapid yeast
1 1/2 cup all purpose flour
1 cup masa corn flour
1 tsp baking powder
1/2 tsp baking soda
1 tbsp granulated sugar
1 tsp kosher salt 
1/4 cup unsalted butter, cut into small pieces + 1 tbsp for brushing
1/4 cup butter flavored shortening (Candace prefers Crisco)
1 cup buttermilk + 1 tbsp for brushing
1 tbsp honey

Directions
1. In a large bowl, combine warm water, sugar, and yeast. Let proof till foamy.
2. In a large mixing bowl, combine all dry ingredients and blend till fully combined.
3. To the dry mix, add butter and shortening. Using your hands or a biscuit cutter,
crumble butter shortening till the mix resembles rocky sand. 
4. Make a well in the center of the flour
mixture and add buttermilk and yeast mixture. Gently fold till completely mixed.
5. Lightly flour a work surface and turn the dough out onto the surface.
6. Gently knead the dough to incorporate all the crumbs.
7. Pat the dough out into a 1-inch thick rectangle.
8. Using a floured bench scraper or biscuit cutter, cut your biscuits into desired shapes. You should yield 8-10 biscuits. 
9. Lightly grease a sheet pan and place your biscuits about 1/2 inch apart. 
10. Cover the pan loosely with plastic wrap and place in a very warm, sunny draft-free location. Let rise for 1 hour.  
11. Preheat the oven to 400 F.
12. Once the biscuits have doubled in size, remove plastic wrap and gently brush the tops with 1 tbsp of buttermilk. 
13. Bake for 12-14 minutes. While the cornbread biscuits are baking, melt the remaining butter and honey. 
14. Remove the biscuits from the oven and brush the biscuits with the honey mix. Sprinkle with a little kosher salt if desired.  

Black-Eyed Pea, Shrimp, and Chicken Stew with Crab Rice

Recipe courtesy Chef Candace Vinson, pg. 63.

Serves:

“Having a busy schedule, leftovers are essential. This dish is one that I can rely on when I come home after a busy shift. Plus, it’s all the flavors of home” – Chef Candace Vinson

Ingredients
1 cup canola or grapeseed oil
1 1/2 cups all purpose flour 
1 pound chicken thighs, boneless, skinless, chopped (You can pre-season if desired)
1 pound medium raw shrimp, peeled (reserve shells and tails)
1 smoked turkey wing or leg
1 pound mustard greens, washed, rough chopped
32 oz chicken stock
2 cups onion, diced, reserved scraps
2 cups green bell pepper, diced
1 cup celery, diced, reserve scraps
4 cloves garlic, minced
3/4 cup black eyed peas, canned or frozen  
1 cup canned diced tomatoes, drained
1 cup okra, cut
2 bay leaves
4 sprigs of fresh thyme
Salt to taste
Crushed red pepper to taste

Directions
1. In a small stock pot, combine smoked turkey, shrimp shells, chicken Stock, 2 sprigs of thyme, 1 bay leaf and all vegetable scraps. Bring to boil and reduce to simmer for 1 hour.
Add 1-2 cups of water if the liquid has reduced too much. 
2. To a large pot on medium low heat, add oil and flour. With a rubber spatula, stir constantly until mixture resembles peanut butter. Be careful not to burn. 
3. To the roux mixture, add celery, onions, green peppers, and garlic. Stir till vegetables are fragrant. 
4. Carefully remove the smoked turkey and set aside to cool. Strain your smoked turkey stock (discard vegetables) into the roux mixture and whisk till fully combined and the broth is smooth (no clumps). 
5. Add your black eyed peas, tomatoes, diced chicken, bay leaf, thyme, okra, and mustard greens. Allow stew to simmer for 30-45 minutes or until black eyed peas are tender. 
6. Carefully shred your smoked turkey meat and discard the bones. Add shredded meat to stew. 
7. Add your shrimp, salt, and pepper to stew and cook until shrimp are pink and fully cooked. 
8. Divide stew into serving bowls and top with crab fried rice. 

Crab Fried Rice

Recipe courtesy Chef Candace Vinson, pg. 63.

Serves:

Ingredients
1/4 cup canola or grapeseed oil
4 cup cooked, day old jasmine rice
1/2 cup crab claw meat
1 cup green onions, small diced
1 tsp onion powder
1 tsp garlic powder  
Salt and pepper, to taste

Directions
1. In a wok or large fry pan on medium high heat, add oil.
2. To the oil, add crab and green onion and stir until heated thoroughly. 
3. Add rice and remaining seasonings. 
4. Toss ingredients in the pan ensuring the rice is broken up (we don’t want clumpy rice).
5. Remove from heat and serve 1/2 cup portion on top of bowled stew. 

Nepali-Inspired Chicken Curry

Recipe courtesy Burton Dining Hall at University of Lynchburg, pg. 53.

Serves:

Ingredients
2 pounds chicken thighs (cut into roughly 1-inch chunks)
3 cups chopped onion
3 cups chopped tomato
2 tbsp chopped garlic
2 tbsp chopped ginger
2 deseeded habanero chilies (depending on size, or omit or use jalapeños for less heat)
1 bundle cilantro (chopped)
8 oz plain Greek yogurt 
1 tbsp red Kashmiri chili powder (can substitute with paprika mixed with cayenne pepper)
1 tbsp turmeric
1 tbsp cumin powder
2 tbsp curry powder
6 bay leaves
2 tsp salt
2 tsp pepper

Directions
1. Combine chopped tomatoes, onions, cilantro, garlic, ginger and chiles in your blender/food processor. Blend/pulse until smooth and set aside. 
2. Set frying pan to medium heat and pour in enough oil to coat the
bottom of the pan.
3. Once oil is hot, add spices and fry for roughly 2 minutes.
4. Add blended vegetables.
5. Cook until sauce starts to thicken.
6. Reduce heat and add yogurt. Mix until fully incorporated.
7. Remove curry sauce from pan and set aside. Rinse frying pan and apply to high heat, once again coating the bottom of your frying pan with oil.
8. Once oil is hot, add in chicken thigh chunks. Season with salt and pepper.
9. Cook until browned.
10. Reduce heat to a simmer and (slowly) pour curry sauce back into the pan and cover. Simmer until chicken is fully cooked.
11. Serve over rice with lots of chopped cilantro and enjoy!  


Healthy, Grab-and-Go Snacks

Simple, No Cook Recipes

Recipes & Photos by Laura Miner

Is there anything to snack on?”

It’s a question you’ve likely heard time and time again—or even thought for yourself. You find yourself raiding the fridge or pantry in between meals, hoping for something to tide you over until mealtime. You don’t want a snack that’s too heavy, you don’t want to mindlessly munch on potato chips, so what do you do? Enter these three simple no cook recipes that can be prepped in advance, so you always have something healthy on-hand.

Salami & Cheese Bites (photo above)
This no-cook, 4 ingredient snack is wonderful when you’re craving something special but only have a few minutes to prep. Creamy, smokey gouda is stacked on a toothpick with savory salami, marinated artichoke hearts, and just a bit of fresh, herbaceous basil. This recipe is great sharing with friends, or for an impromptu cocktail hour served with your favorite fancy drink!
Makes: 12 bites

Ingredients
8 oz. smoked gouda cheese
6 oz. (about 1/2 cup) quartered marinated artichoke hearts, drained 
12 slices thinly sliced salami
Fresh basil leaves
Black pepper

Instructions
Cut away any wax rind on the cheese, and cut the block into bite-sized cubes, about 1/2 inch each. 

Skewer a basil leaf and artichoke heart on a toothpick. Fold a piece of salami twice, then skewer the salami onto the toothpick. Last, skewer the cheese on the toothpick. Repeat until all the ingredients are used. 

Sprinkle lightly with black pepper and serve. 

Notes:
For even more flavor in each bite, add a small slice of sun-dried tomato. Store in an airtight container in the refrigerator for 3-4 days. 

Goat Cheese & Pistachio Stuffed Dates
Elevate your snacking game with these little bites of heaven! Sweet dates are stuffed with creamy, tangy goat cheese, then topped with crunchy pistachios and a drizzle of spicy honey. The combination of flavors and textures in every bite is simply incredible!
Makes: 15-18 dates

Ingredients
2 oz. goat cheese
1/3 cup shelled pistachios
15-18 medjool or noor dates
2 tbsp. spicy honey 

Instructions
Remove the pits from the dates. Roughly chop the pistachios. 

Use a small spoon to add a few pieces of chopped pistachios to the cavity of each date, then fill each one with about 1/2 teaspoon of goat cheese.

Drizzle the stuffed dates with the spicy honey and sprinkle with more chopped pistachios.

Notes:
Make your own hot honey by stirring the honey and 1/2 teaspoon crushed red pepper together in a small bowl. Microwave for 30-40 seconds, until it begins to simmer. Allow it to cool.

To save time, buy pre-pitted dates!

Store in an airtight container in the refrigerator for 3-4 days.

5 Minute Sweet & Salty Snack Mix
This delicious and nutritious snack mix is made with lots of different, ultra-satisfying, crunchy, chewy, salty, and sweet goodies. It’s great by the handful for a quick afternoon pick-me-up or movie nights at home, and it’s perfectly portable for snacking on the go. To make this recipe, simply toss nuts, seeds, dried fruit, popcorn, and chocolate together in a bowl. It doesn’t get any easier than that! Serves: 6

Ingredients
1 cup total mixed nuts (almonds, peanuts, walnuts, cashews, & pistachios are great choices)
1/2 cup dried coconut flakes
1/4 cup pepitas
1/2 cup raisins or dried cranberries
1/4 cup sunflower seeds
2 cups popcorn, cooled
1/2 cup chopped chocolate bars or chocolate chips

Instructions
Add all the ingredients to a large bowl. Mix well and serve immediately!

Notes:
Use unsalted nuts, seeds, and popcorn for a lower sodium snack.

Use unsweetened dried fruit and dark chocolate for a lower sugar option.

Cover the bowl tightly with plastic wrap or store in an airtight container to keep the popcorn from becoming stale.