Pour, Stir, Savor: Two Whisky Cocktail Recipes to Try

There are whiskies made for collecting—and then there are whiskies made for sharing.

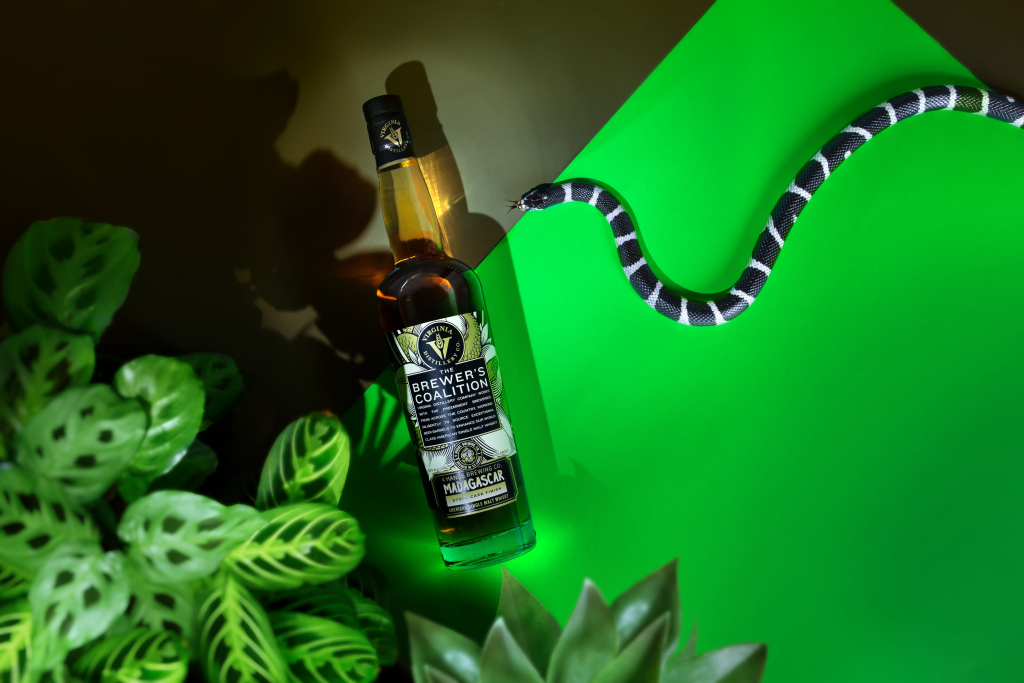
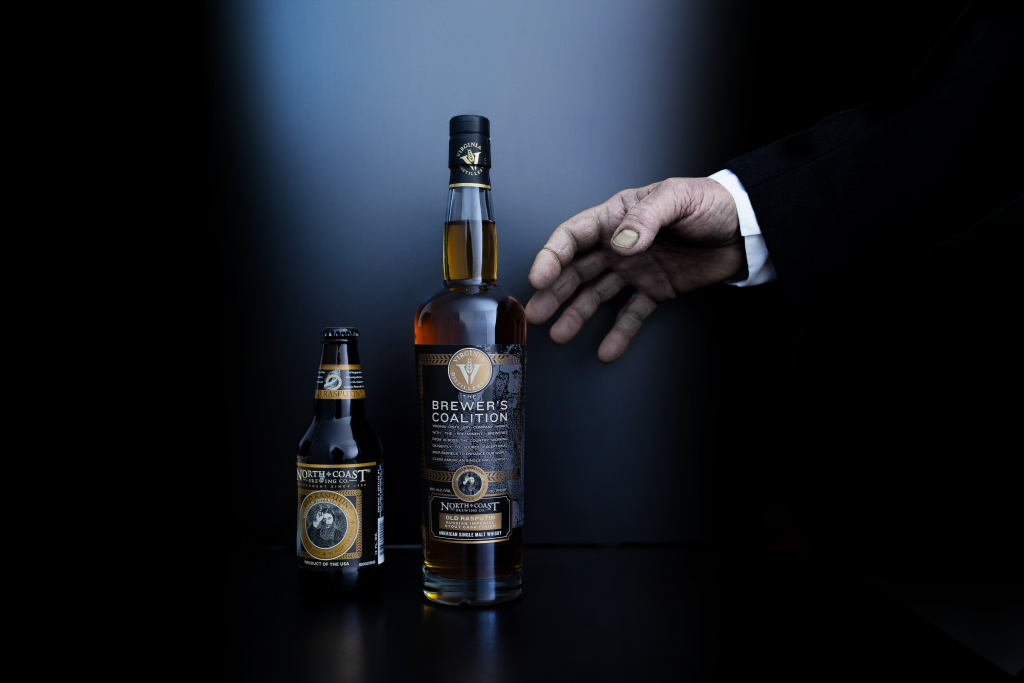
With three new limited releases from Virginia Distillery Co., now feels like the right time to gather a few friends, clear the kitchen counter, and let American Single Malt take center stage.

While these expressions are beautiful neat, their layered flavor profiles also lend themselves to thoughtful, spirit-forward cocktails—drinks that don’t mask the whisky, but elevate it.

The Blue Ridge Black Forest

A dessert-leaning cocktail inspired by the stout cask finishes

Best with: Virginia Distillery’s Brewer’s Coalition stout cask finishes (4 Hands Madagascar Stout or North Coast Old Rasputin)

These whiskies already lean into dark chocolate, roasted nuts, and berry notes. This cocktail amplifies that richness without becoming overly sweet.

Ingredients

  • 2 oz stout cask-finished American Single Malt
  • ½ oz crème de cacao (dark)
  • ½ oz cherry liqueur (or high-quality cherry syrup)
  • 2 dashes chocolate bitters
  • Optional: Luxardo cherry for garnish

Instructions

  1. Add all ingredients to a mixing glass with ice.
  2. Stir until well chilled (about 20–30 seconds).
  3. Strain into a chilled coupe or Nick & Nora glass.
  4. Garnish with a single cherry or a light shave of dark chocolate.

Why it works:
The whisky’s natural cocoa and raspberry notes shine through, while the bitters keep everything structured. It feels like Black Forest cake—but grown up. Perfect for a late-winter dinner party or an after-dinner pour by the fire.

The Nelson County Nightcap

A contemplative, cigar-worthy sipper

Best with: Virginia Distillery’s First Cut Cigar Blend

The Cigar Blend is layered—leather, walnut, candied citrus, subtle smoke—so this cocktail keeps things simple and structured.

Ingredients

  • 2 oz First Cut Cigar Blend
  • ¼ oz rich demerara syrup (2:1 sugar to water)
  • 2 dashes Angostura bitters
  • 1 dash orange bitters
  • Expressed orange peel

Instructions

  1. Add syrup and bitters to a mixing glass.
  2. Add whisky and ice; stir until chilled.
  3. Strain over a large ice cube in a rocks glass.
  4. Express orange peel over the drink and drop it in.

Optional: Lightly smoke the glass beforehand for added depth.

Why it works:
The demerara syrup enhances the whisky’s date cake and walnut notes, while the orange oils highlight its candied lemon peel character. The result is structured, warm, and quietly powerful.

Whether paired with a cigar or simply enjoyed on a porch at dusk, it invites you to slow down.

A Note on Mixing Limited Releases

When working with small-batch whiskies, the goal isn’t to bury complexity under citrus and sugar. Instead:

  • Lean spirit-forward.
  • Keep ingredients minimal.
  • Let the whisky remain the star.

If you’re lucky enough to secure a bottle this season, try it neat first. Notice what unfolds. Then experiment.

Because the beauty of American Single Malt—especially when it’s made in the foothills of the Blue Ridge—is that it rewards attention.

And the best cocktails? They do the same.

RELATED CONTENT:

A Bold Season for American Single Malt Whiskey in Lovingston


A Bold Season for American Single Malt in Lovingston

In the quiet hills of Nelson County, something bold is happening inside the rickhouses at Virginia Distillery Co. Fresh off being named Best American Single Malt at the 2026 World Whiskies Awards, the Lovingston-based distillery is leaning into what it does best: thoughtful craftsmanship, creative cask finishes, and just enough risk to keep things interesting.

This season brings three limited releases—two collaborations in its Brewer’s Coalition series and the debut of a contemplative new Cigar Blend—that feel less like products and more like experiences waiting to be poured.

When Beer Meets Single Malt

The Brewer’s Coalition series has always been about cross-industry creativity, and this year’s additions continue that spirit.

The first, created in partnership with 4 Hands Brewing Co., finishes Virginia Distillery Co.’s American Single Malt in Madagascar Stout barrels. Only six barrels were sourced, making this a small-batch moment in every sense.

Photo Courtesy Virginia Distillery Co.

Aged more than five years in ex-bourbon casks before its stout-barrel finish, the whisky leans indulgent without tipping into excess. Think juicy raspberries, lemon-curd brightness, dark chocolate cake, roasted pecans, and warm ginger snaps. Bottled at 100 proof, it holds its structure beautifully, with a finish that lingers in dark cocoa and raspberry cola.

For those who love to chase nuance, a Cask Strength Select version will be available in limited quantities at the St. Louis brewery itself—a quiet nod to the collaboration at its core.

In March, the second Brewer’s Coalition release partners with North Coast Brewing Co., finishing the distillery’s American Single Malt in Old Rasputin Stout barrels. Eight barrels were selected for this expression.

Photo Courtesy Virginia Distillery Co.

Also made from 100% malted barley and aged more than five years before finishing, this release opens with aromas of almond kringle and honeycomb before shifting into bright citrus zest, dark chocolate, and malty hops. At 100 proof, it strikes that increasingly sought-after balance: robust, but refined.

Together, these collaborations underscore something important about Virginia’s whisky scene—it isn’t insular. It’s curious. It’s collaborative. And it’s willing to let stout barrels from across the country leave their imprint on Blue Ridge–born spirit.

A Whisky Built for the Ritual

If the Brewer’s Coalition expressions feel celebratory, the new First Cut Cigar Blend feels almost meditative.

Crafted specifically to pair with a fine cigar, this American Single Malt is aged a minimum of seven years and matured in an imaginative collection of casks: Spanish Oak, Sherry, Port, STR, Château Palmer Cabernet, Armagnac, Cognac, and Fino—with a whisper of smoke from Islay casks layered in for depth.

The result is complex but intentional. Aromas of red berries and leather give way to walnut and date cake, candied lemon peel, allspice, and clove. The finish lingers in dark chocolate and subtle smoke. Bottled at 108 proof, it’s bold—but not brash. This is a whisky for slowing down. For lingering. For conversation that stretches long past sunset.

Even for those who don’t light cigars, the spirit itself invites a ritual: a porch chair in early spring, a low hum of evening, a glass that evolves as it opens.

A Defining Moment for Virginia Whisky

Virginia Distillery Co. has long positioned itself at the forefront of the American Single Malt category, producing its flagship Courage & Conviction alongside a steady stream of innovative limited releases. But the recent World Whiskies Awards recognition feels like a larger marker—not just for the distillery, but for Virginia’s growing influence in the global whisky conversation.

These three releases underscore that momentum. Collaboration. Complexity. Craft without compromise.

All expressions will be available in limited quantities in February and March through the distillery’s online shop and select retailers nationwide. As with most limited releases from Lovingston, they likely won’t linger long on shelves.

For Virginia whisky lovers, this is a season worth savoring.

RELATED CONTENT:

Two Bold Whiskey Recipes to Try


Toddler-Friendly Summer Snacks

Healthy Popsicles, Mini Veggie Muffins, and Fruit Kabobs They’ll Actually Eat

Summertime brings sunshine, longer days—and endless snack requests. For toddlers, snack time is more than just filling the belly. It’s an opportunity to hydrate, fuel growth, and sneak in some extra nutrients. But when it’s hot outside and schedules are loose, it helps to have go-to options that are healthy, easy to make, and perfect for on-the-go.

These toddler-friendly summer snacks hit all the marks: fun, flavorful, and parent-approved.

Frozen Fruit & Yogurt Popsicles

Cool, creamy, and mess-resistant thanks to Greek yogurt, these popsicles are packed with protein and probiotics.

Ingredients:

  • 1 cup fresh or frozen strawberries (or mixed berries)

  • ¾ cup plain full-fat Greek yogurt

  • 1 tablespoon honey or maple syrup (omit for children under 1)

  • ¼ teaspoon vanilla extract (optional)

Instructions:

  1. Blend all ingredients in a food processor or blender until smooth.

  2. Pour into silicone popsicle molds.

  3. Freeze for at least 4 hours or overnight.

  4. Run molds under warm water to release.

Tip: Make a few with added spinach or chia seeds for an extra boost—your toddler won’t even notice.

Mini Veggie Muffins

Soft, slightly sweet, and packed with vegetables, these muffins are perfect for snack time or breakfast on the go.

Ingredients:

  • 1 cup rolled oats

  • 1 ripe banana

  • 1 egg

  • ¼ cup unsweetened applesauce

  • ½ teaspoon baking soda

  • ½ teaspoon cinnamon

  • ½ cup finely shredded zucchini (squeeze out excess liquid)

  • ¼ cup finely shredded carrot

  • 1 tablespoon olive oil or melted coconut oil

  • Optional: 1 tablespoon maple syrup for older toddlers

Instructions:

  1. Preheat oven to 350°F and grease a mini muffin tin.

  2. Blend oats in a blender or food processor to make oat flour.

  3. Add banana, egg, applesauce, oil, and maple syrup if using. Blend until smooth.

  4. Stir in zucchini, carrot, cinnamon, and baking soda by hand.

  5. Spoon batter into muffin cups (fill almost to the top).

  6. Bake for 13–15 minutes or until a toothpick comes out clean.

  7. Cool before serving. Store in fridge or freeze for later.

Make-Ahead Tip: Double the batch and freeze extras—just thaw overnight in the fridge or microwave for 15–20 seconds.

Fruit & Cheese Kabobs

A snack and a toddler activity rolled into one, these kabobs encourage independence and make healthy eating fun.

Ingredients:

  • Cubed fruit: watermelon, cantaloupe, kiwi, strawberries, blueberries, grapes (quartered)

  • Cubed cheese: cheddar, mozzarella, or Colby Jack

  • Optional add-ins: cooked pasta spirals, sliced cucumber, or avocado chunks

  • Small bamboo skewers or cut paper straws

Instructions:

  1. Help your toddler alternate fruit and cheese on each skewer or straw.

  2. Serve immediately or store in the fridge for up to 2 days.

Safety Tip: For younger toddlers, skip the skewer and arrange on a plate as a “build-your-own” snack.

Snack Smart, Snack Often

With these toddler-friendly recipes in your back pocket, you’ll always be ready when the next snack request hits. Each recipe is simple, nutritious, and made with whole-food ingredients—so you can feel confident about what’s going into their growing bodies. And best of all? These snacks are just as delicious for grown-ups, too.

Smart Snacking Tips for Summer Toddlers

  • Pack with care: Use insulated bags and ice packs when bringing snacks outdoors.

  • Offer water often: Hydration is key in the summer heat. Try water with sliced fruit for flavor.

  • Switch it up: Toddlers love variety. Rotate between textures, colors, and shapes.

  • Limit added sugar: Let fruit and natural flavors shine whenever possible.


Fresh Recipes to Embrace Spring’s Flavors

Spring is a time of renewal, and one of the best ways to embrace the season is through the foods we eat. As the weather warms up and local farmers’ markets start to offer an abundance of fresh, seasonal produce, it’s the perfect opportunity to revamp your meal plan. Seasonal eating not only supports your health but also helps reduce your environmental footprint and boosts your connection to the local community. Here are some seasonal spring eating ideas and recipes to make the most of the season’s flavors.

1. Celebrate the Freshness of Leafy Greens
Spring is synonymous with an abundance of leafy greens. From arugula and spinach to kale and baby lettuce, these nutrient-dense vegetables are at their peak. Try tossing together a salad using mixed greens, fresh herbs like mint and basil, and a light vinaigrette made with lemon juice and olive oil. For added protein, you can include hard-boiled eggs, grilled chicken, or roasted chickpeas.

Spring Green Salad with Lemon-Dijon Vinaigrette
Ingredients:

  • 2 cups mixed greens (arugula, spinach, or baby kale)

  • 1 cucumber, thinly sliced

  • 1/2 cup cherry tomatoes, halved

  • 1/4 cup red onion, thinly sliced

  • 1/4 cup feta cheese (optional)

For the dressing:

  • 1/4 cup olive oil

  • 2 tablespoons Dijon mustard

  • 1 tablespoon fresh lemon juice

  • Salt and pepper, to taste

Directions:

  1. Toss the greens, cucumber, tomatoes, onion, and feta in a large bowl.

  2. In a separate bowl, whisk together the olive oil, Dijon mustard, lemon juice, salt, and pepper.

  3. Drizzle the dressing over the salad and toss to combine. Serve immediately.

2. Incorporate Seasonal Herbs into Your Dishes
Spring herbs are fresh, fragrant, and packed with flavor. Basil, parsley, cilantro, and chives all add brightness to dishes. Use them liberally in sauces, soups, and as garnishes for your meals. A spring pesto made with fresh basil and lemon can be tossed over roasted vegetables, pasta, or grilled chicken for a burst of seasonal flavor.

Spring Herb Pesto
Ingredients:

  • 2 cups fresh basil leaves

  • 1/2 cup pine nuts (or walnuts)

  • 1/2 cup grated Parmesan cheese

  • 2 garlic cloves

  • 1/2 cup olive oil

  • Juice of half a lemon

  • Salt and pepper, to taste

Directions:

  1. In a food processor, blend the basil, pine nuts, Parmesan, and garlic until finely chopped.

  2. With the food processor running, slowly add the olive oil and lemon juice until smooth.

  3. Season with salt and pepper to taste. Serve over pasta, roasted veggies, or grilled meats.

3. Enjoy Spring Berries in Sweet and Savory Dishes
Berries come into season in the spring, and they’re a wonderful way to add sweetness and color to your meals. Blueberries, strawberries, raspberries, and blackberries are great in both sweet and savory dishes. Try adding them to oatmeal, yogurt, or a spring salad, or even making a refreshing fruit salsa to serve with grilled fish or chicken.

Berry and Goat Cheese Salad
Ingredients:

  • 1 cup mixed berries (strawberries, raspberries, blueberries)

  • 4 cups mixed greens

  • 1/4 cup goat cheese, crumbled

  • 1/4 cup chopped walnuts

  • 1 tablespoon honey

  • 1 tablespoon balsamic vinegar

Directions:

  1. Combine the berries, greens, goat cheese, and walnuts in a large bowl.

  2. Drizzle with honey and balsamic vinegar, then toss gently to combine.

  3. Serve immediately as a side dish or light main course.

4. Enjoy Fresh Spring Vegetables
Spring is a time when farmers’ markets are overflowing with fresh, tender vegetables. Asparagus, peas, radishes, and artichokes are all in season and can be easily incorporated into your meals. Roasted or grilled asparagus makes a great side dish, or you can add it to salads, omelets, or pastas.

Roasted Asparagus with Lemon and Parmesan
Ingredients:

  • 1 bunch asparagus, trimmed

  • 1 tablespoon olive oil

  • Salt and pepper, to taste

  • 1 tablespoon fresh lemon juice

  • 1/4 cup grated Parmesan cheese

Directions:

  1. Preheat your oven to 400°F.

  2. Arrange the asparagus on a baking sheet and drizzle with olive oil. Season with salt and pepper.

  3. Roast for 15-20 minutes, or until tender.

  4. Drizzle with lemon juice and sprinkle with Parmesan before serving.

5. Refresh with Spring Fruits
Spring brings an abundance of fruits, including strawberries, cherries, rhubarb, and citrus. These fruits are perfect for adding a burst of natural sweetness to your spring dishes. Try making a simple fruit compote for a light dessert or incorporating citrus into your salads for a refreshing zing.

By embracing spring’s bounty, you’ll not only enjoy delicious meals but also nourish your body with the freshest, healthiest ingredients. Seasonal eating is a great way to stay connected to the rhythm of nature and celebrate the flavors of the season.


Small Changes, Big Impact

How Plant-Based Eating Can Reduce Your Carbon Footprint

Shifting toward a plant-based diet isn’t just a trend—it’s one of the most effective ways individuals can reduce their environmental impact. While going fully vegan might not be realistic for everyone, incorporating more plant-based meals into your routine can significantly lower your personal carbon footprint while offering health benefits.

According to a 2018 study published in Science, cutting out meat and dairy can reduce an individual’s food-related greenhouse gas emissions by up to 73%. While that might sound drastic, the good news is that even small dietary changes—like swapping out a few key ingredients or reducing meat consumption one or two days a week—can collectively make a big difference.

So, where do you start?

Simple Plant-Based Swaps

Choose Plant-Based Dairy Alternatives
Dairy farming contributes to deforestation, methane emissions, and excessive water use. By replacing cow’s milk with oat, almond, cashew, or soy milk, you significantly reduce your impact. Oat milk, in particular, has one of the lowest carbon footprints and works well in coffee, cereal, and baking.

Go Meatless Once or Twice a Week
Participating in “Meatless Monday” (or any other day) is a simple way to transition into a more plant-forward lifestyle. Swap out beef or chicken for hearty plant-based proteins like lentils, beans, chickpeas, tofu, or tempeh. Not only do these foods offer a great source of protein, but they also require significantly fewer resources to produce than animal products.

Opt for Whole, Plant-Based Proteins
If you’re worried about getting enough protein without meat, don’t be! Legumes, quinoa, nuts, seeds, and whole grains are all excellent sources of protein. For example, one cup of cooked lentils provides about 18 grams of protein—comparable to the protein content of a chicken breast.

Reduce Processed and Packaged Foods
Even plant-based diets can have a high carbon footprint if they rely on overly processed foods. Instead of plant-based “junk food” (like imitation meats and prepackaged meals), focus on whole foods like vegetables, fruits, grains, and legumes. Bonus: Whole foods are often more affordable and pack more nutrients!

The Environmental Benefits of Eating More Plants

🔹 Less Greenhouse Gas Emissions: The meat industry is one of the largest contributors to methane emissions, a potent greenhouse gas. By eating less meat, you directly reduce demand and emissions.

🔹 Lower Water Usage: Producing a single pound of beef requires approximately 1,800 gallons of water, whereas producing a pound of tofu takes only about 300 gallons. By choosing plant-based proteins, you conserve precious water resources.

🔹 Less Deforestation and Land Use: Livestock farming is a leading cause of deforestation, particularly in the Amazon rainforest. By reducing reliance on meat, we help preserve critical ecosystems and biodiversity.

Making It Affordable and Accessible

One of the most common concerns about plant-based eating is cost. But eating more plants doesn’t have to break the bank.

  • Buy in Bulk – Stock up on dried beans, rice, lentils, and oats, which are inexpensive and shelf-stable.
  • Choose Seasonal Produce – Local, in-season fruits and vegetables are often more affordable and fresher.
  • Utilize Frozen Options – Frozen veggies and fruits are just as nutritious as fresh, and they help reduce food waste.
  • Meal Prep in Advance – Planning meals ahead can make plant-based eating easier and more convenient.

Transitioning to a more plant-forward lifestyle doesn’t require an all-or-nothing approach. Even the smallest changes add up to make a real impact—on both your health and the planet.

RELATED: PLANT BASED PLEASURES

RELATED: LYNCHBURG’S HEALTHY EATS


Perfecting the Art of Mac and Cheese

Mac and cheese is the ultimate comfort food—warm, creamy, and satisfying. While the classic boxed version has its place, there’s a world of possibilities to elevate this dish into something truly extraordinary. With a few carefully chosen ingredients, you can transform mac and cheese into a gourmet experience that’s perfect for family dinners, holiday gatherings, or even a casual dinner party.

Start with the Basics

Before we dive into the enhancements, it’s essential to have a solid base recipe. Here’s a classic stovetop mac and cheese recipe to build upon:

Classic Mac and Cheese Base

Ingredients:

  • 12 ounces elbow macaroni (or pasta of choice)
  • 4 tablespoons unsalted butter
  • 4 tablespoons all-purpose flour
  • 3 cups whole milk
  • 2 cups shredded sharp cheddar cheese
  • 1 cup shredded mozzarella cheese
  • Salt and pepper to taste

Instructions:

  1. Cook the pasta according to package instructions until al dente. Drain and set aside.
  2. In a large saucepan, melt butter over medium heat. Whisk in the flour and cook for 1-2 minutes until the mixture turns golden.
  3. Gradually add the milk, whisking constantly to avoid lumps. Bring to a simmer and cook until thickened.
  4. Reduce heat to low and stir in the cheddar and mozzarella until melted and smooth. Season with salt and pepper.
  5. Toss the sauce with the cooked pasta and serve as is or proceed with the enhancements below.

The Gourmet Touch: Truffle Oil

Truffle oil can transform mac and cheese into a luxurious dish with earthy, aromatic depth.

Truffle Mac and Cheese Recipe:

  • Prepare the Classic Mac and Cheese Base.
  • Stir in 1-2 teaspoons of white truffle oil into the cheese sauce before mixing it with the pasta.
  • For added flair, top with toasted breadcrumbs (1/2 cup panko breadcrumbs toasted in 1 tablespoon butter) and a drizzle of truffle oil before serving.

Bacon Bliss

Adding bacon introduces a smoky, savory element that pairs beautifully with creamy cheese.

Bacon Mac and Cheese Recipe:

  • Cook 6 slices of bacon until crispy. Crumble and set aside.
  • Prepare the Classic Mac and Cheese Base, stirring in 1/4 teaspoon smoked paprika for a subtle kick.
  • Mix half of the crumbled bacon into the cheese sauce.
  • Sprinkle the remaining bacon on top before serving.
  • Optional: Bake the mac and cheese in a 375°F oven for 15 minutes to crisp the top.

A Cheese Lover’s Dream

Why stop at cheddar? Mixing different cheeses can create complex flavors and textures. Some great options include Gruyère for nuttiness, Parmesan for sharpness, and fontina for creaminess.

Four-Cheese Mac and Cheese Recipe:

  • Substitute 1 cup of sharp cheddar with 1/2 cup Gruyère, 1/2 cup Parmesan, and 1/2 cup fontina in the Classic Mac and Cheese Base.
  • For a golden crust, sprinkle with shredded Parmesan and broil until bubbly and browned.

Veggie Upgrades

Elevate your mac and cheese with the addition of roasted or sautéed vegetables. Broccoli, butternut squash, and mushrooms are excellent choices.

Vegetable Mac and Cheese Recipe:

  • Roast 2 cups of bite-sized broccoli florets (tossed with olive oil, salt, and pepper) at 400°F for 15-20 minutes.
  • Prepare the Classic Mac and Cheese Base and mix in the roasted broccoli before serving.
  • Optional: Add 1/2 teaspoon garlic powder or a pinch of nutmeg to the cheese sauce for added depth.

Spicy Spin

For those who love a little heat, spices and peppers can add an exciting twist.

Spicy Jalapeño Mac and Cheese Recipe:

  • Sauté 2 finely chopped jalapeños in butter before adding the flour to make the roux.
  • Use pepper jack cheese in place of mozzarella in the Classic Mac and Cheese Base.
  • Garnish with thinly sliced jalapeños and a sprinkle of crushed red pepper flakes.

Seafood Sensation

Mac and cheese pairs surprisingly well with seafood, creating an indulgent dish perfect for special occasions.

Lobster Mac and Cheese Recipe:

  • Prepare the Classic Mac and Cheese Base using Gruyère and cheddar.
  • Fold in 1 cup of cooked lobster meat (cut into bite-sized pieces).
  • Top with breadcrumbs mixed with a tablespoon of melted butter and bake at 375°F for 20 minutes.

The Final Touch

Once you’ve chosen your enhancement, presentation is key. Consider serving your mac and cheese in individual ramekins for a sophisticated touch or garnishing with fresh herbs like parsley or chives.

Mac and cheese is a dish that invites creativity. Whether you’re adding a touch of truffle oil, crispy bacon, or a medley of cheeses, the possibilities are endless. Experiment with these ideas and make this beloved comfort food your own!


Creative Ways to Make Use of Your Porch Pumpkins After Halloween

Once Halloween is over and the ghosts and goblins have retreated, many of us are left with a collection of pumpkins on our porches. Instead of tossing them in the trash, consider these creative and sustainable ways to repurpose your pumpkins, transforming them into delicious meals, compost, or decorations for the next holiday season.

1. Composting

Composting is one of the best ways to recycle your pumpkins. They break down easily, enriching your compost pile with nutrients that can benefit your garden.

How to Compost Pumpkins

  • Preparation: Remove any paint, glitter, or decorations from the pumpkins. Cut them into smaller pieces to speed up decomposition.
  • Mixing: Add them to your compost bin or pile along with other organic materials like kitchen scraps and yard waste.
  • Maintenance: Turn your compost regularly to aerate it, which will help the pumpkins decompose more quickly.

2. Roasting Pumpkin Seeds

Pumpkin seeds, also known as pepitas, are a delicious and healthy snack that can be enjoyed year-round.

How to Roast Pumpkin Seeds

  1. Clean the Seeds: After scooping out the seeds, rinse them in a colander to remove the pumpkin guts. Pat them dry with a towel.
  2. Seasoning: Toss the seeds with olive oil and your choice of seasonings—salt, garlic powder, paprika, or even cinnamon and sugar for a sweet treat.
  3. Roasting: Spread the seeds in a single layer on a baking sheet. Bake at 300°F (150°C) for about 20-30 minutes, stirring occasionally, until they are golden brown.

Recipe: Savory Garlic Pumpkin Seeds

  • Ingredients: 1 cup pumpkin seeds, 1 tablespoon olive oil, 1 teaspoon garlic powder, salt to taste.
  • Instructions: Follow the roasting instructions above, but add garlic powder and salt to the olive oil before tossing with the seeds.

3. Making Pumpkin Puree

Pumpkin puree can be used in a variety of recipes, from soups to pies, offering a rich flavor and nutritional benefits.

How to Make Pumpkin Puree

  1. Preparation: Cut the pumpkin in half and scoop out the seeds and stringy pulp.
  2. Cooking: You can either steam or roast the pumpkin halves. For roasting, place them cut side down on a baking sheet and bake at 350°F (175°C) for about 45-60 minutes until tender.
  3. Pureeing: Once cooked, scoop the flesh into a food processor and blend until smooth. Store in airtight containers in the fridge for up to a week or freeze for later use.

Recipe: Classic Pumpkin Soup

  • Ingredients: 2 cups pumpkin puree, 1 onion (chopped), 2 cloves garlic (minced), 4 cups vegetable broth, 1 cup coconut milk, salt, pepper, and spices (like nutmeg or cumin).
  • Instructions: Sauté onion and garlic in a pot until translucent. Add the pumpkin puree and broth, stirring to combine. Bring to a simmer for about 20 minutes. Stir in coconut milk and spices, then blend for a creamy texture.

4. Pumpkin in Baking

Use your pumpkin puree in baked goods for a seasonal flavor.

Recipe: Pumpkin Bread

  • Ingredients: 1 cup pumpkin puree, 1/2 cup sugar, 1/2 cup brown sugar, 1/2 cup vegetable oil, 2 eggs, 1 1/2 cups flour, 1 teaspoon baking soda, 1 teaspoon cinnamon, 1/2 teaspoon nutmeg.
  • Instructions: Preheat oven to 350°F (175°C). Mix pumpkin puree, sugars, oil, and eggs. In another bowl, combine flour, baking soda, and spices. Gradually mix dry ingredients into the wet mixture. Pour into a greased loaf pan and bake for 60 minutes.

5. Making Pumpkin Face Masks

Pumpkin is rich in vitamins and antioxidants, making it a great ingredient for DIY face masks.

Recipe: Pumpkin Face Mask

  • Ingredients: 1/2 cup pumpkin puree, 1 tablespoon honey, 1 tablespoon milk (or yogurt).
  • Instructions: Mix all ingredients until smooth. Apply to your face and leave on for 15-20 minutes. Rinse off with warm water.

6. Creating Bird Feeders

Turn your pumpkins into bird feeders to attract local wildlife.

How to Make a Bird Feeder

  1. Preparation: Cut the pumpkin in half and scoop out the seeds and stringy insides.
  2. Assembly: Fill the pumpkin halves with birdseed. You can also attach strings or twine for hanging.
  3. Placement: Hang the feeders in your yard or place them on a flat surface.

7. Decorative Fall Arrangements

Once you’ve used the flesh and seeds, consider using the hollowed-out pumpkins as planters or vases.

How to Use Pumpkins as Decor

  • Planters: Fill with soil and plant fall flowers like mums or pansies.
  • Vases: Use for fresh or dried flowers to create a rustic centerpiece.

8. Donate to a Local Farm or Animal Rescue

Many local farms or animal rescues (such as Liberty Meadows Farm Sanctuary) will accept uncarved, unbleached pumpkins!  While the “jack-o-lantern” pumpkins are tasty, they’re predominantly sugary treats, so if you have heirloom pumpkins peppering your porch, donate them to a local farm to give the animals a healthy boost of vitamins, minerals, antioxidants and de-worming benefits.

After Halloween, your pumpkins can serve a variety of purposes beyond decoration. From enriching your compost to becoming a key ingredient in your favorite recipes, these versatile gourds can contribute to sustainability and creativity in your kitchen and home. Embrace the full potential of your pumpkins and make the most of this seasonal harvest!


Healthy Comfort Food: Recipes that Satisfy

When the chill of autumn sets in or a rainy day calls for a cozy evening, there’s nothing quite like comfort food to lift our spirits. The problem is, many traditional comfort dishes can be heavy and laden with calories, sugars, and unhealthy fats. Fortunately, with a few clever tweaks, you can enjoy all the warmth and nostalgia of your favorite comfort foods while still keeping health in mind.

1. Creamy Mac and Cheese Reimagined

The Classic:

Macaroni and cheese is a quintessential comfort dish, creamy and indulgent, but often packed with refined carbs and saturated fats.

The Makeover:

Cauliflower Mac and Cheese

Ingredients:

  • 1 head of cauliflower, cut into florets
  • 1 cup whole-grain pasta (like brown rice or quinoa pasta)
  • 1 cup low-fat milk or unsweetened almond milk
  • 1 cup shredded sharp cheddar cheese
  • 1/4 cup nutritional yeast (for a cheesy flavor)
  • 1 tsp garlic powder
  • Salt and pepper to taste
  • Optional: Whole grain breadcrumbs for topping

Instructions:

  1. Steam the cauliflower florets until tender, about 10 minutes.
  2. Cook the whole-grain pasta according to package instructions.
  3. In a blender, combine the steamed cauliflower, milk, cheddar cheese, nutritional yeast, garlic powder, salt, and pepper. Blend until smooth.
  4. Mix the cheese sauce with the cooked pasta. If desired, top with whole grain breadcrumbs and bake at 350°F for 15 minutes for a crunchy topping.

Why It Works: This dish retains the creamy texture of classic mac and cheese while adding fiber and nutrients from the cauliflower, making it a lighter yet satisfying option.

2. Hearty Beef Stew with a Twist

The Classic:

Beef stew is the epitome of hearty comfort food, typically simmered with potatoes, carrots, and a rich broth.

The Makeover:

Turkey and Sweet Potato Stew

Ingredients:

  • 1 lb ground turkey (or diced turkey breast)
  • 1 large sweet potato, peeled and cubed
  • 2 carrots, sliced
  • 1 onion, chopped
  • 3 cloves garlic, minced
  • 4 cups low-sodium chicken or vegetable broth
  • 1 can diced tomatoes
  • 1 tsp dried thyme
  • Salt and pepper to taste

Instructions:

  1. In a large pot, brown the ground turkey over medium heat. Remove and set aside.
  2. In the same pot, add onions, garlic, and carrots, cooking until softened.
  3. Add the sweet potatoes, turkey, broth, diced tomatoes, thyme, salt, and pepper. Bring to a boil, then simmer for 30 minutes until the sweet potatoes are tender.

Why It Works: Ground turkey is leaner than traditional beef, reducing calories and saturated fat, while sweet potatoes provide a nutrient boost and a naturally sweet flavor that complements the savory elements of the stew.

3. Classic Pizza with a Healthy Twist

The Classic:

Pizza is an ultimate comfort food, often laden with processed meats, cheeses, and a thick crust.

The Makeover:

Cauliflower Crust Veggie Pizza

Ingredients:

  • 1 head of cauliflower, riced
  • 1 cup shredded mozzarella cheese
  • 1 egg, beaten
  • 1 tsp Italian seasoning
  • Your favorite pizza toppings (think bell peppers, onions, spinach, mushrooms, etc.)
  • Tomato sauce (low-sugar)

Instructions:

  1. Preheat your oven to 450°F.
  2. Rice the cauliflower by grating it or pulsing it in a food processor until fine. Microwave for 8 minutes, then let cool.
  3. Combine riced cauliflower, mozzarella, egg, and Italian seasoning in a bowl. Spread the mixture onto a parchment-lined baking sheet, forming a pizza shape.
  4. Bake for 15-20 minutes until golden and crispy. Remove from the oven, add sauce and toppings, and bake again for an additional 10 minutes.

Why It Works: This pizza makeover replaces traditional dough with cauliflower, drastically cutting carbs and boosting fiber while allowing for all your favorite toppings without the guilt.

4. Decadent Chocolate Cake with a Nutritional Boost

The Classic:

Rich chocolate cake is often a go-to for celebrations, but it can be a calorie bomb.

The Makeover:

Black Bean Chocolate Cake

Ingredients:

  • 1 can (15 oz) black beans, rinsed and drained
  • 3 large eggs
  • 1/2 cup cocoa powder
  • 1/2 cup honey or maple syrup
  • 1/4 cup coconut oil, melted
  • 1 tsp vanilla extract
  • 1 tsp baking powder
  • A pinch of salt

Instructions:

  1. Preheat your oven to 350°F and grease a cake pan.
  2. In a blender, combine all ingredients until smooth.
  3. Pour the batter into the greased pan and bake for 30-35 minutes or until a toothpick comes out clean.

Why It Works: Black beans provide fiber and protein, making this cake moist and fudgy while adding a nutrient boost that traditional recipes lack. Plus, you won’t even taste the beans!

Revamping classic comfort foods into healthier versions doesn’t mean sacrificing flavor or satisfaction. These nutritious twists provide all the warmth and joy of your favorite dishes while keeping your health goals in check.


Spooky Season Treats: 5 Halloween Recipes

As the leaves turn and the nights grow longer, it’s time to embrace the magic of spooky season! Whether you’re throwing a Halloween party, hosting a haunted movie night, or simply indulging in festive treats, these five Halloween-inspired recipes will add a deliciously eerie touch to your festivities.

1. Witch’s Broomstick Pretzels

Ingredients:

  • 12 pretzel sticks
  • 12 chocolate kisses
  • 12 strands of green or yellow fruit leather (or string cheese)
  • Mini chocolate chips (optional)

Instructions:

  1. Prepare the Brooms: Unwrap the chocolate kisses and attach them to one end of each pretzel stick using a small dab of melted chocolate or icing.
  2. Create the Bristles: Cut the fruit leather into strips and wrap them around the other end of the pretzel stick to resemble broom bristles. Secure with a little chocolate if needed.
  3. Optional: Add mini chocolate chips to the top of the kisses for a little extra decoration.
  4. Chill: Place in the refrigerator for about 30 minutes to set before serving.

2. Mummy Hot Dogs

Ingredients:

  • 8 hot dogs
  • 1 can of crescent roll dough
  • Mustard or ketchup (for eyes)

Instructions:

  1. Preheat Oven: Preheat your oven to 375°F (190°C).
  2. Wrap the Hot Dogs: Unroll the crescent dough and cut it into thin strips. Wrap the strips around each hot dog, leaving gaps to resemble mummy bandages.
  3. Bake: Place the wrapped hot dogs on a baking sheet and bake for 12-15 minutes, or until golden brown.
  4. Decorate: Once cooled slightly, use mustard or ketchup to add eyes on the mummies.

3. Graveyard Dirt Cups

Ingredients:

  • 1 package chocolate pudding mix
  • 2 cups milk
  • 1 package Oreo cookies
  • Gummy worms
  • Tombstone cookies (store-bought or homemade)

Instructions:

  1. Make Pudding: Prepare the chocolate pudding according to package instructions using the milk.
  2. Crush Oreos: In a food processor or in a bag with a rolling pin, crush the Oreo cookies into fine crumbs to resemble dirt.
  3. Layer Cups: In clear cups, layer chocolate pudding, crushed Oreos, and gummy worms. Repeat layers until the cups are filled.
  4. Decorate: Insert tombstone cookies into the top layer of Oreos, and top with a few more gummy worms for added spookiness.

4. Spooky Spider Cupcakes

Ingredients:

  • 1 box of chocolate cake mix (plus ingredients to prepare)
  • Chocolate frosting
  • Oreo cookies
  • Candy eyes
  • Licorice or black string candy (for legs)

Instructions:

  1. Bake the Cupcakes: Prepare and bake the chocolate cupcakes according to package instructions. Allow to cool.
  2. Frost: Once cooled, frost each cupcake generously with chocolate frosting.
  3. Create Spiders: For each spider, take an Oreo, twist it apart, and use the half with the cream to create the body. Use the other half as the top. Attach candy eyes using a dab of frosting.
  4. Add Legs: Cut licorice into strips for spider legs and insert four on each side of the Oreo.
  5. Display: Arrange the cupcakes on a platter to create a spooky display.

5. Ghostly Banana Pops

Ingredients:

  • 2 bananas
  • White chocolate chips
  • Mini chocolate chips
  • Popsicle sticks

Instructions:

  1. Prepare Bananas: Peel the bananas and cut them in half. Insert a popsicle stick into the cut end of each banana half.
  2. Melt Chocolate: In a microwave-safe bowl, melt the white chocolate chips in 30-second intervals, stirring until smooth.
  3. Coat Bananas: Dip each banana half into the melted white chocolate, coating it entirely.
  4. Add Eyes: Place mini chocolate chips on the dipped bananas to create ghost eyes before the chocolate sets.
  5. Chill: Place the coated banana pops in the refrigerator for about 30 minutes to firm up.


Creative Back-to-School Snacks: Fun, Nutritious Ideas Kids Will Love

As the school year kicks off, one of the challenges many parents face is keeping their kids energized and focused throughout the day. A key part of this is providing snacks that are both nutritious and appealing. Whether it’s for a lunchbox, after-school refuel, or an on-the-go bite between activities, the right snacks can make a big difference in your child’s day. 

DIY Trail Mix

Trail mix is a versatile snack that’s perfect for busy school days. The best part? It’s completely customizable, so you can cater to your child’s taste preferences and dietary needs. Start with a base of whole-grain cereals, nuts, or seeds. Then, add in some dried fruit for a touch of natural sweetness—think raisins, cranberries, or banana chips. To make it more fun, mix in a handful of dark chocolate chips or yogurt-covered raisins for a treat that feels indulgent but still packs a nutritional punch.

This snack is great because it’s portable, doesn’t require refrigeration, and provides a good balance of protein, healthy fats, and carbs to keep your child full and energized. Plus, involving your kids in the process of creating their own trail mix can make them more excited to eat it.

Fruit and Veggie Skewers

If you’re looking for a way to make fruits and vegetables more appealing, try serving them on skewers. There’s something about food on a stick that makes it instantly more fun to eat. Alternate colorful fruits like strawberries, grapes, and melon with vegetables like cucumber slices, cherry tomatoes, and bell pepper chunks to create a rainbow effect. You can even add a small cube of cheese or a piece of whole-grain bread for a more balanced snack.

To make this snack even more interactive, let your child help with the assembly. It’s a simple way to get them involved in the kitchen and more interested in what they’re eating. And because it’s visually appealing, it’s likely to be a hit even with picky eaters.

Homemade Granola Bars

Granola bars are a snack-time staple, but many store-bought options can be high in sugar and low in nutritional value. Making your own granola bars at home allows you to control the ingredients, ensuring they’re both healthy and delicious. Start with a base of rolled oats, and add in your child’s favorite nuts, seeds, and dried fruits. You can use honey or maple syrup as a natural sweetener and bind everything together with nut butter.

Once you’ve mixed the ingredients, press the mixture into a baking pan and refrigerate until firm. Cut into bars or squares, and you’ve got a convenient snack that’s perfect for lunchboxes or an after-school treat. These bars can be wrapped individually, making them easy to grab on the way out the door.

Yogurt Parfaits

Yogurt parfaits are a fantastic way to combine protein, calcium, and vitamins into one tasty snack. Start with a base of Greek yogurt, which is higher in protein than regular yogurt. Layer it with fresh fruit like berries, sliced bananas, or peaches. Top it off with a sprinkle of granola, nuts, or seeds for added crunch.

For an extra special treat, you can drizzle a little honey or add a few dark chocolate shavings. Serve in a small, clear container to showcase the colorful layers, making it as visually appealing as it is delicious. Parfaits are versatile enough to be eaten as a breakfast option, mid-morning snack, or dessert, providing a healthy alternative to sugary treats.

Savory Snack Muffins

Who says muffins have to be sweet? Savory muffins are a great way to pack in some veggies and protein while still feeling like a treat. Start with a basic whole-wheat muffin batter and then get creative with your add-ins. Shredded zucchini, carrots, or spinach work well, as do ingredients like cheese, diced ham, or turkey.

These muffins are easy to make in advance and can be stored in the freezer, making them a convenient grab-and-go snack. They’re perfect for kids who prefer savory over sweet, and they’re a good way to sneak in extra nutrients without much fuss.

Apple Sandwiches

Apple slices make a great alternative to bread for a fun, gluten-free sandwich option. Start by cutting an apple into thick, round slices. Core the slices, and then spread one side with peanut butter, almond butter, or sunflower seed butter. For added flavor and texture, sprinkle with granola, raisins, or mini chocolate chips before topping with another apple slice.

These apple sandwiches are quick to prepare and provide a good mix of fiber, healthy fats, and protein. They’re also easy for kids to hold and eat, making them a great option for lunchboxes or a quick snack between after-school activities.

Fueling Success with Creative Snacks

Snacks play a crucial role in keeping kids energized and focused throughout the school day. By offering a variety of fun, nutritious options, you’re not only supporting their physical health but also helping to instill good eating habits that can last a lifetime. The key is to balance taste with nutrition, making sure each snack is something your child will enjoy eating. With a little creativity and some simple ingredients, you can easily turn snack time into an opportunity to nourish both body and mind, setting your child up for success in and out of the classroom.